●
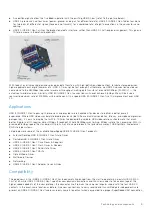
An additional physical bus that is added in parallel with the existing USB 2.0 bus (refer to the picture below).
●
USB 2.0 previously had four wires (power, ground, and a pair for differential data); USB 3.0/USB 3.1 Gen 1 adds four more
for two pairs of differential signals (receive and transmit) for a combined total of eight connections in the connectors and
cabling.
●
USB 3.0/USB 3.1 Gen 1 utilizes the bidirectional data interface, rather than USB 2.0's half-duplex arrangement. This gives a
10-fold increase in theoretical bandwidth.
With today's ever increasing demands placed on data transfers with high-definition video content, terabyte storage devices,
high megapixel count digital cameras etc., USB 2.0 may not be fast enough. Furthermore, no USB 2.0 connection could ever
come close to the 480Mbps theoretical maximum throughput, making data transfer at around 320 Mbps (40 MB/s) — the
actual real-world maximum. Similarly, USB 3.0/USB 3.1 Gen 1 connections will never achieve 4.8Gbps. We will likely see a
real-world maximum rate of 400MB/s with overheads. At this speed, USB 3.0/USB 3.1 Gen 1 is a 10x improvement over USB
2.0.
Applications
USB 3.0/USB 3.1 Gen 1 opens up the laneways and provides more headroom for devices to deliver a better overall
experience. Where USB video was barely tolerable previously (both from a maximum resolution, latency, and video compression
perspective), it's easy to imagine that with 5-10 times the bandwidth available, USB video solutions should work that much
better. Single-link DVI requires almost 2Gbps throughput. Where 480Mbps was limiting, 5Gbps is more than promising. With its
promised 4.8Gbps speed, the standard will find its way into some products that previously weren't USB territory, like external
RAID storage systems.
Listed below are some of the available SuperSpeed USB 3.0/USB 3.1 Gen 1 products:
●
External Desktop USB 3.0/USB 3.1 Gen 1 Hard Drives
●
Portable USB 3.0/USB 3.1 Gen 1 Hard Drives
●
USB 3.0/USB 3.1 Gen 1 Drive Docks & Adapters
●
USB 3.0/USB 3.1 Gen 1 Flash Drives & Readers
●
USB 3.0/USB 3.1 Gen 1 Solid-state Drives
●
USB 3.0/USB 3.1 Gen 1 RAIDs
●
Optical Media Drives
●
Multimedia Devices
●
Networking
●
USB 3.0/USB 3.1 Gen 1 Adapter Cards & Hubs
Compatibility
The good news is that USB 3.0/USB 3.1 Gen 1 has been carefully planned from the start to peacefully co-exist with USB 2.0.
First of all, while USB 3.0/USB 3.1 Gen 1 specifies new physical connections and thus new cables to take advantage of the
higher speed capability of the new protocol, the connector itself remains the same rectangular shape with the four USB 2.0
contacts in the exact same location as before. Five new connections to carry receive and transmitted data independently are
present on USB 3.0/USB 3.1 Gen 1 cables and only come into contact when connected to a proper SuperSpeed USB connection.
Technology and components
9
Содержание Latitude 7400 2-in-1
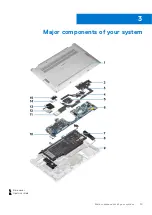
Страница 15: ...Major components of your system 1 Base cover 2 Heatsink shield 3 Major components of your system 15 ...
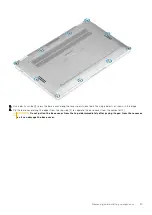
Страница 24: ...4 Pry along the left right and bottom edges of the base 24 Removing and installing components ...
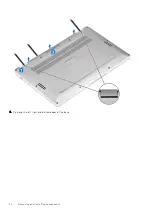
Страница 27: ...2 Press along the edges of the base cover until it clicks into place Removing and installing components 27 ...
Страница 28: ...3 Tighten the 10 captive screws to secure the base cover to the computer 28 Removing and installing components ...
Страница 43: ...5 Place the metal shield on the WWAN card Removing and installing components 43 ...
Страница 51: ...8 Adhere the Mylar sheet on the system board Removing and installing components 51 ...
Страница 56: ...4 Remove the metal foil from the heatsink shield 56 Removing and installing components ...
Страница 57: ...5 Remove the heatsink shield from the system board Removing and installing components 57 ...
Страница 60: ...3 Place the heatsink shield on the heatsink 60 Removing and installing components ...
Страница 61: ...4 Adhere the metal foils on the heatsink shield Removing and installing components 61 ...
Страница 87: ...8 Lift the keyboard off the palmrest assembly Removing and installing components 87 ...


