


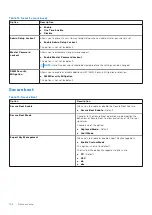
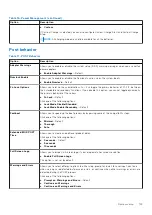


Table 17. POST Behavior (continued)
Option
Description
Sign of Life Indicator
This option allows system to indicate during the POST that the power button has been
acknowledged in a manner the user can either hear or feel.
●
Enable Sign of Life Audio Indication
●
Enable Sign of Life Display Indication
●
Enable Sign of Life Keyboard Backlight Indication
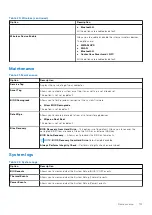
Manageability
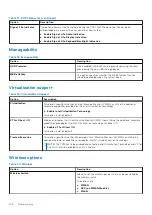
Table 18. Manageability
Option
Description
USB Provision
When enabled Intel AMT can be provisioned using the local
provisioning file via a USB storage device
MEBx Hotkey
This option specifies whether the MEBx Hotkey function
should bee enabled when the system boots.
Virtualization support
Table 19. Virtualization Support
Option
Description
Virtualization
This option specifies whether a Virtual Machine Monitor (VMM) can utilize the additional
hardware capabilities provided by the Intel Virtualization technology.
●
Enable Intel Virtualization Technology
This option is set by default.
VT for Direct I/O
Enables or disables the Virtual Machine Monitor (VMM) from utilizing the additional hardware
capabilities provided by the Intel Virtualization technology for direct I/O.
●
Enable VT for Direct I/O
This option is set by default.
Trusted Execution
This option specifies whether a Measured Virtual Machine Monitor (MVMM) can utilize the
additional hardware capabilities provided by Intel® Trusted Execution Technology.
NOTE:
The TPM has to be enabled and activated and Virtualization Technology and VT for
Direct I/O must be enabled to use this feature.
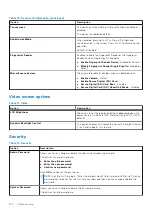
Wireless options
Table 20. Wireless
Option
Description
Wireless Switch
Allows to set the wireless devices that can be controlled by
the wireless switch.
The options are:
●
WWAN
●
GPS (on WWAN Module)
●
WLAN
106
System setup
Содержание Latitude 7400 2-in-1
Страница 15: ...Major components of your system 1 Base cover 2 Heatsink shield 3 Major components of your system 15 ...
Страница 24: ...4 Pry along the left right and bottom edges of the base 24 Removing and installing components ...
Страница 27: ...2 Press along the edges of the base cover until it clicks into place Removing and installing components 27 ...
Страница 28: ...3 Tighten the 10 captive screws to secure the base cover to the computer 28 Removing and installing components ...
Страница 43: ...5 Place the metal shield on the WWAN card Removing and installing components 43 ...
Страница 51: ...8 Adhere the Mylar sheet on the system board Removing and installing components 51 ...
Страница 56: ...4 Remove the metal foil from the heatsink shield 56 Removing and installing components ...
Страница 57: ...5 Remove the heatsink shield from the system board Removing and installing components 57 ...
Страница 60: ...3 Place the heatsink shield on the heatsink 60 Removing and installing components ...
Страница 61: ...4 Adhere the metal foils on the heatsink shield Removing and installing components 61 ...
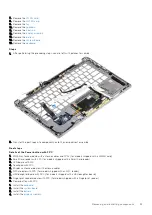
Страница 87: ...8 Lift the keyboard off the palmrest assembly Removing and installing components 87 ...


