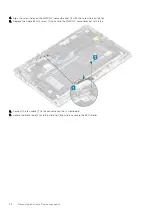
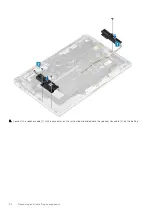

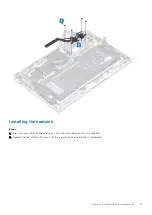
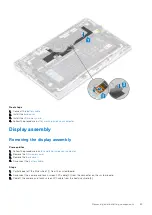

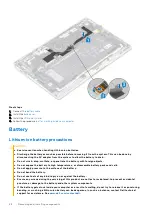
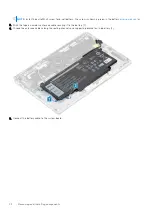


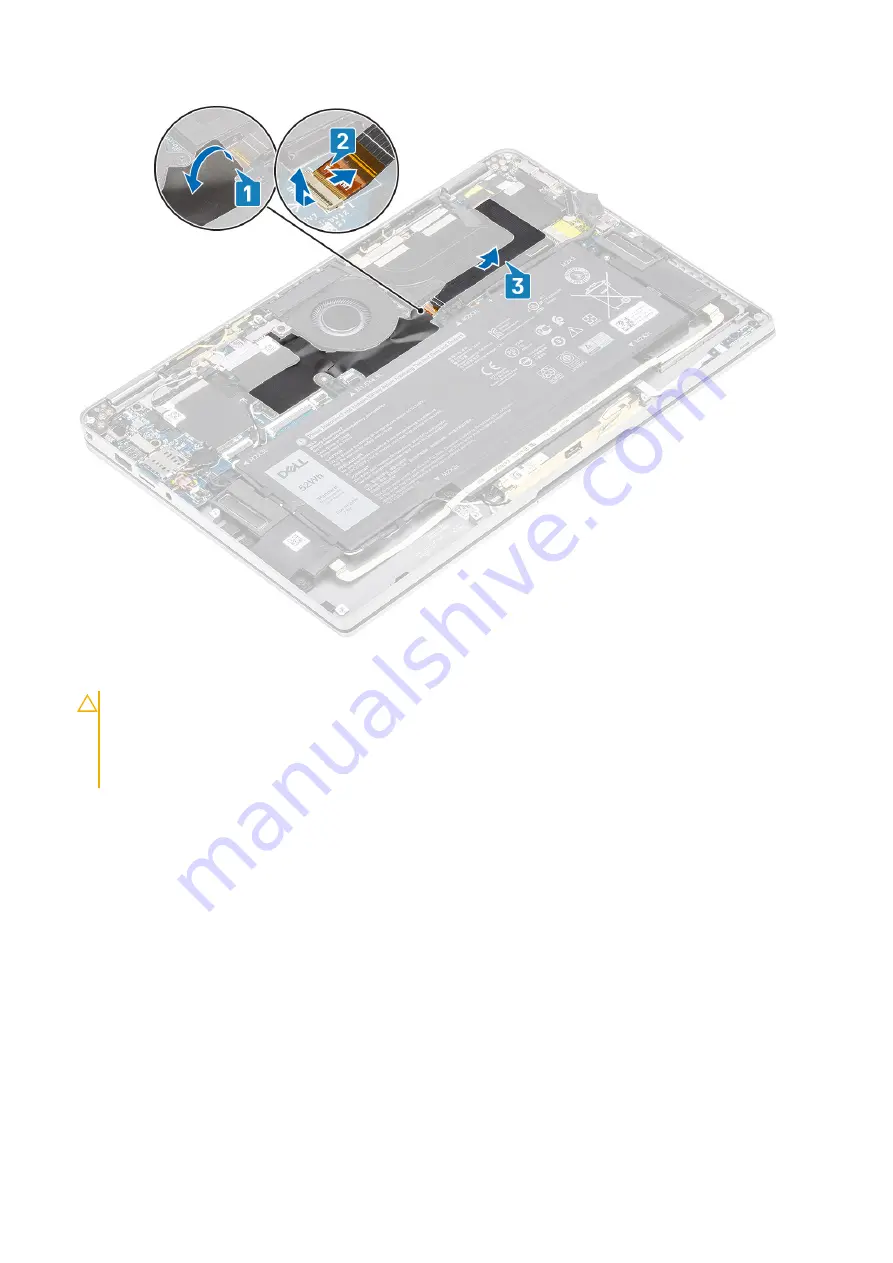
4. Peel off the tape on the display cable [1].
5. Pry the retention clips on both sides and flip open the latch [2].
CAUTION:
The connector for the display cable features a latch that locks it in place on the system board
which technicians must flip open in order to disconnect the display cable from the system board. After
flipping open the latch, technicians must grasp the left and right sides of the cable's connector head and
disconnect the display cable from the system board in a direct upward motion to prevent damage to the
connector's pins.
6. Disconnect the display cable from the connector on the system board [3].
64
Removing and installing components
Содержание Latitude 7400 2-in-1
Страница 15: ...Major components of your system 1 Base cover 2 Heatsink shield 3 Major components of your system 15 ...
Страница 24: ...4 Pry along the left right and bottom edges of the base 24 Removing and installing components ...
Страница 27: ...2 Press along the edges of the base cover until it clicks into place Removing and installing components 27 ...
Страница 28: ...3 Tighten the 10 captive screws to secure the base cover to the computer 28 Removing and installing components ...
Страница 43: ...5 Place the metal shield on the WWAN card Removing and installing components 43 ...
Страница 51: ...8 Adhere the Mylar sheet on the system board Removing and installing components 51 ...
Страница 56: ...4 Remove the metal foil from the heatsink shield 56 Removing and installing components ...
Страница 57: ...5 Remove the heatsink shield from the system board Removing and installing components 57 ...
Страница 60: ...3 Place the heatsink shield on the heatsink 60 Removing and installing components ...
Страница 61: ...4 Adhere the metal foils on the heatsink shield Removing and installing components 61 ...
Страница 87: ...8 Lift the keyboard off the palmrest assembly Removing and installing components 87 ...


