Replace a faulted drive in a 25-drive expansion
enclosure
Take the following actions to remove a faulted drive from a 25-drive expansion enclosure and install a replacement drive.
Identify a faulted drive from PowerStore Manager
Before you replace a drive, ensure that you have identified its location within the system. Using PowerStore Manager, you can
identify and locate a faulted drive.
Steps
1. From PowerStore Manager, select
Hardware
.
2. Select the appliance that includes the drive that you need to replace.
3. On the
Components
card, under
Drives
, expand
ExpansionEnclosure
and select the faulted drive.
Faulted parts appear in red in the image of the system, and report a status of
Faulted
in the
State
field.
4. Click
Blink LED
.
The amber fault light on the drive starts blinking.
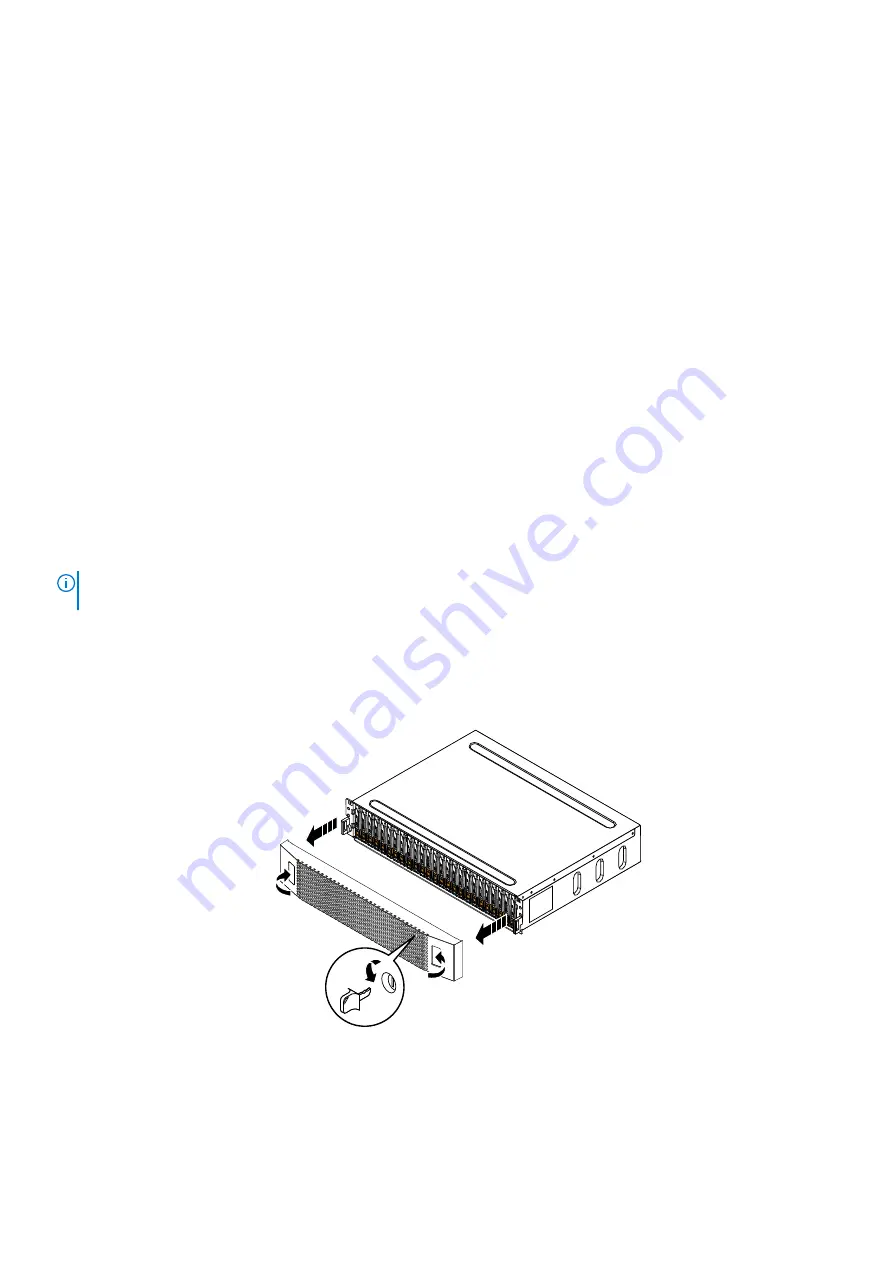
Removing the front bezel
About this task
NOTE:
Remove the front bezel of the expansion enclosure to gain access to the drives. The bezel is required for EMI
compliance when the enclosure is powered up. Remove it only to replace or add a drive.
Steps
1. If the bezel has a lock, insert the key that shipped with your enclosure into the lock, and turn the key to unlock the bezel.
2. Press the two latch buttons on the bezel surface to release the bezel from the cabinet.
3. Pull the bezel off the cabinet, and put it on a clean, static-free surface.
CL5261
Figure 118. Removing the front bezel
94
Expansion enclosure service procedures


