260
261
User Guide
Setting up the CuraEngine slicer for Windows computers
Setting up the Slic3r slicer for Mac computers
Setting up the slicing software for the idbox
To convert 3D data into the commands that control a 3D printer (G-code), you use a program called a slicer.
Repetier-Host
has
different slicers included with it. We will use CuraEngine for Windows and Slic3r for Mac computers.
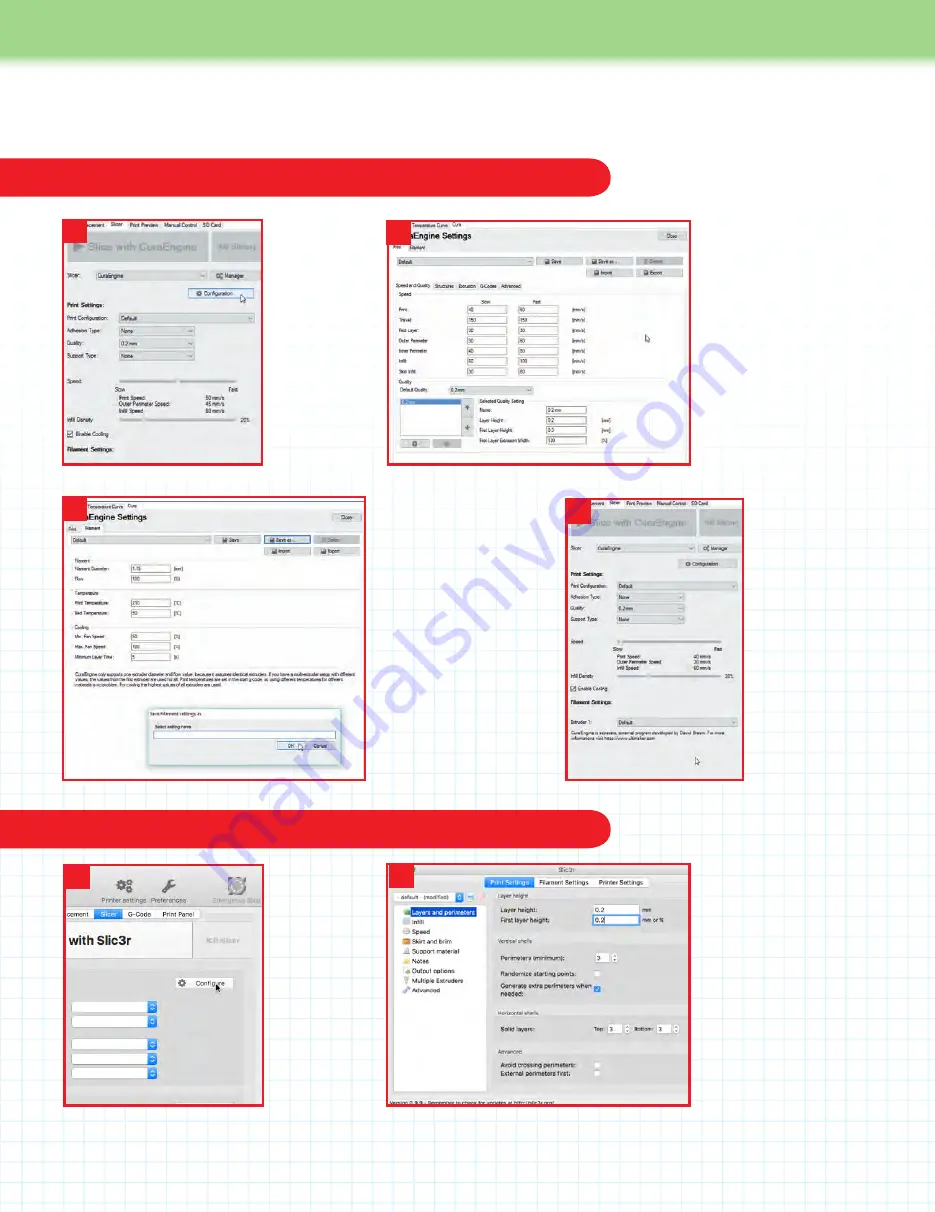
1.
Open
Repetier
,
and click on
the Slicer tab
near the top
right of the
screen. Select
CuraEngine
from the drop-
down list by
Slicer: and
then click the
Configuration
button.
2.
On the left of the screen,
select the Print, then Speed
and Quality tabs. Enter the
values shown in the image
on the left for both the
Speed and Quality sections.
The values entered for the
speed determine the speed
of the movement of the
head when printing using
CuraEngine, and the values
for the Quality determine
the height of each layer
when printing.
3.
Click the Filament tab
to enter the details of the
filament. (Details here are
for PLA.) Note the setting
by Temperature will change,
depending on the filament
you are using. To save
settings for a filament,
click the ‘Save as…’ button
near the top of the pane,
and enter a name for the
filament, such as PLA, then
click OK to save it. Ignore
the settings in the Cooling
section, as the idbox does
not use them.
1
2
3
4.
The settings
can be selected
on the right of
the screen. If you
have not changed
the name of the
settings, these
will show as
Default in ‘Print
Configuration’,
0.2mm in ‘Quality’
and Default in
‘Extruder 1:’.
4
1.
Click the
Slicer tab in
the
Repetier
window to
open the Slicer
panel, then
click Configure
to open the
configuration
window for
Slic3r.
1
2.
Under the ‘Print Settings’
tab, click on ‘Layers and
perimeters’ in the panel on
the left. Enter the values
as shown in the image on
the left for the two settings
shown under SETTINGS
below.
SETTINGS
Layer height:
0.2 mm
First layer height:
0.2 mm or %
2


