268
269
Assembly Guide
268
269
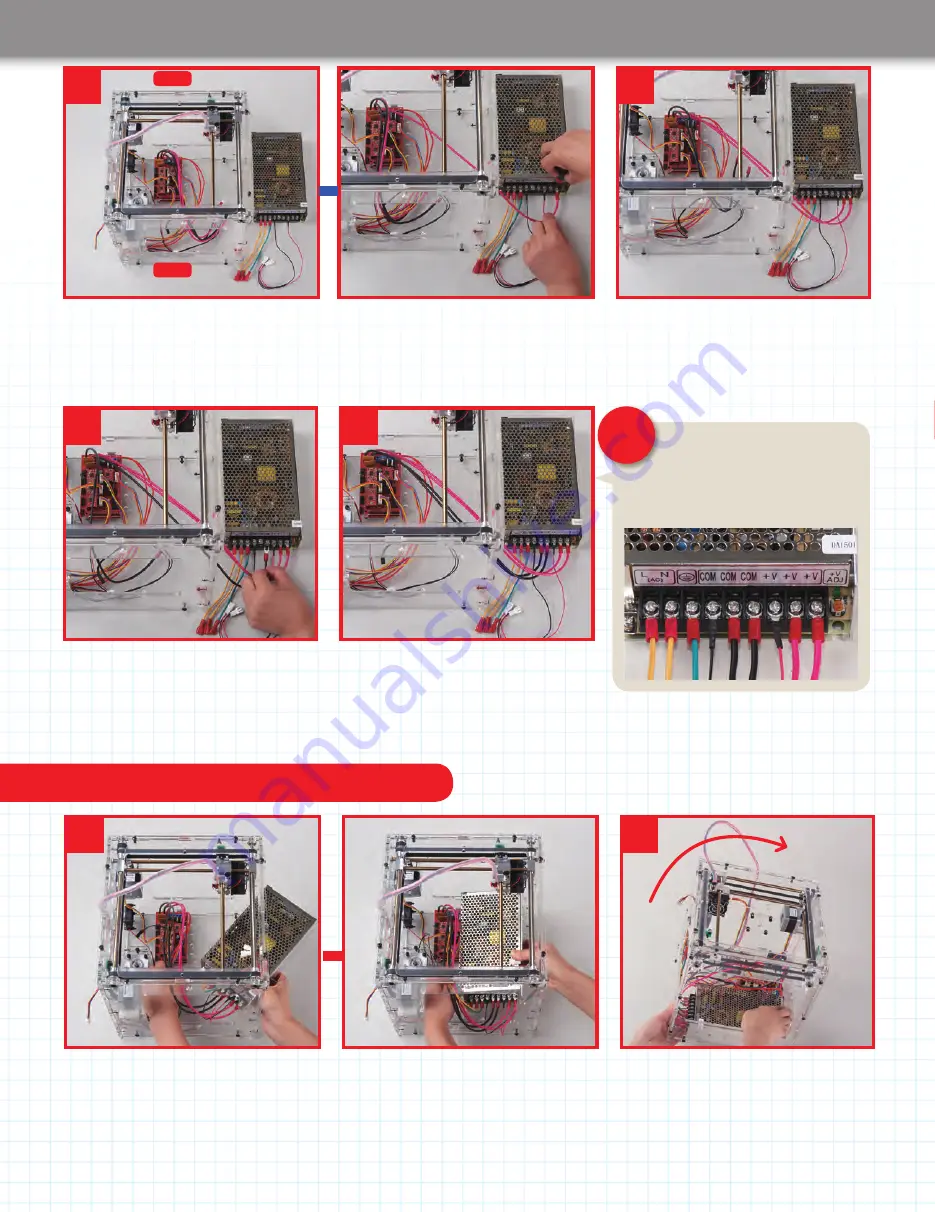
Attach the power supply to the housing
12
13
Pass the power supply through the front panel (you’ll have to angle it to get it through).
Make sure the cables do not go under the power supply, and beware of damaging the
housing while you manoeuvre the power supply.
With the front panel facing you, rotate
the housing by 90 degrees so it lies on
its right panel. Support the power supply
while you do this.
Rotate by 90
degrees
8
9
Turn the housing so its left side is facing you. Place the power supply as shown, so it is
to the right of the housing. Pass the rightmost of the two thick pink power cables from
the driver board through the opening in the front panel of the housing and plug it into the
rightmost terminal of the power supply, which has +V above it, and tighten the screw.
Pass the second thick pink cable from the
driver board through the hole in the front
panel and plug it into the power supply’s
eighth terminal from the left, which has a
+V above it, and tighten the screw.
Left
Right
It is very important that the wires
connected to the power supply
are in the correct terminals. Check
particularly that the pink and black wires are
in the correct positions as shown below.
10
11
Take the rightmost of the two thick black
cables from the driver board and plug it
into the sixth from the left of the power
supply’s terminals, which has COM above
it, and tighten the screw.
Take the other thick black cable from
the driver board and plug it into the
fifth from the left of the power supply’s
terminals, which has COM above it,
and tighten the screw.
CAUTION!


