I-Class
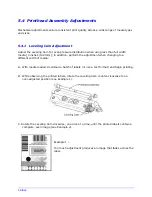
C. Equally turn each Adjustment Screw counter-clockwise until the burn line is positioned
past the platen roller apex. Print a Validation Label; see Section 4.3.4. (The print on the
label should have a light, uneven appearance.)
D. Tighten the Locking Screws just enough to remove any play in the printhead assembly,
while leaving them loose enough to allow for adjustment.
E. Equally turn each Adjustment Screw clockwise about ¼ turn (or 1/8 turn for finer
adjustments as print quality becomes maximized – see note below) then print a
Validation Label and examine the print quality for improvement. Repeat this step until
the labels are produced with even print contrast and acceptable print quality.
Note: Turning the Adjustment Screws counter-clockwise will NOT move the
printhead outward; if the printhead was adjusted too far inward, restart the
entire procedure.
F. Tighten the Locking Screws. Print a final test label to verify the adjustment.
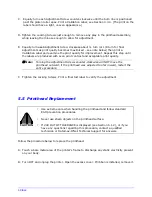
5.5 Printhead Replacement
CAUTION
•
Use extreme care when handling the printhead and follow standard
ESD prevention procedures.
•
Never use sharp objects on the printhead surface.
•
If 24V OUT OF TOLERANCE is displayed (see Section 6.1.2), or if you
have any questions regarding this procedure, contact a qualified
technician or Datamax-O’Neil
Technical Support for answers.
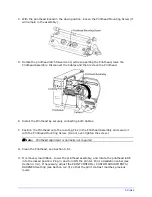
Follow the procedure below to replace the printhead:
A. Touch a bare metal area of the printer’s frame to discharge any static electricity present
on your body.
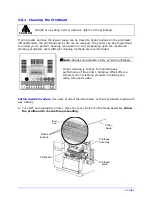
B. Turn OFF and unplug the printer. Open the access cover. If ribbon is installed, remove it.
Содержание I-class series
Страница 1: ...Operator s Manual ...
Страница 118: ...Operator s Manual ...
Страница 126: ...Ribbon Routing Diagrams CSI Coating Side In Ribbon Routing CSO Coating Side Out Ribbon Routing ...


