background image

MATRIX 450N™ REFERENCE MANUAL 


38 


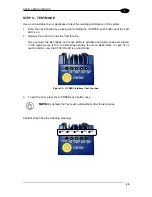
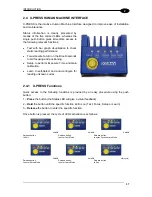
Test Mode 

 
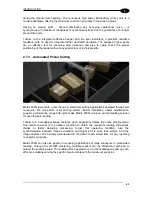
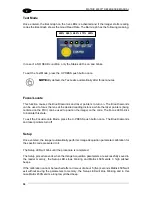
Once entered, the Bar Graph on the five LEDs is activated and if the imager starts reading 
codes the Bar-Graph shows the Good Read Rate. The Bar Graph has the following meaning: 


In case of a NO READ condition, only the Status


LED is on and blinks. 


To exit the Test Mode, press the X-PRESS push button once. 


NOTE:

 By default, the Test exits automatically after three minutes. 


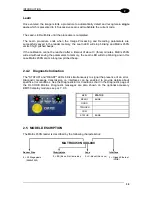
Focus/Locate 

 
This  function causes  the  Blue  Diamonds  and  laser  pointers  to  turn  on.  The  Blue  Diamonds 
can be used to focus the lens at the desired reading distance, while the laser pointers (being 
centered on the FOV) can be used to position the imager on the code. The Focus LED blinks 
to indicate this state. 
 
To exit the Focus/Locate Mode, press the X-PRESS push button once. The Blue Diamonds  
and laser pointers turn off. 


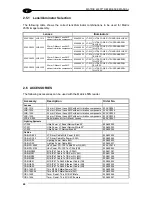
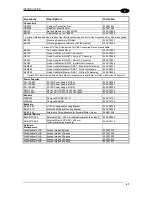
Setup 

 
Once entered, the imager automatically performs Image Acquisition parameter calibration for 
the specific code presented to it. 
 

The Setup LED will blink until the procedure is completed. 
 
The Setup procedure ends when the Image Acquisition parameters are successfully saved in 
the  reader  memory,  the  Setup  LED  stops  blinking  and  Matrix  450N  emits  3  high  pitched 
beeps. 
 
If the calibration cannot be reached after a timeout of about 5 (five) seconds Matrix 450N will 
exit  without  saving  the  parameters  to  memory,  the  Setup  LED  will  stop  blinking  and  in  this 
case Matrix 450N emits a long low pitched beep. 
 

≥20%  ≥40%  ≥60%  ≥75%  ≥95% 

Содержание matrix 450N

Страница 1: ...REFERENCE MANUAL Matrix 450N...

Страница 2: ...from Datalogic S p A Datalogic and the Datalogic logo are registered trademarks of Datalogic S p A in many countries including the U S and the E U Matrix 450N ID NET DL CODE X PRESS and Blue Diamonds...

Страница 3: ...Density 10 Step 6 X PRESS Configuration 12 Step 7 Installing DL CODE Configuration Program 15 Step 8 Device Configuration 18 Step 9 Test Mode 29 Advanced Reader Configuration 30 2 INTRODUCTION 31 2 1...

Страница 4: ...rial Host 76 5 TYPICAL LAYOUTS 77 5 1 Ethernet Connection 77 5 2 Serial Connection 79 5 3 Fieldbus Connection 80 5 4 Pass Through 81 5 5 ID NET Multidata Network Pass Through 82 5 6 ID NET Synchronize...

Страница 5: ...CODE 140 7 9 2 Accessing the HMI Interface Through Keypad and Display Menu 140 7 9 3 Display Messages 142 7 9 4 BM150 Backup and Restore Procedure 145 8 MAINTENANCE 146 8 1 Cleaning 146 9 TROUBLESHOOT...

Страница 6: ...Accessories and Downloads including documentation software drivers and utility programs SUPPORT SERVICES INDUSTRIAL AUTOMATION Several links from the Industrial Automation list take you to additional...

Страница 7: ...l 20th 2016 the main European directives applicable to Datalogic products require inclusion of an adequate analysis and assessment of the risk s This evaluation was carried out in relation to the appl...

Страница 8: ...to Laser Notice N 50 date June 24 2007 This product is classified as a Class 2 laser product according to IEC 60825 1 regulations CAUTION Use of controls or adjustments or performance of procedures o...

Страница 9: ...vibration and shock when correctly installed however it is also a precision product and therefore before and during installation it must be handled correctly to avoid damage avoid that the readers ar...

Страница 10: ...x do not weld the reader into position which can cause electrostatic heat or reading window damage do not spray paint near the reader which can cause reading window damage NO NO...

Страница 11: ...ng Labels Bracket Mounting Holes 6 Lens Cover Lens separate accessory MAC Address Label Ethernet Connector Power On LED LT 03x Lighting System separate accessory Ethernet Connection LED HMI X PRESS In...

Страница 12: ...xii...

Страница 13: ...cleaning 2 Remove the sensor protection label by pulling it off of the base 3 Mount the LNS 12xx lens by slowly screwing it onto the base until it arrives at the mechanical stop NOTE The lens mount is...

Страница 14: ...ion gasket shown in the figure below Figure 2 Assembling Matrix 450N and LNS 12xx Lens NOTE The anti vibration components are already mounted to all Datalogic LNS 12xx Lenses Locking Knobs Lens Cover...

Страница 15: ...ens 5MP with anti vibration components 93A400034 LT 032 ULTRA POWER LT NARROW BLUE 40 93ACC0034 LNS 1225 25 mm C Mount Lens 5MP with anti vibration components 93A400032 LT 030 ULTRA POWER LT SUPERNARR...

Страница 16: ...x Connect the Brown White wires to Vdc and Black Blue wires to GND Connect the cable shield to Earth ground Use CAB MS0x between Matrix 450N and the CBX for Matrix 450N power external trigger device p...

Страница 17: ...e Ethernet host through the Gigabit Ethernet connection CAB GE0x Figure 5 Matrix 450N in Stand Alone Layout without CBX to Ethernet Host Matrix 450N LT 03x can also be used in an ID NET Master Slave c...

Страница 18: ...itive Auxiliary Interface I1B External Trigger B polarity insensitive TX Auxiliary Interface TX V Power Reference External Trigger RX Auxiliary Interface RX V Power Source Inputs SGND Auxiliary Interf...

Страница 19: ...Matrix 450N body mounting bracket accessory The body mounting bracket is not designed to support the LT 03x 2 When mounting the Matrix 450N LT 03x assembly take into consideration these three ideal l...

Страница 20: ...Once the lens is fully tightened to the mechanical stop Step 1 it can be rotated counterclockwise up to one full turn without loosening the lens so that the diaphragm scale and locking knobs can be ea...

Страница 21: ...focus Tighten the Focus Locking Knob c Set the Diaphragm to the aperture stop F number stated in the conditions relative to the selected reading diagram and then tighten the Diaphragm Locking Knob d R...

Страница 22: ...changed or if the focal distance is changed Locate 1 Enter the Focus function by pressing and holding the X PRESS push button until the Focus LED is on 2 Release the button to enter the Focus functio...

Страница 23: ...SS Interface Setup Function Learn 7 Enter the Learn function by pressing and holding the X PRESS push button until the Learn LED is on 8 Release the button to enter the Learn function The Learn LED wi...

Страница 24: ...it the Focus function by pressing the X PRESS push button once The Blue Diamonds and laser pointers turn off Figure 14 X PRESS Interface Locate Function Setup 5 Enter the Setup function by pressing an...

Страница 25: ...s a long low pitched beep Figure 16 X PRESS Interface Learn Function NOTE The Grade A Barcode Test Chart or the Focusing and PPI Setup Chart cannot be used to set the Code 128 symbology even though th...

Страница 26: ...ease and re press the button during this LED blinking sequence All the device s Environment parameters are reset including the default IP Address The Matrix 450N emits 3 high pitched beeps and after a...

Страница 27: ...files maintaining the folder structure and run the start hta file to access the installation pop up Click on the Install DL CODE link to run the installation program and follow the installation proced...

Страница 28: ...s 4 Find your device in the list by matching its serial number SN then click on the device wrench icon to open the Device Environment Configuration window 5 Change the Ethernet Settings IP Address Sub...

Страница 29: ...RAPID CONFIGURATION 17 1 7 Double click on or drag the device icon into the Selected Device Information Area Details about the device will be displayed in this area Figure 19 DL CODE Opening Window...

Страница 30: ...a select Open Device Configuration The device enters run mode and begins acquiring images 2 The Open Device Configuration window opens showing the list of currently saved configurations jobs saved on...

Страница 31: ...ick the Image Setup button and then click the Image Auto Setup button to automatically acquire the best exposure time and gain values 5 Select the Static or Dynamic Self Tuning option Start Autolearn...

Страница 32: ...ng multiple lighting or code reading conditions up to 10 different Image Setups can be configured by adding them with the icon For the next step you need to enable the Focus Calibration Tool from the...

Страница 33: ...lick Play to enter run mode and reposition the code NOTE To enlarge the visual image of the code and the oscilloscope views you can drag the Focus Calibration window up and click on the zoom image ico...

Страница 34: ...quire PPI button to automatically set Image Density so that Matrix 450N will function correctly and to the fullest extent of its capabilities This procedure is necessary for first time installations o...

Страница 35: ...figuration from temporary memory to permanent memory giving it a specific name 8 Now place an application specific code in front of the reader and only click the Image Auto Setup button to register an...

Страница 36: ...and moved by dragging its borders with the mouse The code must be found within this area in order to be decoded 2 Add your application specific codes to the Code Settings by selecting them from the ic...

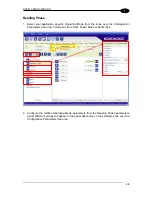
Страница 37: ...ons over the Configuration Parameters tree area Continuous One Shot Phase Mode or PackTrack 2 Configure the relative Operating Mode parameters from the Reading Phase parameters panel Different groups...

Страница 38: ...d The following example shows Code Combination By default the Expected Codes when more than one code type is selected are in logical AND which means that all codes are required to be decoded to produc...

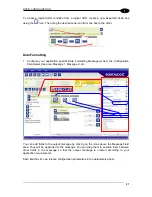
Страница 39: ...ting Message s from the Configuration Parameters tree area Message 1 Message 2 etc You can add fields to the output message by clicking on the icons above the Message Field area They will be appended...

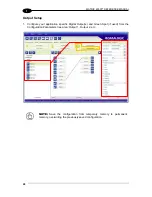
Страница 40: ...gure your application specific Digital Output s and Green Spot if used from the Configuration Parameters tree area Output 1 Output 2 etc NOTE Save the configuration from temporary memory to permanent...

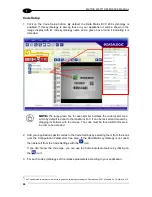
Страница 41: ...enter the Test function Once entered the Bar Graph on the five LEDs is activated and when codes are placed in the reading area FOV the Bar Graph shows the Good Read Rate In case of no read condition o...

Страница 42: ...ATION For further details on advanced product configuration refer to the DL CODE User s Guide available in the DL CODE Help menu Host Mode Programming The reader can also be partially configured from...

Страница 43: ...Multiple reading attempts are generally not needed so the highest reading throughput and ease of use are always guaranteed Matrix 450N is also the perfect solution for automated identification in man...

Страница 44: ...feedback from the reader DL CODE provides a Calibration Tool to verify the exact positioning of the reader and to maximize its reading performance Statistics on the reading performance can also be vi...

Страница 45: ...gnostic software tools Flexible Solution Modular design Adjustable C Mount lenses Complete set of Accessories like external lighting systems mounting brackets connection boxes cables and photocells Et...

Страница 46: ...1 4 TRIGGER yellow LED indicates the status of the reading phase Figure 21 5 COM yellow LED indicates active communication on the main serial port Figure 21 6 STATUS red LED indicates a NO READ result...

Страница 47: ...tion multiple readers ID NET interface allows local connection of multiple readers reading different sides of the same target All readers share a single presence sensor and activate deactivate simulta...

Страница 48: ...ch other and they can have different operating modes from each other At the end of each reading phase each reader transmits its own data message to the host Thanks to ID NET data collection among read...

Страница 49: ...ime and Gain calibration Learn to self detect and auto configure for reading unknown codes 2 4 1 X PRESS Functions Quick access to the following functions is provided by an easy procedure using the pu...

Страница 50: ...OV can be used to position the imager on the code The Focus LED blinks to indicate this state To exit the Focus Locate Mode press the X PRESS push button once The Blue Diamonds and laser pointers turn...

Страница 51: ...Learn LED will stop blinking and in this case Matrix 450N emits a long low pitched beep 2 4 2 Diagnostic Indication The STATUS and READY LEDs blink simultaneously to signal the presence of an error Di...

Страница 52: ...5 mm C Mount Lens 5MP with anti vibration components 93ACC0034 LNS 1235 35 mm C Mount Lens 5MP with anti vibration components 93ACC0035 LNS 1250 50 mm C Mount Lens 5MP with anti vibration components 9...

Страница 53: ...l Master ID NET Profinet IO Gateway 93ACC0038 Various M12 Service Cables and Field Mount Connectors are available for Quick Link Series Connectors Power Supplies PG 120 K01 AC DC Power Supply Kit EU 9...

Страница 54: ...ter packs are manually moved across the Matrix 450N scanning zone where two laser pointers mark the center The Sort to Light mode is one of the most common solutions the code s is communicated to the...

Страница 55: ...through slot conveyors like cross belts or small drop sorters Easier installation easier maintenance superior performance longer life cycle make Matrix 450N a unique and compelling solution for over t...

Страница 56: ...simplifying the integration and eliminating any extra hardware Low aspect ratio codes have no impact on the simplicity of the Matrix 450N reading solution since regular image capture contains any sca...

Страница 57: ...ck for the operator to validate a successful reading In order to extend the illuminator life cycle and also to save energy the continuous illumination can be optionally activated on a trigger basis si...

Страница 58: ...ontinuous image acquisition the http image mirroring produces a sort of real time video useful feature for local visualization on screen or also for remote monitoring The live streaming uses the stand...

Страница 59: ...x 450N reader and all the parts supplied with the equipment are present and intact when opening the packaging the list of parts includes Matrix 450N reader Quick Reference Guide Test Charts 2 Focusing...

Страница 60: ...In this configuration Matrix 450N can be installed to operate in different positions using the body mounting bracket accessory shown in Figure 28 The fourteen screw holes M4 on the body of the reader...

Страница 61: ...9 202 7 95 5 0 20 130 5 12 200 7 87 179 7 05 90 3 54 9 0 35 65 2 56 30 1 18 62 2 44 50 25 27 5 1 08 34 5 1 36 55 2 17 45 1 77 9 0 35 22 5 0 89 42 5 1 67 20 0 79 20 0 79 60 2 36 compact assembly standa...

Страница 62: ...NING MATRIX 450N Using the LT 03x L shaped mounting bracket you can obtain rotation on the various axes of the reader as shown in the diagrams below Figure 25 Mounting LT 03x Bracket Figure 26 Matrix...

Страница 63: ...e reader as shown in the diagram below Figure 27 Matrix 450N Positioning with Two LT 03x Brackets In applications where the LT 03x Series Lighting Systems are not used Matrix 450N can be mounted using...

Страница 64: ...pplications performance can be improved by modifying the Skew angle The Pitch Tilt and Skew angles are represented in Figure 29 Follow the suggestions below for the best orientation Position the reade...

Страница 65: ...many variations can be constructed NOTE For all of the following mounting examples the positioning distances are not given since they depend on the application and characteristics of the reader lens...

Страница 66: ...profiles with one bolt in the center position and one bolt in the outer ring 2 Rotate the mirror brackets so that the 15 skew angle slot is aligned with the profile channel see the figure below 3 Moun...

Страница 67: ...center the BK 90 040 brackets on the vertical profile 2 Mount the mirror brackets to the BK 90 040 brackets with one bolt in the center position and one bolt in the outer ring 3 Rotate the mirror brac...

Страница 68: ...instead of at the reader 1 Mount the mirror brackets to the profiles with one bolt in the center position and one bolt in the outer ring 2 Rotate the mirror brackets so that the 15 skew angle slot is...

Страница 69: ...EMK 600 Deflection Mirror 1 Mount and center the BK 90 040 brackets on the vertical profile 2 Mount the mirror brackets to the BK 90 040 brackets with one bolt in the center position and one bolt in t...

Страница 70: ...block connectors Use this pinout when the Matrix 450N reader is connected by means of the CBX100 500 CBX100 500 Terminal Block Connectors Input Power Vdc Power Supply Input Voltage GND Power Supply I...

Страница 71: ...m device source jumper setting Power must be supplied to the CBX as shown below To power the reader and or I O devices through the CBX power must be supplied to the CBX100 500 spring clamp terminal pi...

Страница 72: ...or LT 03x and Matrix 450N make sure that LT 03x is powered up before Matrix 450N in order to be correctly recognized If using customer supplied power keep in mind the following worst case peak current...

Страница 73: ...p On Line page of the Reading Phase step Channels in DL CODE Details regarding the connections and use of the interfaces are given in the next paragraphs 4 2 1 RS232 Interface The RS232 interface is g...

Страница 74: ...ws CBX100 500 Function TX RS422 Transmit Data RX RS422 Receive Data TX RS422 Transmit Data RX RS422 Receive Data SGND Signal Ground RX422 TX422 SGND RX422 TX422 USER INTERFACE SGND TX RX TX RX READER...

Страница 75: ...cable shield as common reference The ID NET max cable length depends on the baudrate used see the Baudrate Table below For Common Power Connections use only 2 wires ID and ID DC Voltage Power cable Vd...

Страница 76: ...Time 240 220 200 180 160 140 120 100 80 60 40 20 0 Response Time ms Number of Nodes 500 kbps 250 kbps 125 kbps 0 1 2 3 4 5 6 7 8 9 10 11 12 13 14 15 16 Figure 36 ID NET Response Time CONDITIONS ID NE...

Страница 77: ...CBX ELECTRICAL CONNECTIONS 65 4 Figure 37 ID NET Network Connections with isolated power blocks...

Страница 78: ...MATRIX 450N REFERENCE MANUAL 66 4 Figure 38 ID NET Network Connections with Common Power Branch Network...

Страница 79: ...CBX ELECTRICAL CONNECTIONS 67 4 Figure 39 ID NET Network Connections with Common Power Star Network...

Страница 80: ...iary Interface connector inside the CBX is the preferred connector for temporary communication monitoring 5 1 6 9 Figure 40 9 pin female connector If permanent system wiring is required the following...

Страница 81: ...ate of these inputs is selected in software An anti disturbance filter by default is implemented in software on both inputs The value can be changed through the software parameter Debounce Filter See...

Страница 82: ...ER CAUTION Power from the Vdc GND spring clamps is available directly to the Input Device on the V V spring clamps and does not pass through the Power Switch ON OFF inside the CBX Disconnect the power...

Страница 83: ...CBX ELECTRICAL CONNECTIONS 71 4 Figure 43 NPN External Trigger Using CBX Power...

Страница 84: ...nce Inputs INPUT 2 CONNECTIONS USING CBX POWER CAUTION Power from the Vdc GND spring clamps is available directly to the Input Device on the V V spring clamps and does not pass through the Power Switc...

Страница 85: ...R Figure 46 PNP Input 2 Using External Power Figure 47 NPN Input 2 Using External Power Power to Input Input Device Signal Input Device Reference Input Device Pulled down to External Input Device Refe...

Страница 86: ...the following VCE 30 Vdc max ICE 40 mA continuous max 130 mA pulsed max VCE saturation 1 Vdc max 10 mA PD 90 mW Max 50 C ambient temp By default Output 1 is associated with the No Read event which act...

Страница 87: ...ter Using External Power Figure 51 NPN Output Open Collector Using External Power Power to Output Output device Signal Output device Reference Output 1 Device Power to Output Output device Signal Outp...

Страница 88: ...rface the following communication channels are available TCP Client TCP Server UDP Client FTP Client The following Fieldbus protocols are also available over the on board Gigabit Ethernet interface Et...

Страница 89: ...lso configurable as before NOTE The Master Slave Role is only significant for the Internal ID NET Network If your layout doesn t use the ID NET network then the device s Role is not significant and ca...

Страница 90: ...re 54 Ethernet Network Layout All devices always support multiple output channels i e for data monitoring Host Matrix 450N CAB GE0x PG 120 Alone CAB LD 002 with power CAB PG 0105 CBX HOST Gigabit Ethe...

Страница 91: ...ode operating mode is used the reader can be activated by an External Trigger for example a pulse from a photoelectric sensor when the object enters its reading zone Figure 55 Serial Interface Point t...

Страница 92: ...RS232 auxiliary interface independently from the Fieldbus interface selection to monitor data When One Shot or Phase Mode operating mode is used the reader can be activated by an External Trigger pho...

Страница 93: ...ations to accept input from different devices on different channels i e middle reader above However readers are not required to have a pass through configuration if they don t need to receive data fro...

Страница 94: ...D NET Slave readers are not required to have a pass through configuration if they don t need to receive data from an input channel i e right reader above The ID NET Master always has at least one pass...

Страница 95: ...m the Master reader to the Host computer It is not necessary to bring the External Trigger signal to all the readers This allows the more economical QL connections to be used for all Slave readers The...

Страница 96: ...with QL100 Host QL100 PS Power Main Interface 1 The ID NET network must be terminated inserting an ID NET terminator into the QL300 Master and into the last QL in the network ID NET Synchronized Slav...

Страница 97: ...t interface of each individual reader using the DL CODE configuration program Figure 62 ID NET Synchronized Layout with Master CBX500 Fieldbus Interface to Fieldbus Host QL100 2 1 3 PS Power CBX500 1...

Страница 98: ...0 LNS 1250 50 mm 9 2 7 8 12 1 340 The viewing angle has a tolerance of 1 depending on the focus distance FOVx 2 d 44 mm tan x 2 where FOVx horizontal vertical or diagonal FOV x horizontal vertical or...

Страница 99: ...Systems are especially effective in high speed code movement applications When defining a HW SW configuration for the Matrix 450N LT 03x assembly for conditions different from those of the reference...

Страница 100: ...stem LT 032 LT 032 Software Parameters Exposure Time s 190 250 Max code moving speed 1 8 m s 1 8 m s Gain 13 14 Internal Lighting Very High Power Strobed or Continuous High Power Processing Mode Advan...

Страница 101: ...LT 030 LT 031 LT 032 Software Parameters Exposure Time s 60 120 120 Max code moving speed 3 0 m s 1 5 m s 1 5 m s Gain 10 10 17 Internal Lighting Very High Power Strobed or Continuous High Power Proc...

Страница 102: ...eters Exposure Time s 150 160 200 120 120 190 Max code moving speed 1 8 m s 1 8 m s 1 5 m s 2 8 m s 2 8 m s 1 8 m s Gain 7 13 16 8 16 15 Internal Lighting Very High Power Strobed or Continuous High Po...

Страница 103: ...s 120 120 180 160 160 220 Max code moving speed 2 3 m s 2 3 m s 1 5 m s 3 2 m s 3 2 m s 2 5 m s Gain 7 14 16 6 12 16 Internal Lighting Very High Power Strobed or Continuous High Power Processing Mode...

Страница 104: ...032 Software Parameters Exposure Time s 250 250 380 Max code moving speed 1 8 m s 1 8 m s 1 2 m s Gain 8 16 19 Internal Lighting Very High Power Strobed or Continuous High Power Processing Mode Advan...

Страница 105: ...030 LT 031 Software Parameters Exposure Time s 150 300 Max code moving speed 1 2 m s 0 6 m s Gain 16 16 Internal Lighting Very High Power Strobed or Continuous High Power Processing Mode Advanced Mini...

Страница 106: ...T 031 LT 030 LT 031 Software Parameters Exposure Time s 200 400 150 270 Max code moving speed 1 0 m s 0 5 m s 1 8 m s 1 0 m s Gain 22 22 18 22 Internal Lighting Very High Power Strobed or Continuous H...

Страница 107: ...0 LT 031 LT 030 LT 031 Software Parameters Exposure Time s 230 400 150 270 Max code moving speed 2 0 m s 1 0 m s 3 0 m s 1 7 m s Gain 20 23 18 22 Internal Lighting Very High Power Strobed or Continuou...

Страница 108: ...Skew Angle 15 Lighting System LT 030 LT 031 Software Parameters Exposure Time s 70 130 Max code moving speed 1 8 m s 1 0 m s Gain 16 18 Internal Lighting Very High Power Strobed or Continuous High Pow...

Страница 109: ...codes or postal code reading applications heavily depends on the direction of symbol movement When the direction of movement is parallel to the elements of the code the maximum speed is greater Assum...

Страница 110: ...me value obtainable for the specific application It can be evaluated in static reading conditions and depends on the Matrix reader hardware selected for the application LT 03x lighting system model op...

Страница 111: ...One 19 or larger monitor optimized for 1280x1024 resolution 7 2 READER CONFIGURATION For an example of Matrix device configuration see the example in chapter 1 Steps 7 8 NOTE Especially for lengthy co...

Страница 112: ...mage Setup step the following window appears Figure 64 Image Auto Setup Select the Static or Dynamic Self Tuning option Start Autolearn and Apply to the Image Setup The Image Setup window works intera...

Страница 113: ...ers in their order of appearance 1 increase the Exposure Time 2 increase the Gain NOTE In general a longer exposure time corresponds to a lighter image but is susceptible to blurring due to code movem...

Страница 114: ...MANUAL 102 7 Over exposure To correct this result it is recommended to change the following parameters in their order of appearance 1 decrease the Gain 2 decrease the Exposure Time Figure 67 Example O...

Страница 115: ...he Field of View To correct this result and have the code completely visible in FOV it is possible to follow one or both the procedures listed below reposition the reader use the Delay on Trigger and...

Страница 116: ...vely by an activation event For example an application may have several stable but different lighting conditions which require different lighting options One Image Acquisition Setting could enable and...

Страница 117: ...means that for N acquisitions we will surely have captured the correct lighting condition but we will also have captured some acquisitions with the wrong lighting condition A consequence then is that...

Страница 118: ...we can pre select the correct Image Setting from an external source When the Image Settings Selection is External Acquisition Sequences are created and by default each Image Setting has its own Acqui...

Страница 119: ...ence box Select the empty Sequence box and delete it with the delete key Each Acquisition Sequence can be activated exclusively by a single event either through a string from an available communicatio...

Страница 120: ...ping is performed from the Image Setup tab by clicking on the Add Cropping Region icon as shown below In Matrix 450N the frame rate is dependent on the number of rows and columns in the defined window...

Страница 121: ...fault is equal to the FoV By dragging the edges with the mouse resizing you can crop the image to a specific location where codes are present The numbers in the blue boxes refer to pixel references x...

Страница 122: ...UAL 110 7 The cropped area can be moved by dragging the center You can also set the cropped image size and position through the Cropping Region Area group of parameters size Width and Height position...

Страница 123: ...and or small size codes This algorithm is much more aggressive but in general it may have longer decoding times than the lower complexity algorithms To minimize decoding time it is better to select t...

Страница 124: ...single code or group of codes in one or more Image Settings See the DL CODE User s Manual for examples of Image Filter application The Erode Filter enlarges the image dark zones to increase readabili...

Страница 125: ...13 7 The Open filter eliminates white areas defects in the dark zones of the image Before No Read After Readable Open The Contrast Stretching filter maximizes image contrast Before No Read After Reada...

Страница 126: ...distribution uniform Before No Read After Readable Histogram Equalization The Smoothing filter deletes small insignificant details in the center of the image Before No Read After Readable Smoothing Th...

Страница 127: ...able Deblurring The Black Enhancement filter produces a nonlinear increase in the black level for light images Before No Read After Readable Black Enhancement The White Enhancement filter produces a n...

Страница 128: ...device configurations The pass through configuration allows individually working devices Alone to collect data from other devices also working Alone and pass this data to a third device through a dif...

Страница 129: ...settings Layout Type Alone Internal Network Role Slave In order to automatically recognize the ID NET Slaves all devices must be physically installed and electrically connected including ID NET networ...

Страница 130: ...n as ID NET Master current default setting is Slave Click on Setup Internal Network Configuration from the Task area You will be advised that the device role will be changed to Master Click OK The Net...

Страница 131: ...recognized If not verify all device connections and power and then repeat the operation by clicking on the Start Net Autoset button Depending on the application select one of the Default Internal Netw...

Страница 132: ...EFERENCE MANUAL 120 7 This selection will open a pre configured job for the Master reader according to the selection Follow the specific application instructions in the following paragraphs Synchroniz...

Страница 133: ...on to Clone Master configuration on Slaves Figure 70 Saving Multidata Configuration to Master The jobs must not be cloned because the Master and Slaves have different input output communication channe...

Страница 134: ...MATRIX 450N REFERENCE MANUAL 122 7 Open the Slave specific application job the first time it has the Master Specific name...

Страница 135: ...URATION 123 7 When the configuration opens pause run mode and set all the application specific configuration parameters including Image Setup Verify the focus and decoding with the capture image and C...

Страница 136: ...The following screenshots show the pass through configuration settings for the three devices in the example in par 5 5 4 An application job with the same name as the Master s but with Slave specific c...

Страница 137: ...SOFTWARE CONFIGURATION 125 7 ID NET Master ID NET Slave 1 ID NET Slave 2...

Страница 138: ...onfiguration of all the application parameters including Image Setup and save them to the Master with an application relative name and with the option to Clone Master configuration on Slaves Figure 72...

Страница 139: ...SOFTWARE CONFIGURATION 127 7 Open the cloned application job...

Страница 140: ...meters Image Auto Setup feature in the Image Setup step Acquisition Trigger Delays necessary to avoid lighting interference between adjacent or oppositely positioned readers Reading Phase step Images...

Страница 141: ...the entire network is configured See par 5 6 for an example Synchronized ID NET configuration 5 An application job with the same name as the Master s has been cloned to the Slaves Each Slave can have...

Страница 142: ...he DL CODE Console or a configured channel terminal If necessary as a troubleshooting tip you can temporarily apply the Reading Mask field in place of each Code Content field to verify if all devices...

Страница 143: ...he Slaves are shown in order from right to left 1 to 31 Example Master Slave 1 00000000000000000000000000000011 The figure above shows the Master reading Code 128 and Slave 1 reading Code 39 3 After v...

Страница 144: ...on tab at the bottom of the screen By selecting the various configuration steps above you can visualize the slave configuration NOTE You can modify some Slave Synchronized parameters from this view bu...

Страница 145: ...all Slaves present in the network CAUTION For Master Slave networks any other configurations jobs stored in the device memory will not be backed up Therefore upon a restore all jobs other than the sta...

Страница 146: ...Master only select the Backup current Internal Network configurations selection You will be reminded that configuration in temporary memory will not be saved so you should save the configuration to t...

Страница 147: ...cating successful completion 7 5 3 Replacement CAUTION The replacement device must be the exact same model as the device it is replacing The Restore function also provides easy and secure Single Devic...

Страница 148: ...le configurations jobs are saved on a single device these parameters can be different from one configuration to the next Environment parameters regard the device Identity and Position in a Network Eth...

Страница 149: ...ation is set as the startup configuration 7 6 2 Restore Default Environment Restore Default Environment returns all Environment parameters to their factory default settings The default IP address will...

Страница 150: ...prompted to confirm All Environment parameters will be restored to Factory default values and any existing configurations stored on the device will be erased The device will be reset and therefore sta...

Страница 151: ...ng performance can be viewed by enabling the Statistics panel from the DL CODE Monitor item selected from the File menu or Monitor icon Figure 75 Reading Statistics The enabled Statistical Counters ca...

Страница 152: ...herefore the BM150 display module if present will also be enabled Unchecked Disabled the BM100 backup memory module will not be detected on power up reset therefore the BM150 display module if present...

Страница 153: ...select an item or enter a submenu press and release the Enter key After executing an HMI function the display shows a result message and then automatically exits from the menu structure To exit a menu...

Страница 154: ...Type MUL Multidata SYN Synchronized ALN Alone N Device Network Setting M00 ID NET Network Master Sxx ID NET Network Slave address Null string Alone no network D device serial number A Ethernet IP Addr...

Страница 155: ...ress Duplication 171 Protocol Index Failure 185 Backup Memory Communication Failure 187 Wrong Rotary Switch Selection 189 Fieldbus Communication Failure 191 Fieldbus Type Mismatch 193 Fieldbus Configu...

Страница 156: ...for Stand Alone or Master plus Slave readers 1 15 0 No Read 1 Good Read M Multiple Read T Reading Mask for Slave readers 16 31 0 No Read 1 Good Read M Multiple Read Reading Mask Device State Master O...

Страница 157: ...the Startup Configuration for the Master and all Slaves present in the network CAUTION For Master Slave networks any other configurations jobs stored in the device memory will not be backed up Therefo...

Страница 158: ...gure A 3 periodically for continued correct operation of the reader Dust dirt etc on the lens cover may alter the reading performance Repeat the operation frequently in particularly dirty environments...

Страница 159: ...tion host mshta exe in Windows System32 Power ON the POWER LED is not lit Is power connected If using a power adapter like PG6000 is it connected to wall outlet If using rail power does rail have powe...

Страница 160: ...the Reading Phase step and the Data Formatting parameters on the data Formatting step Image not clear verify the Focus procedure Image focused but not decoded verify the Calibrate Image Density proced...

Страница 161: ...nu item is grey Are you using the Installer Expert User level If not change it in the Options Change User menu How do I obtain my reader Serial Number The reader Serial Number consists of 9 characters...

Страница 162: ...ators to EN 62471 Laser Safety Class pointers Class 2 Laser Light to IEC60825 1 ENVIRONMENTAL FEATURES Operating Temperature6 0 to 50 C 32 to 122 F Storage Temperature 20 to 70 C 4 to 158 F Max Humidi...

Страница 163: ...dard and Direct Marking MicroQR Code MAXICODE Aztec Code Australia Post Royal Mail 4 State Customer Kix Code Japan Post PLANET POSTNET POSTNET BB Intelligent Mail Swedish Post Operating Mode CONTINUOU...

Страница 164: ...6 19 pin Male Power COM and I O Connector Power COM and I O Connector Pinout Pin Name Function A Vdc Power supply input voltage L GND Power supply input voltage K CHASSIS Cable shield internally conne...

Страница 165: ...system through the CAB LD 002 cable Matrix 450N cannot source power through this connector Figure 78 M12 8 pin Male Lighting System Control Connector Matrix 450N M12 8 pin Lighting System Connector P...

Страница 166: ...for Matrix 450N LT 03x assemblies Accessory Power Supplies Power Supply Number of Matrix 450N LT 03xs Supported PG 120 1 PWR 120 1 PWR 480B 4 NOTE If using separate power sources for LT 03x and Matrix...

Страница 167: ...ve pin 2 DD Channel D bi directional data positive pin 3 DD Channel D bi directional data negative pin 4 DA Channel A bi directional data negative pin 5 DC Channel C bi directional data positive pin 6...

Страница 168: ...ion A Vdc Power Supply input voltage B I1A External Trigger A polarity insensitive C I1B External Trigger B polarity insensitive D I2A Input 2 A polarity insensitive E I2B Input 2 B polarity insensiti...

Страница 169: ...Line page for the Output Setup step in DL CODE Figure 83 Isolated Current Sinking Output Connection Figure 84 Isolated Current Sourcing Output Connection Figure 85 Non Isolated Current Sinking Output...

Страница 170: ...TX 2 TX 5 GND 7 GND How To Build A Simple Interface Test Cable The following wiring diagram shows a simple test cable including power external push button trigger and PC RS232 COM port connections Fig...

Страница 171: ...ction of ROM based code with a standard API used to interface with standard PC hardware Bit Binary digit One bit is the basic unit of binary information Generally eight consecutive bits compose one by...

Страница 172: ...ost A computer that serves other terminals in a network providing services such as network control database access special programs supervisory programs or programming languages Image Processing Any f...

Страница 173: ...center distance of adjacent elements is uniform Matrix symbols may include recognition patterns which do not follow the same rules as the other elements within the symbol Multi row or Stacked Symbolog...

Страница 174: ...onse Time 64 ID NET Synchronized Network 83 Image Cropping 108 Inputs 69 156 Internal Network Configurations 117 L Layouts 77 M Main Serial Interface 61 Maintenance 146 Manual Calibration 101 Mechanic...

Страница 175: ......
Отзывы: