RAPID CONFIGURATION
1
1
1 RAPID CONFIGURATION
STEP 1 – ASSEMBLE THE READER
The first step to perform is to assemble the accessories that make up the Matrix
400™
reader. The lens and either an internal or an external illuminator must be used. This
procedure shows an internal illuminator.
CAUTION
Matrix 400™ must be disconnected from the power supply during this
procedure.
1. In a dust-free environment, remove the Matrix 400™ Lens Cover by unscrewing it.
CAUTION
Do not touch the sensor aperture, lens glass or lens cover glass. These
areas must be kept clean. Avoid any abrasive substances that might damage
these surfaces during cleaning.
2. Remove the sensor protection label by pulling it off of the base.
3. Mount the lens by screwing it tightly onto the base.
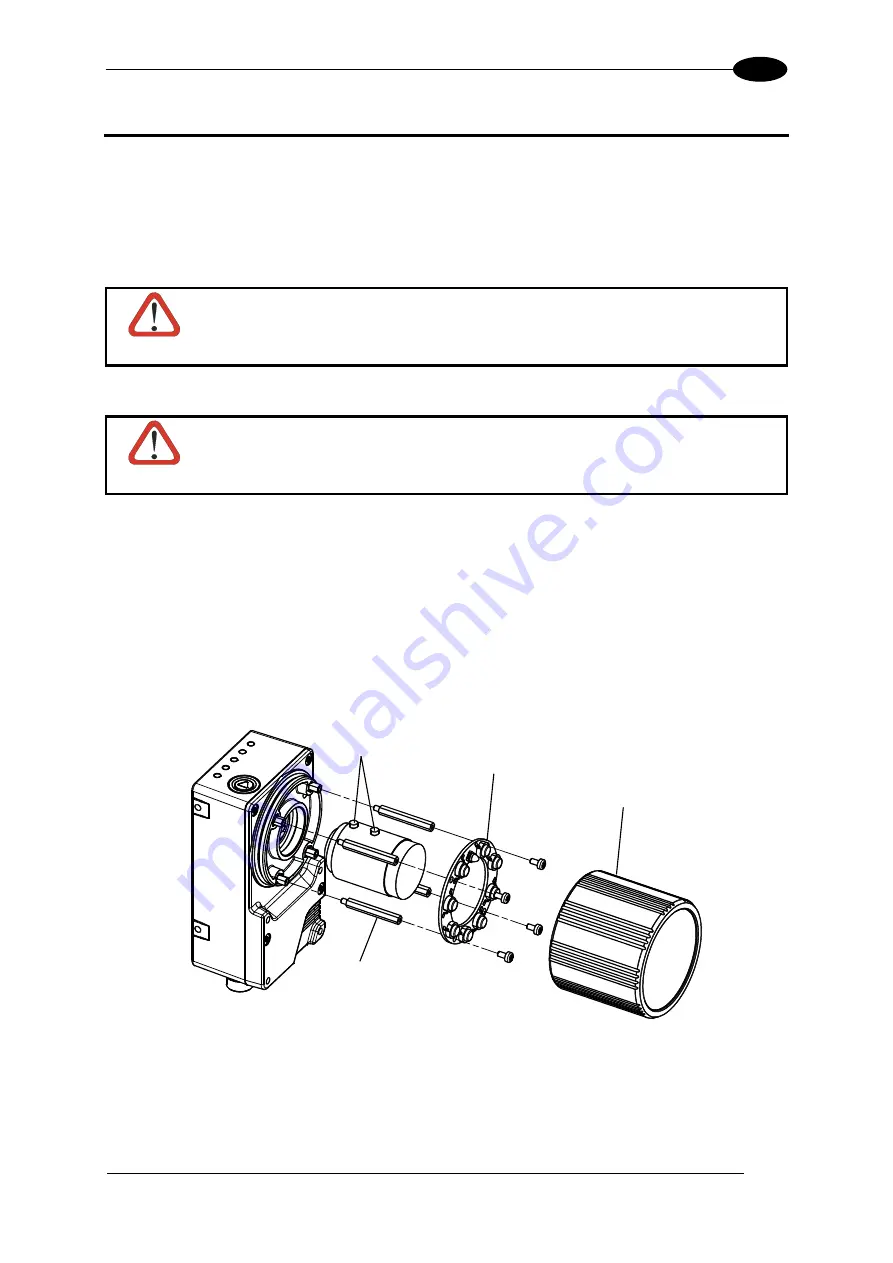
4. If using an internal illuminator:
a. Mount the 4 internal illuminator spacers into the holes provided on the base.
b. Align and mount the Illuminator board tightly onto the spacers using the 4 screws
provided in the illuminator package. The spacers are positioned asymmetrically to
avoid incorrect alignment.
5. To keep dust and dirt off of the lens during mounting, temporarily replace the lens cover.
Figure 1 – Assembling Matrix 400™ Accessories
Locking Knobs
Internal
Illuminator
Lens Cover
Illuminator Spacers
Содержание Matrix 400
Страница 1: ...MATRIX 400 Reference Manual...
Страница 59: ...CBX ELECTRICAL CONNECTIONS 49 4 Figure 55 Matrix 400 Multidrop Connection to a Multiplexer...
Страница 62: ...MATRIX 400 REFERENCE MANUAL 52 4 Figure 57 ID NET Network Connections with isolated power blocks...
Страница 63: ...CBX ELECTRICAL CONNECTIONS 53 4 Figure 58 ID NET Network Connections with Common Power Branch Network...
Страница 64: ...MATRIX 400 REFERENCE MANUAL 54 4 Figure 59 ID NET Network Connections with Common Power Star Network...
Страница 81: ...19 PIN CONNECTOR ELECTRICAL CONNECTIONS 71 5 Figure 83 ID NET Network Connections with isolated power blocks...
Страница 82: ...MATRIX 400 REFERENCE MANUAL 72 5 Figure 84 ID NET Network Connections with Common Power Branch Network...
Страница 115: ...SOFTWARE CONFIGURATION 105 8 Figure 116 Options Communication Serial Port Figure 117 Options Communication Ethernet...
Страница 142: ...www automation datalogic com...


