Local Configurations
61
After you have configured the network settings, on the
NETWORK
interface, click
Step 1
Next
.
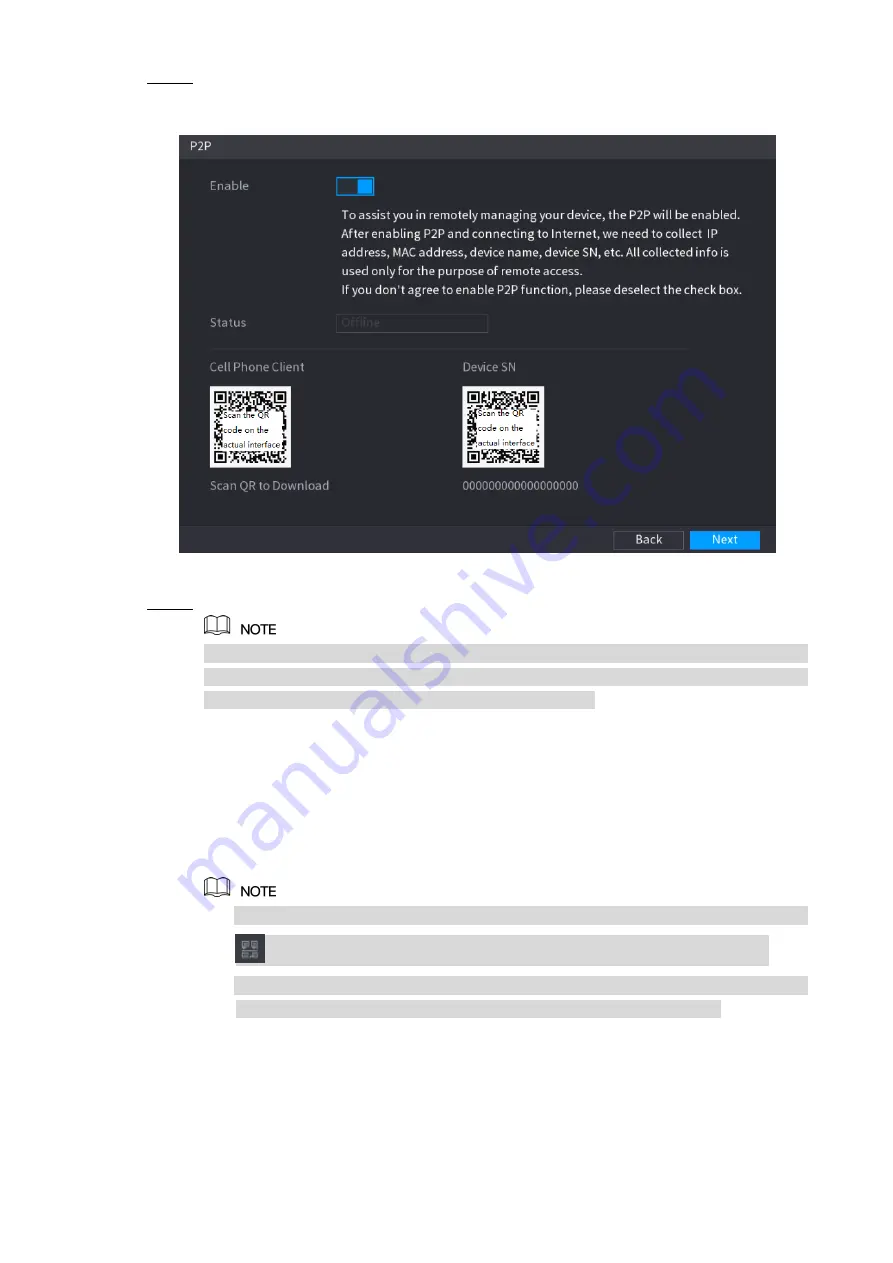
The
P2P
interface is displayed. See Figure 5-22.
Figure 5-22
Enable the P2P function.
Step 2
After the P2P function is enabled and connected to the Internet, the system will collects
your information for remote access, and the information includes but not limited to
email address, MAC address, and device serial number.
You can start adding the device.
Cell Phone Client: Use your mobile phone to scan the QR code to add the device
into the Cell Phone Client, and then you can start accessing the Device.
Platform: Obtain the Device SN by scanning the QR code. Go to the P2P
management platform and add the Device SN into the platform. Then you can
access and manage the device in the WAN. For details, refer to the P2P operation
manual.
You can also enter the QR code of Cell Phone Client and Device SN by clicking
on the top right of the interfaces after you have entered the Main Menu.
If selection of this function is canceled, the
Message
interface is displayed. See
Figure 5-23. Choose to enable it or not according to your actual need.
Содержание XVR Cooper Series
Страница 1: ...DIGITAL VIDEO RECORDER User s Manual V1 3 0...
Страница 53: ...Connecting Basics 37 Figure 4 2...
Страница 198: ...Local Configurations 182 Figure 5 147 Figure 5 148...
Страница 220: ...Local Configurations 204 Figure 5 170 Figure 5 171 Double click the video or click Step 7...
Страница 287: ...Local Configurations 271 Figure 5 242 Figure 5 243...
Страница 337: ...Glossary 321 Abbreviations Full term VGA Video Graphics Array WAN Wide Area Network...
Страница 355: ...Earthing 339...


