26
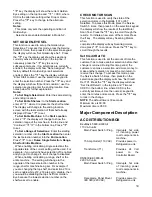
1. Pressing the “
” key will set STS to a one to
one configuration such that each selection is
mapped only to its corresponding column.
Note: This setting overrides any
previously defined Space-to-Sales
blocks
.
2. Pressing a tray selection followed by “
” will
configure an entire tray as a single Space-
to-Sales block. Example is selections A1
through A9 vend from columns A1 through
A9 sequentially.
3. Pressing an item selection (A1) will specify
the first product of the Space-to-Sales block.
After the first item is programmed, the
display will change to “Enter end location”.
Press the item selection corresponding to
the last item in the block. This option may
transcend more than one shelf, i.e. A1 to B9.
In all of the above options, after a selection is made,
Display will show “OK?
= Y CLR = N. You must
press “
” at this prompt to save your setting.
Press “CLR” at any time to return to SETUP MODE
2.
DEFAULT STS
-
Press key “D”
Configures the Vender Space-to-Sales to the preset
mappings. Press “D” on the keypad and the display
will show “DEFAULT STS”. Press the “
” key to
configure Space-to-Sales in preset blocks of three
(A1 – A3, A4-A6, A7-A9, B1-B3,…). Display will
show “Set Default STS?
= Y CLR = N. You must
press * at this prompt to accept Default STS. Press
“CLR” at any time to return to SETUP MODE 2.
DISPLAY STS
-
Press key “E”
Allows verification of the Vender Space-to-Sales
settings for an individual selection block. Press the
letter “E” on the keypad. The display will show
“DISPLAY STS”. Press the “
” key and the display
will change to “ENTER SELECTION”. Enter any
selection item, press the “
” Key, and the display
will read “##-## ## Continue?
= Y CLR = N. The
first ## indicates the first column in the selection’s
block. The second ## indicates the last column in
the selection’s block. The last ## indicates the
column that the next vend will come from in this STS
block. For example, entering “A2” might display “A1-
A3 A1, indicating that selection A2 is part of the
block that spans between A1 and A3 and that A1
selection is next in line to be vended. Press “CLR”
at any time to return to SETUP MODE 2.
SET NOVEND LIMIT
–
Press Key “F”
If a Vend fails - either due to a vend error or no
product detected in the recovery unit - and the drop
sensor is enabled, the VMC will mark the column as
sold out. If the Space-to-Sales is enabled, the
product column will be removed form the Space-to-
Sales rotation and the VMC will attempt to vend from
the next column in the Space-to-Sales block. If the
vender is unable to vend any products from a
Space-to-Sales block, the customer’s credit will be
returned and the entire block will be marked as
“SOLD OUT”. Press the “F” key on the keypad. The
display will show “SET NOVEND LIMIT”. Press the
“
” key and the display will show” NOVEND LIMIT
#”. The value # is the current vend limit which is
applied to each selection. When # is 0, no vend
limits are enforced. Enter the desired vend limit and
press the “
” key to accept this value or press the
“CLR” key to cancel changes and return to SETUP
MODE 2. The NOVEND limit specifies the number
of times a location can be vended empty before it is
blocked as “Sold Out”.
**MULTIVEND
-
Press key “1”
This function, when turned on, allows credit to be
retained after a vend so the customer can vend from
another selection. (i.e..50 vend price, put in $1.00,
push a select button and vends, .50 still shows on
the display, push a second select button and vends).
Credit is cancelled after 5 minutes of inactivity.
There is unlimited acceptance. If a customer wants
their credit (money) back, the coin return lever must
be pressed. To show the current “Multi Vend”
condition, press the “
”key and the display will show
the current setting. Press the “
” key to toggle
“Multi Vend” on and off.
SET LANGUAGE
- Press key “2”
This function is used to set the language that will be
used for sales mode messages. To display the
current language selected, press the “
”key. To
change the language selected, with the current
setting displayed, press the “
”key to scroll through
the available languages in the menu (English,
French, German, Spanish, & Italian). Once the
desired language is shown on the display, press the
“
”key to save and return to Set Language.
SOLD OUT ENABLED/DISABLED
-
Press
key “3”
Controls sold out detection by the port sensor.
When “On”, a signal is sent to the VCU when the
port sensor does not detect a selected item. That
signal tells the VCU that the item selected is sold out
and removes it from the STS block until the next
time the vender is serviced. Press the number “3”
on the keypad. The display will show “SOLD OUT
ENABLED (DISABLED)”. Press the “
” key and
display will show “Use Port Sensor: Off (On), Press
“
” - turn On (Off). Press “CLR” to exit without
making changes and return to “SOLD OUT
ENABLE/DISABLE”. Press “CLR” to return to
“SETUP MODE 2”.
Содержание BevMax 4
Страница 2: ...1 ...
Страница 69: ...68 ...
Страница 70: ...69 MACHINE FRONT VIEW 6A 9 11 13 14 5B 5A 7 3A 4B 19 18 6B 3C 4B 4A 2 4C 17 16 1 12 20 ...
Страница 72: ...71 CABINET DETAIL PRODUCT AREA 3 2B 12 9 6 7 2A 8 5 14 11 ...
Страница 74: ...73 CABINET DETAIL SERVICE DOOR AREA 1 16 10 4 7 11 5 17 11 4 5 20 22 21 14 12 2 10 15 8 ...
Страница 78: ...77 DELIVERY PICKER CUP ASSEMBLY 11 1 2 21 10 5 16 14 15 17 4 7 12 13 19 6 19 20 9 8 19 3 22 ...
Страница 80: ...79 SERVICE DOOR OUTSIDE 3 1 4 12 18 20 25 5 7 8B 8B 23 9 15 14 18 17 8A 21 16 13 26 19D 19B 6 10 24 27 ...
Страница 82: ...81 SERVICE DOOR INSIDE 1 5 10 3 11 25 6 2 25 35 9 15 14 10 17 34 19 23 24 20 9 4 5 18 21 22 8B 26 29 7 8A ...
Страница 84: ...83 GATE TRAY DETAIL 8 3 7 11 1 2 4 6 12 13 14 10 9 ...
Страница 92: ...91 REFRIGERATION UNIT BevMax 4 with Metal Evap Box prior to 9539 0032DJ 26 2 10 18 13 11 15 28A 28C 6 16 9 27 ...
Страница 94: ...93 ELECTRONICS Pepsi Generic BevMax 4 EXE Control Boards 3 1 7 5 4 6 7 Executive 4 pin interface added ...
Страница 96: ...95 HARNESSES 8 2 10 1 4 9 3 6 7 11 24 18 17 12 21 16 23 19 20 15 25 26 22 5 ...
Страница 98: ...97 ...


