


User Manual: WaveLinx Lite (1.5)
www.cooperlighting.com
21
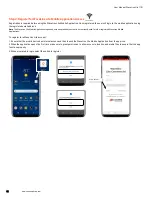
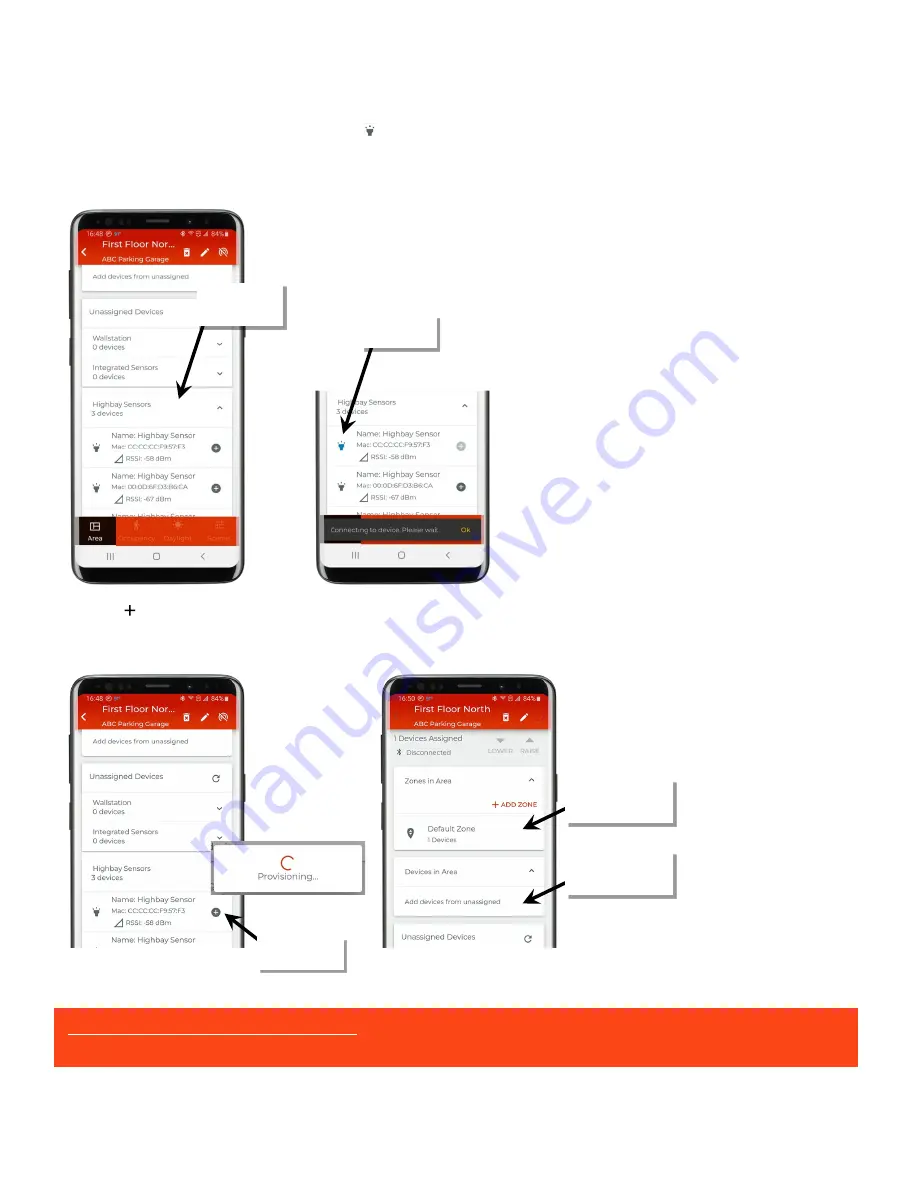
7: Locate and open the appropriate device type list for the device being provisioned. The device that has the strongest signal (possibly the
closest device) will be at the top. Tap the identify icon ‘ ’ to place the device in the identify mode to verify that it is the expected device. The
device should respond with the identification behavior described in the device reference sheet section beginning on page 6. If the unintended
device responds, try the next device listed and continue until the expected device is found.
Note
: The device will automatically return to normal operation after 15 seconds.
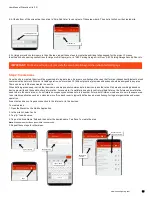
8: Next, tap ‘ ’ on the identified device to begin the provisioning process. Once complete, the device will appear in the area. A wallstation will
appear directly in the area while a fixture mount or integrated sensor will be assigned to the area’s ‘Default Zone’.
Note
: If zones have been previously added to the area, an additional screen will display to select the desired zone.
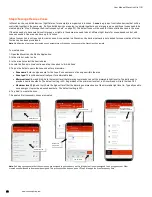
Device type list
expanded to show
Highbay Sensors
Tap identify icon.
A fixture mount or
integrated sensor will
appear in the default zone
A wallstation will appear
in the ‘Devices in Area’
Tap ‘+’ to provision
device
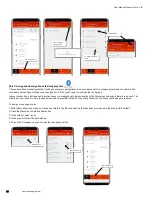
DO NOT PROVISION ADDITIONAL DEVICES
until Step 4: Manage the Area Zones and Step 5: Manage the Area
Occupancy Sets are complete.


