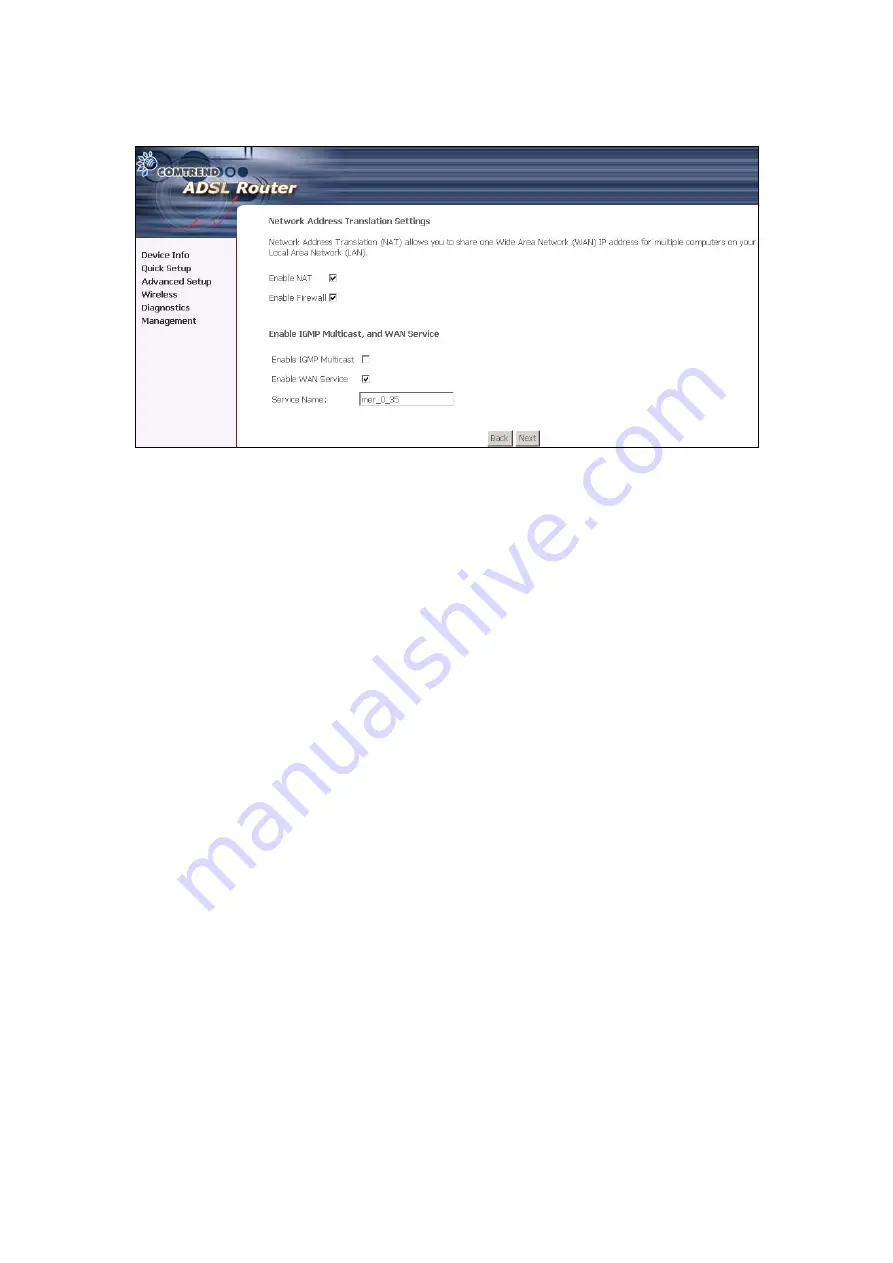
4. Click
Next
to display the following screen.
Enable NAT checkbox:
If the LAN is configured with a private IP address, the user
should select this checkbox. The NAT submenu on the left side main panel will be
displayed after reboot. The user can then configure NAT-related features after the
system comes up. If a private IP address is not used on the LAN side, this checkbox
should be de-selected to free up system resources for better performance. When
the system comes back after reboot, the NAT submenu will not be displayed on the
left main panel. The default setting for Mer is enable.
Enable Firewall checkbox:
If the firewall checkbox is selected, the firewall
submenu on the left side main panel will be displayed after system reboot. The
user can then configure firewall features after the system comes up. If firewall is
not used, this checkbox should be de-selected to free up system resources for better
performance. When system comes back after reboot, the Firewall submenu will
not be displayed on the left main panel. The default setting for Mer is enable.
Enable IGMP Multicast:
Tick the checkbox to enable IGMP multicast (proxy).
IGMP (Internet Group Membership Protocol) is a protocol used by IP hosts to report
their multicast group memberships to any immediately neighboring multicast
routers.
Enable WAN Service:
Tick the checkbox to enable the WAN (ADSL) service. If
this item is not selected, you will not be able to use the ADSL service. The default
setting for Mer is enable.
Service Name:
This is User-defined.
42
Содержание CT-5372E
Страница 1: ...CT 5372E Wireless Multi DSL Router User s Manual Version A1 0 December 06 2006 261074 002 ...
Страница 7: ...1 2 Application The following diagram depicts the application of the CT 5372E 6 ...
Страница 15: ...STEP 10 Installation is complete 14 ...
Страница 29: ...4 2 5 VDSL Statistics 28 ...
Страница 32: ...4 2 8 DHCP Click DHCP to display the DHCP information 31 ...
Страница 109: ...108 ...
Страница 122: ...Step 6 Select driver file directory on CD ROM and click OK Step 7 Once the printer name appears click OK 121 ...
Страница 123: ...Step 8 Choose Yes or No for default printer setting and click Next Step 9 Click Finish 122 ...
Страница 124: ...Step 10 Check the status of printer from Windows Control Panel printer window Status should be shown ready 123 ...


