10
eVenue Tempo
H a r d w a r e I n s t a l l a t i o n
Tempest
®
FX Installation (if applicable)
In order to use Tempest FX with your eVenue Tempo system, you must have the most recent Tempest firmware. A CoachComm
technician will help upgrade your existing Tempest FX system after you purchase eVenue Tempo.
To connect the Tempest FX BaseStation to eVenue Tempo, use the following procedure:
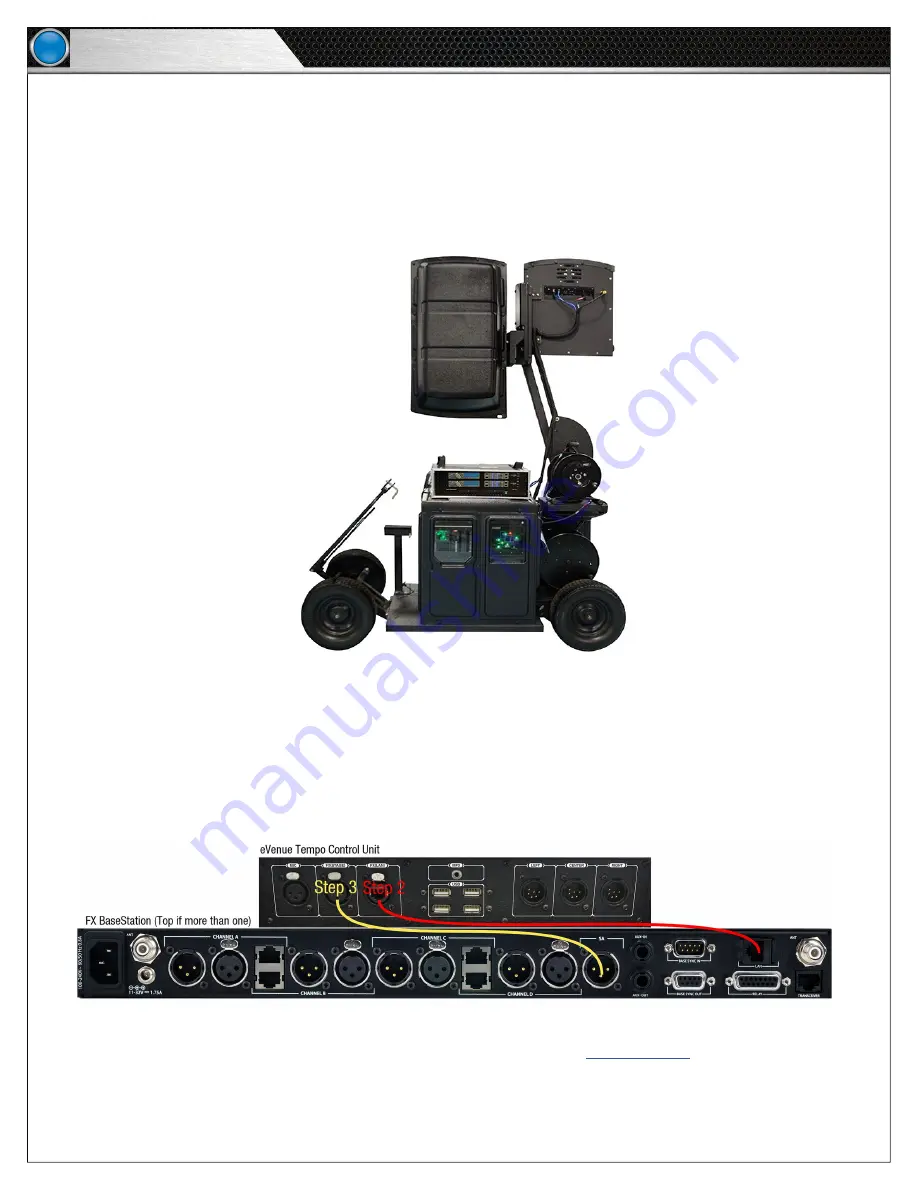
1. Place your Tempest FX BaseStation unit on top of the eVenue ePod’s sub-woofer. Use the tie-down straps to secure it in
place.
2. Connect the LAN network cable from the BaseStation into the FX LAN port on the Tempo Control Unit’s I/O connection
panel. (If you have a dual FX system, always connect the top BaseStation to eVenue Tempo.)
3. Connect the Stage Announce 3-pin XLR cable from the BaseStation’s SA output to the FX (STAGE) input on the Tempo
Control Unit’s I/O connection panel. (If you have a dual FX system, always connect the top BaseStation to eVenue
Tempo.)
4. Follow the Tempest FX setup instructions found in the Tempest FX manual at
coachcomm.com
to connect and mount your
Remote Transceiver and connect power. An extra AC power outlet is provided from the ePod’s power conditioner to power
your Tempest FX system if desired. It is recommended that you power on your FX system before powering on your ePod
and eVenue Tempo Control.
Figure 12: Raised ePod (back) with Tempest FX BaseStation on top of ePod’s sub-woofer.
Figure 13: Tempest FX BaseStation and eVenu eTempo Control Unit Connections


