8
eVenue Tempo
S e t u p a n d T e a r d o w n P r o c e d u r e s
3. Next, turn each ePod on by flipping the power switch on the power conditioner and holding down the power button on the
Uninterrupted Power Supply (UPS).
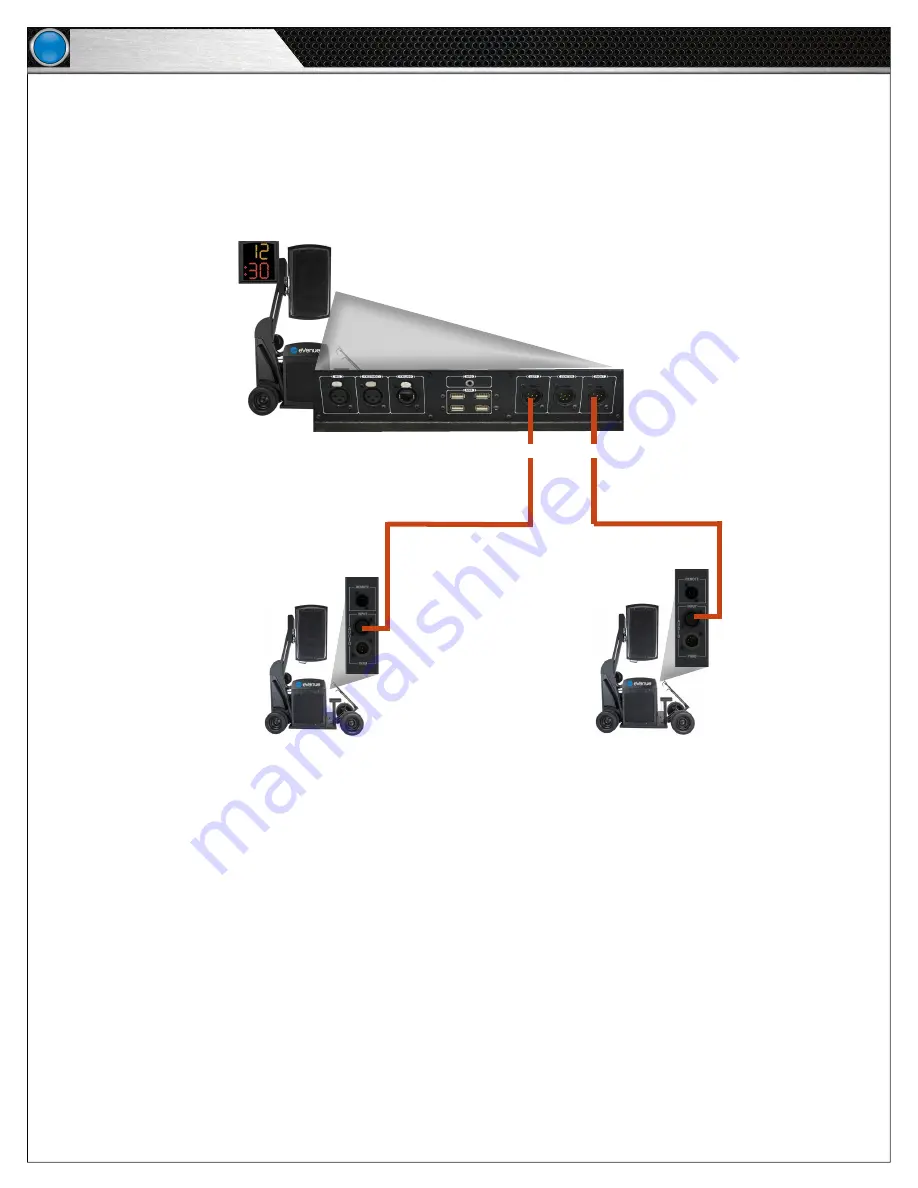
4. To connect ePods to one another, un-spool the length of audio cable you will need from each ePod. Then, walk each cable
end to its connection point and make the connection according to your system’s configuration. Finally, connect each
ePod’s local audio cable end and secure it with the provided carabiner. More information about the Control Unit’s I/O Panel
is provided under “Hardware Installation” on page 9 of this manual.
5. If applicable, connect the Tempest FX BaseStation to your Tempo Control Unit. More information about connecting your
Tempest FX system is available in the Tempest FX Installation section on page 10 of this manual.
6. After all the connections are made, test the multiple audio inputs and outputs through the eVenue Tempo system by
checking signal clarity, and making sure no equipment damage will occur. If needed, adjust sound coverage by changing
the ePod upper speaker array placement with the eVenue Commando-e Remote. For further specifications, see the Sound
Coverage Overview section on page 16 or the eVenue Commando-e Remote section on page 14 of this manual.
7. After your event, do the following:
• Return all ePods and the Control Unit to the Travel Ready position.
• Turn off each eVenue product.
• Disconnect all audio devices.
• Disconnect and re-spool audio and power cables.
• Tow the system to your storage location.
Figure 9: eVenue Tempo Audio Cable (from rear of Control Unit)
to additional optional ePods
ePod
(Optional)
ePod
(Optional)
6-pin XLR(s)
Note:
When re-spooling, walk the cable head
back to its spool, secure it, and use
the spool handle to reel in the rest of the cable.


