


© 1999-2017 Citrix Systems, Inc. All rights reserved.
p.205
https://docs.citrix.com
8. For any interface that you do not want to use after conversion, run the following commands:
> disable interface 1/x
> disable interface 10/x
9. Run the following command to verify that the status of the power supplies is normal: > stat system – detail
10. Run the following command: > show techsupport
Note: The output of the command is available in the /var/tmp/support/collector_<IP_address>_P_<date>.tar.gz file.
Copy this file to another computer for future reference. It might be helpful if you want to contact a Citrix technical
support engineer.
11. At the NetScaler command line interface, switch to the shell prompt. Type: shell
12. Run the following command to verify that 4 Cavium cores are available: root@ns# dmesg | grep cavium
13. Run the following command to verify that 132 MB of RAM is reserved for shared memory: root@ns# dmesg | grep
memory
14. Run the following command to verify that the appliance has 4 CPU cores: root@ns# dmesg | grep cpu
15. Run the following command to verify that the /var drive is mounted as /dev/ad4s1e: root@ns# df –h
16. Enter the following command to run the ns_hw_err.bash script. This script checks for latent hardware errors. root@ns#
/netscaler/ns_hw_err.bash
17. At the shell prompt, switch to the NetScaler command line interface. Type: exit
18. Run the following command to shut down the appliance: shutdown -p now
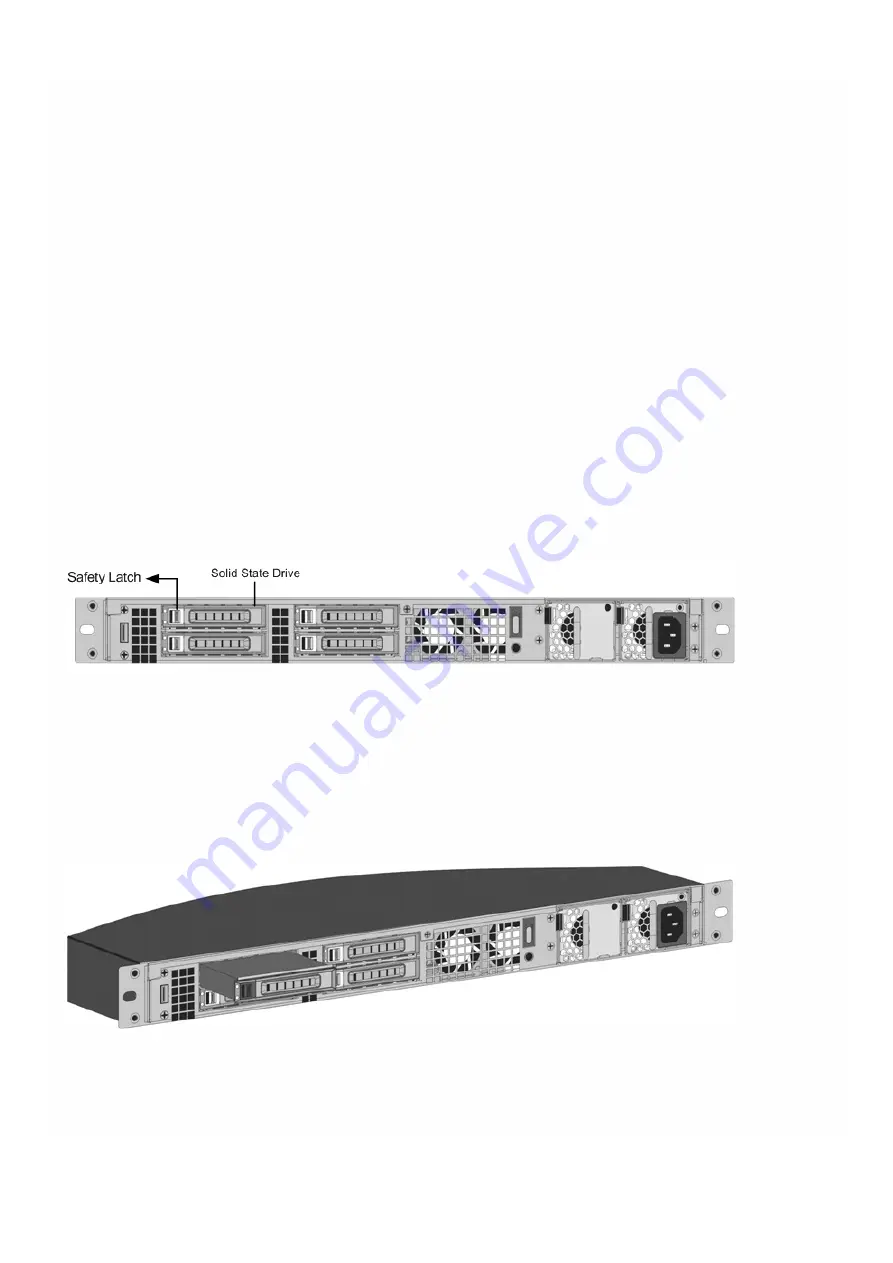
19. Locate the solid-state drive on the back panel of the appliance, as shown in the following figure:
20. Verify that the replacement solid-state drive is the one required for your NetScaler model. The Citrix label is on the top
of the solid-state drive, which is pre-populated with a new version of BIOS and a recent build of the required Service VM
software.
21. Remove the currently installed SSD drive by pushing the safety latch of the drive cover to the right and removing the
drive handle and the existing drive.
22. Open the drive handle on the new drive completely to the left, and insert the drive into the slot. The following figure
shows the drive partially inserted. Push the drive all the way into the slot.
23. Close the handle flush with the rear side of the appliance so that the solid-state drive locks securely into the slot.
Important: The orientation of the solid-state drive is important. Make sure that the Citrix product label is facing up when
you insert the drive.
Содержание NetScaler SDX 11500
Страница 90: ...1999 2017 Citrix Systems Inc All rights reserved p 90 https docs citrix com 5 Click OK...
Страница 218: ...1999 2017 Citrix Systems Inc All rights reserved p 218 https docs citrix com...
Страница 235: ...1999 2017 Citrix Systems Inc All rights reserved p 235 https docs citrix com...
Страница 253: ...1999 2017 Citrix Systems Inc All rights reserved p 253 https docs citrix com errorcode 1 message IP address is missing...


