


Citrix ADC MPX
4. Verify that the replacement SSD is the correct type for the platform.
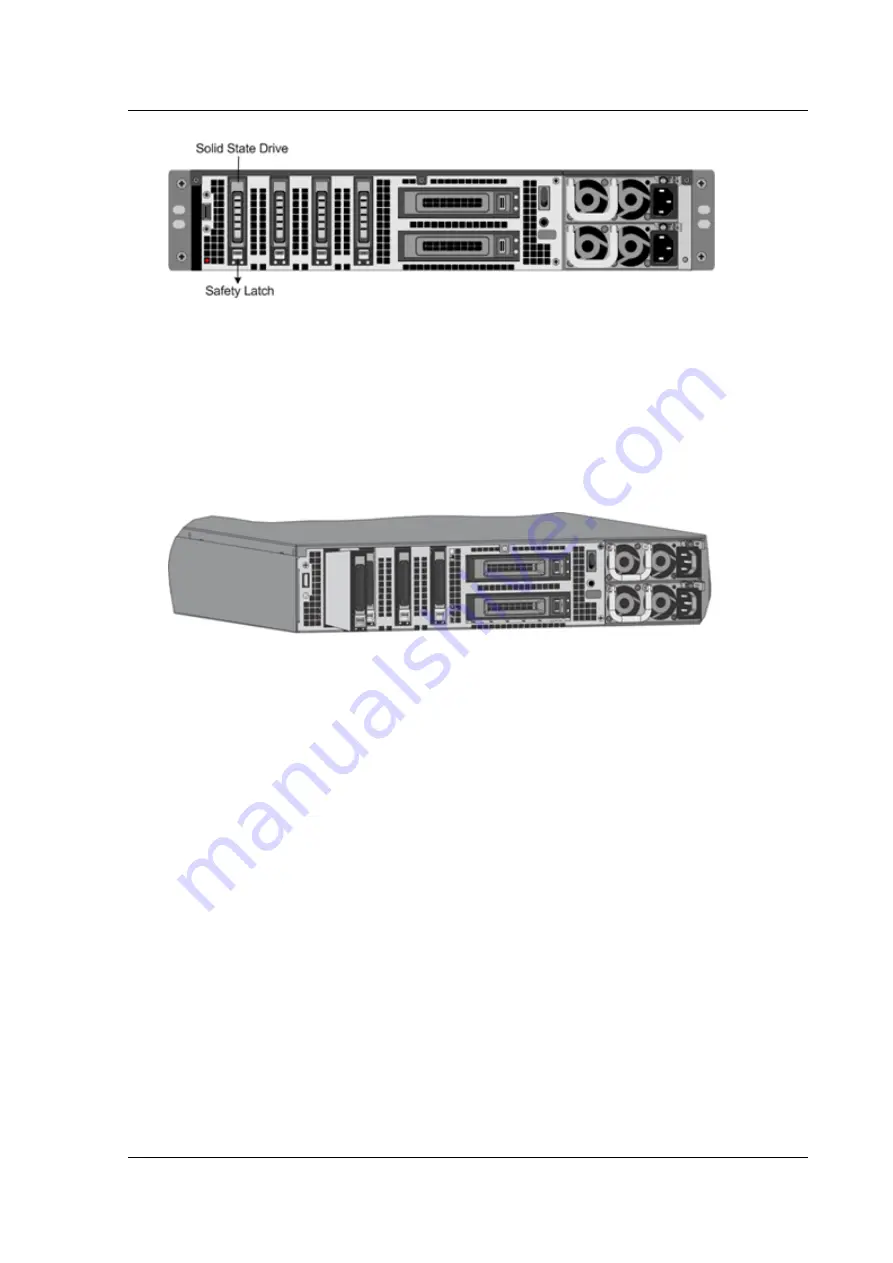
5. Pick up the new SSD, open the drive handle fully to the left or up, and insert the drive into the
slot as far as possible. To seat the drive, close the handle flush with the rear of the appliance so
that the drive locks securely into the slot.
Important
: When you insert the drive, make sure that the Citrix product label is at the top if the
drive is inserted horizontally or at the right if the drive is inserted vertically.
Figure 8. Insert the replacement solid-state drive
6. Turn on the Citrix ADC appliance. When the appliance starts, it no longer has the previous work-
ing configuration. Therefore, the appliance is reachable only through the default IP address of
192.168.100.1/16, or through the console port.
7. Perform the initial configuration of the appliance, as described in
. Log on
to the default IP address by using a web browser, or connect to the serial console by using a
console cable, to perform the initial configuration.
8. Upload a platform license and any optional feature licenses, including universal licenses, to the
Citrix ADC appliance. For more information, see
9. Once the correct Citrix ADC software version is loaded, you can restore the working configura-
tion. Copy a previous version of the ns.conf file to the /nsconfig directory by using an SCP utility
or by pasting the previous configuration into the /nsconfig/ns.conf file from the Citrix ADC com-
mand prompt. To load the new ns.conf file, you must restart the Citrix ADC appliance by entering
the reboot command at the Citrix ADC command prompt.
Hard disk drive
A hard disk drive (HDD) stores logs and other data files. Files stored on the HDD include the
newnslog
files,
dmesg
and messages files, and any core/crash files. The HDD comes in various capacities, de-
© 1999-2019 Citrix Systems, Inc. All rights reserved.
102


