R E V I E W D R A F T — C I S C O C O N F I D E N T I A L
3-28
Cisco 7500 Series Installation and Configuration Guide
OL-5008-03 B0
Chapter 3 Installing a Cisco 7500 Series Router
Installing the Cisco 7513, Cisco 7513-MX, and Cisco 7576
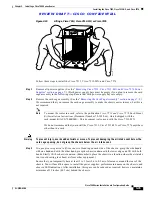
Figure 3-17
Handling a Power Supply (Cisco 7513, Cisco 7513-MX, and Cisco 7576 AC-Input Power
Supply Shown)
Step 4
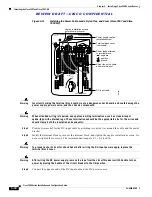
While firmly pressing the power supply faceplate so that is flush with the chassis rear panel, use a large
slotted screwdriver to tighten the captive screw that secures the power supply to the chassis frame.
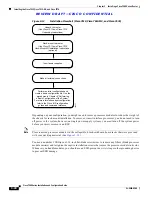
Figure 3-18
Installing a Power Supply (Cisco 7513, Cisco 7513-MX, and Cisco 7576 AC-Input
Power Supply Shown)
Step 5
For AC-input power supplies—push the cable retention clip away from the power receptacle, and plug
in the power cable.
Note
For DC-input power supplies, proceed to the
“Connecting Power to Cisco 7513, Cisco
7513-MX, and Cisco 7576 DC-Input Power Supplies” section on page 3-29
; otherwise, continue
with Step 6.
Step 6
Secure the cable in the power supply receptacle by pushing the cable retention clip until it snaps into
place around the cable connector.
Step 7
After the AC power cable is connected, reconnect the power cable at the power source, remove the tape
(if any) that you placed on the breaker switch, but do not turn on the breaker or power to the power
supply.
H5267
0
I
AC
OK
FAN
OK
OUTPUT
FAIL
122306
Captive screws
0
I
AC
OK
FAN
OK
OUTPUT
FAIL
0
I
AC
OK
FAN
OK
OUTPUT
FAIL
POWER
B

