


Preliminary Check
2-1
2.
Preliminary Check
Before using this power supply for the first time, please complete the following actions.
1. Make sure that the power line voltage setting on the rear panel is correct:
The power line voltage must be set to the proper value for your country once you receive
this unit. There are 115 Vac and 230 Vac selections available.
2. Make sure that the correct power line fuse is installed: For 115 Vac and 230 Vac, a 4AF
fuse is used.
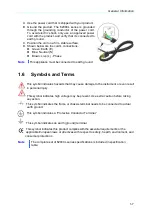
3. Make sure that the power cord is connected.
2.1
Power-On Check
When the power supply is powered on, it will execute an automatic self-test that checks the
internal microprocessor and allows the user to check the display visually.
All of the segment of the display will light up during the power-on self-test is executing.
If the power-on test failed, an error is generated and the
ERR
annunciator is lit.
2.2
Output Check
An output check is performed in order to verify that the power supply outputs are valid and
properly responding to commands from the front panel.
2.2.1 Voltage Output Check
Through the following steps, you may check the basic voltage functions under no load
conditions.
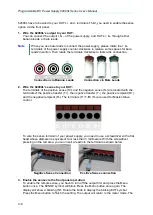
1. Turn on the power supply: The power-on/reset state is running, the output is disabled (the
OFF light is on), and the knob is selected for voltage control.
2. Enable the outputs: After pressing the Output On/Off button once, some symbols, such as
OVP, OCP are lit, as well as the CV or CC according to the resistance of the test load. The
blinking cursor can be changed by turning the knob. Please note that the display is in the
meter mode which means that the display shows the actual output voltage and current.
3. Verify that the front panel voltmeter responds to knob control within the
0~36V(62010L-36-7)/0~60V(62015L-60-6) ranges: Rotate the knob clockwise or
counter-clockwise to check whether the voltmeter tracks the knob control, and the
ammeter shows nearly zero amps.
4. Make sure that the voltage can be adjusted within the 0~36V (62010L-36-7)/0~60V
(62015L-60-6) range: Rotate the knob until the voltmeter shows 36V/60V.


