Chassis Plans CPC1-17, -19 Technical Reference
Chapter 5 – Operation & OSDs
Page 21
Chapter 5 - Operation
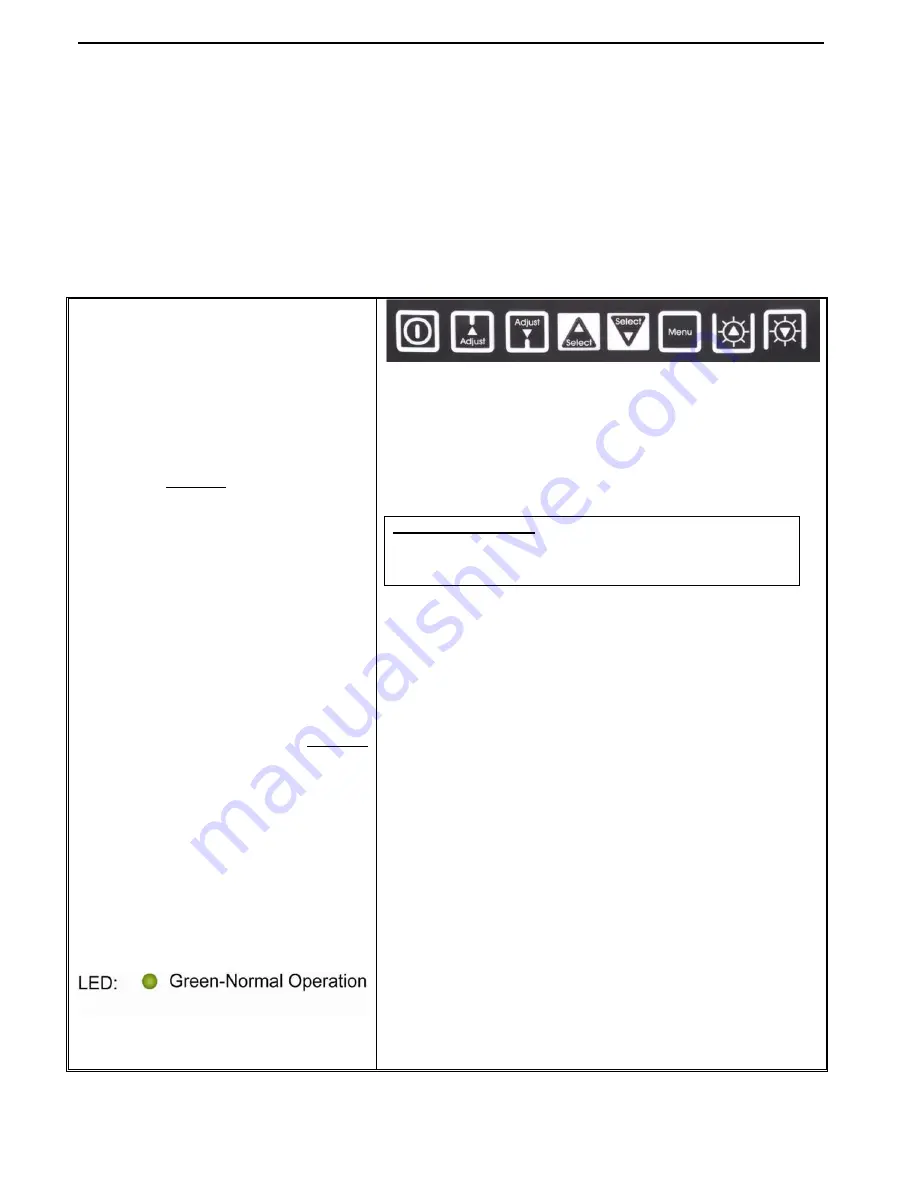
LCD Front Panel Controls
The On Screen Display (OSD) is adjusted as follows:
1. Press
the
Menu
Button located on the front of the monitor.
2. Use the buttons described below to maneuver around the Menu.
3. Select the desired OSD Menu from the Menu Screen Shots below to make the desired adjustment(s).
4. Press
the
Menu
button to exit out of the OSD Menu when complete or wait for the OSD window to
automatically close as set by the OSD Time Out setting.
Table 7 - Front Panel Controls
Power:
Turns the Unit On and Off
Adjust
▲
:
o
Hot Key 1
Increase
o
When the cursor is not showing in
sub menus, moves selection
right
between top tabs.
o
Cursor showing in sub menus,
adjusts setting
up
.
o
Cursor on sub-sub menu (
►
showing), enters sub-sub menu.
(See Select
▲
below to escape).
o
Toggles
Off
to
On
Adjust
▼
:
o
Hot Key 1 Decrease
o
When the cursor is not showing in
sub menus, moves selection
left
between top tabs.
o
Cursor showing in sub menus,
adjust setting
down
o
Toggles
On
to
Off
Select
▲
:
o
Hot Key 2
Increase
o
Moves the cursor
up
.
o
When in a sub-sub menu,
repeatedly press to move to the
previous menu level. (See Adjust
▲
above)
Select
▼
:
o
Hot Key 2
Decrease.
o
Moves the cursor
Down
.
Menu
o
Opens or closes the OSD menu
o
See Note 1 below for additional
information.
Brightness
▲
:
o
Increases
the screen brightness.
Brightness
▼
:
o
Decreases
the screen brightness.
Green
Normal Operation
Red
Power On but no input signal
Off
No power or display turned off
Hot Keys
Hot Keys are defined in the Utility/Hot Key menu and allow single
button access to the defined function.
Adjust
▲
and
▼
- Hot Key 1 Up and Down
Select
▲
and
▼
- Hot Key 2 Up and Down
Display Auto Adjust
Pressing
Auto/Exit
will perform a auto display adjustment
when in aRGB mode. This automatically adjusts the Phase
and Clock for the
est displayed image.
To save your changes, press the front panel
Menu
button.
Alternatively, changes are saved if no buttons are pressed and
the OSD times out returning back to the display.
Notes On the Menu Buttons
–
1. The Menus are context sensitive in that only adjustments
pertaining to the selected input will be displayed. For
example, if DVI is selected for the input, then items such
as Hue will not be adjustable.
2. Pressing the Menu button returns to the previously
opened menu.
Notes on Hot Keys -
1. Hot Keys allow single button selection of a function.
2. Definition of the Hot Keys is set in the Utility menu.
Thus, for example, if the Adjust keys are set up for Input
Source, pushing the Up button rolls Up through the Input
Sources and pushing the Down button rolls Down
through the Input Sources.
3. The Hot Keys display in the upper left of the screen when
pushed.
Note on Factory Default –
1. Under the Utilities Menu, a selection is available to return
the board setting to the factory defaults.
Содержание CPC1-17
Страница 2: ...This Page Intentionally Blank...
Страница 22: ...Chassis Plans CPC1 17 19 Technical Reference Chapter 2 KVM Switch Options Page 14 This Page Intentionally Blank...
Страница 28: ...Chassis Plans CPC1 17 19 Technical Reference Chapter 4 Installation Page 20 This Page Intentionally Blank...
Страница 32: ...Chassis Plans CPC1 17 19 Technical Reference Chapter 5 Operation OSDs Page 24 This Page Intentionally Blank...
Страница 68: ...Chassis Plans CPC1 C17 C19 Technical Reference Appendix B Auto Color Gain Page 60 This Page Intentionally Blank...


