165
NOTE: Disassembly of the top cover may be required under spe
-
cial service circumstances. It is very important that the orientation
and position of the top cover be marked on the unit prior to disas
-
sembly. This will allow proper replacement of the top cover onto
the unit and prevent rainwater from leaking into the unit.
COMPRESSORS
Each compressor is readily accessible from sides of unit.
LIQUID SERVICE VALVES, SUCTION SERVICE VALVES,
AND SIGHT GLASSES
Access to these components is from the sides of the unit.
SUPPLY-FAN MOTORS, PULLEYS, AND BELTS
Access to these components is through the 2 doors labeled
FAN SECTION on each side of the unit.
POWER EXHAUST MOTORS, PULLEYS, AND BELTS
Access to these components is through the door at the return
end of the unit.
RETURN AIR FILTERS
Access to these filters is through the door marked FILTER
SECTION.
UNIT CONTROL BOX
Access to this component is through the door marked ELEC
-
TRICAL SECTION on the condenser end of the unit.
UNIT POWER BOX
Access to the power components is through the door marked
ELECTRICAL SECTION in the condenser section of the unit.
GAS HEAT SECTION (48N ONLY)
Access to the gas heat section is through the door labeled
HEAT SECTION on the right side of the unit (when facing re
-
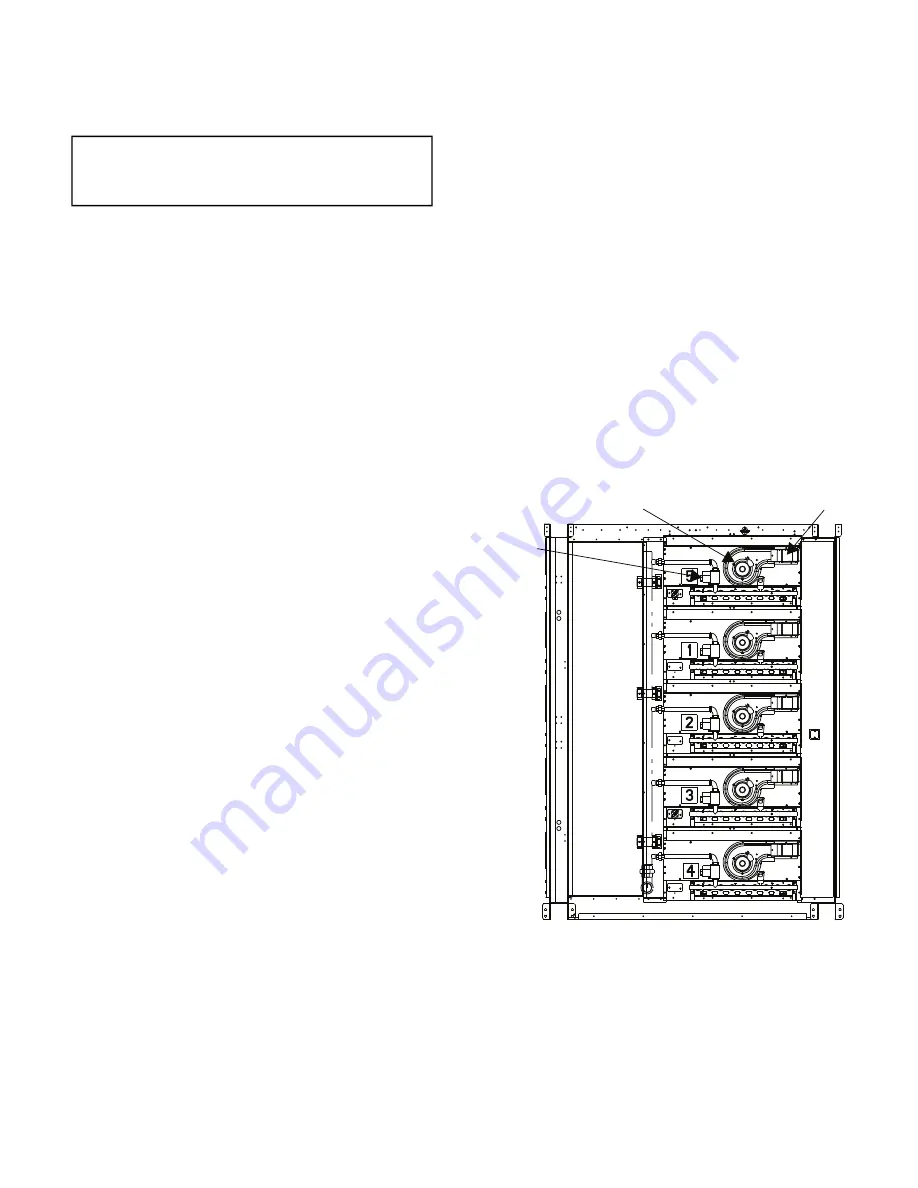
turn air end). Figures 42 and 43 show typical gas heat sections.
For modulating heat units, Fig. 44 replaces section 1 in Fig. 43.
MAIN BURNERS (48N ONLY)
At the beginning of each heating season, inspect for deteriora
-
tion due to corrosion or other causes. The main burner assem
-
bly is shown in Fig. 42-47 for 2-stage heat. For modulating gas
heat, see Fig. 46 and 47. Refer to Main Burners Removal and
Replacement section on page 184 for burner removal sequence.
Observe the main burner flames and adjust if necessary. See
Gas System Adjustment sections on page 184.
FLUE GAS PASSAGEWAYS (48N ONLY)
The flue collector box and heat exchanger cells may be in
-
spected by removing heat exchanger access panel, flue box
cover, and main burner assembly (Fig. 42 and 43). If cleaning
is required, remove heat exchanger baffles and clean tubes with
a wire brush.
PRESSURE SWITCH (48N MODULATING GAS ONLY)
Inspect the riveted surface of the pressure fitting (see Fig. 44)
by removing the flue box cover. Clean as necessary to ensure
the proper function of the combustion air proving switch.
When reassembling the flue box, ensure that both ends of pres
-
sure switch tubing are tightly pressed into fitting and pressure
switch, respectively.
COMBUSTION-AIR BLOWERS (48N ONLY)
Clean periodically to assure proper airflow and heating effi
-
ciency. Inspect blower wheel every fall and periodically during
heating season. For the first heating season, inspect blower
wheel bi-monthly to determine proper cleaning frequency.
To inspect blower wheel, remove heat exchanger access panel.
Shine a flashlight into opening to inspect wheel. If cleaning is
required, remove motor and wheel assembly by removing
screws holding motor mounting plate to top of combustion fan
housing. The motor and wheel assembly will slide up and out
of the fan housing. Remove the blower wheel from the motor
shaft and clean with a detergent or solvent. Replace motor and
wheel assembly. See Fig. 48.
ECONOMIZER DAMPER MOTOR(S)
On units so equipped, the economizer motor(s) is located in the
mixing box section. Access to it is through the door labeled
FILTER SECTION.
CONDENSER FANS AND FAN MOTORS
Remove the wire fan guard on top of the unit to gain access to
the condenser fans and motors.
RETURN-AIR FILTERS
Access to these filters is through the door marked FILTER
SECTION. Filters in upper and lower bag filter tracks can only
be removed from the right side of the unit.
Fig. 42 —
Standard Gas Heat
IMPORTANT: After servicing is completed, make sure
door is closed and relatched properly, and that the
latches are tight. Failure to do this can result in water
leakage into the indoor-air section of the unit.
GAS
VALVE
INDUCER
MOTOR
FLUE
OUTLET
NOTE: UNITS CONTAIN 2 TO 5 SECTIONS
NOTE: 120 to 150 ton units shown. 75 to 105 ton units have a
maximum of 4 sections numbered 4, 1, 2, 3 from top to bottom.
Содержание WeatherExpert 48N2
Страница 135: ...135 Fig 18 48 50N Typical Power Schematic Nominal 075 Ton Unit Shown ...
Страница 136: ...136 Fig 19 48 50N Typical Power Schematic Nominal Ton 90 150 Units Shown ...
Страница 137: ...137 Fig 20 48 50N Main Base Board Input Output Connections ...
Страница 138: ...138 Fig 21 48 50N RXB EXB CEM Input Output Connections a48 9307 ...
Страница 139: ...139 Fig 22 48 50N EXV SCB Input Output Connections a48 9308 ...
Страница 140: ...140 Fig 23 48N Typical Modulating Gas Heat Unit Control Wiring ...
Страница 141: ...141 Fig 24 50N Typical Electric Heat Unit Control Wiring ...
Страница 144: ...144 Fig 27 48N Typical Gas Heat Section Wiring Nominal Ton 120 to 150 Units ...
Страница 145: ...145 Fig 28 48 50N Typical Power Component Control Wiring 460 v ...
Страница 146: ...146 Fig 29 48 50N Component Control Wiring 575 v Nominal Ton 075 to 150 Units ...
Страница 147: ...147 Fig 30 48 50N Component Arrangement Power Box ...
Страница 148: ...148 Fig 31 48 50N Component Arrangement Control Box ...
Страница 168: ...168 Fig 47 Sensor and Ignition Position Fig 48 Combustion Blower Details SENSOR DETAILS IGNITION DETAILS ...
Страница 240: ...240 APPENDIX D VFD INFORMATION CONT Fig G VFD Bypass Wiring Diagram WHEN USED ...


