16
T
1
T
2
T
3
T
4
0%
25%
50%
75%
4
R
L
6
2
+
‒
3
5
+
‒
R
L
‒
+
1
R
L
R
L
+
‒
‒
+
100%
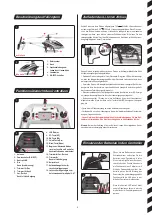
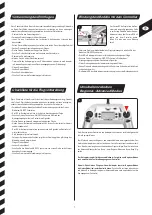
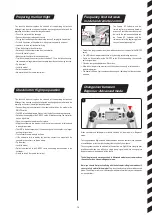
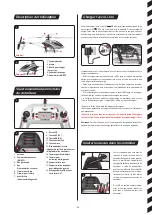
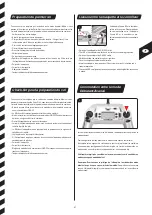
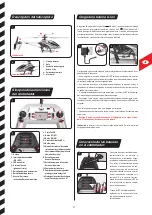
In case you don´t know the control functions of your Carrera RC helicopter yet,
please take some minutes before the first flight in or to make yourself familiar
with them. The descriptions left or right refer to the view out of the cockpit
(pilote´s view).
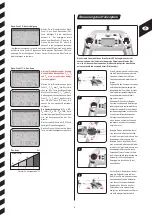
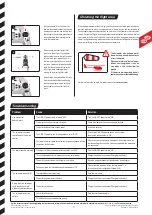
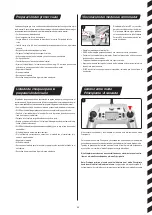
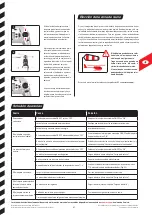
With the throttle being at minimum posi-
tion and the trim of throttle in medium or
lower position, the rotor blades are not
going to revolve. Push the throttle up to
increase the rotational speed of the
main rotor blades. Increase the rota-
tional speed of the main rotor blades
and the model will start to ascend.
If you push down the throttle and thus
reduce the rotational speed of the main
rotor blades the helicopter will descend.
When the model has lifted off the
ground you can get it into stationary
hovering without abrupt ascending or
descending by carefully moving the
throttle upwards and downwards.
Move the left lever (tail) to the left and
the helicopter´s nose turns (yaws)
round the main rotor´s axis in a circle to
the left. Move the left lever (tail) to the
right and the helicopter´s nose turns
(yaws) round the main rotor´s axis in a
circle to the right.
Use the trimmer for tail until you have
reached a stable neutral position of the
helicopter when hovering, without
moving the left lever (tail).
The forward-/backward lever controls
the helicopter´s pitch forward and back-
ward. When shifting the lever forward
the nose of the helicopter will move
downwards and the helicopter will fly
forward. When shifting the forward-/
backward lever backward the helicopter
will move backwards and the helicopter
Controlling the helicopter
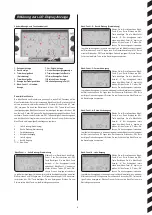
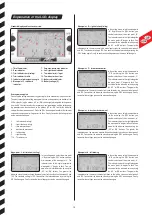
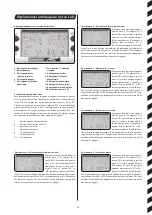
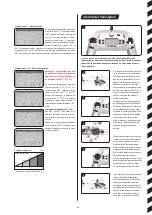
Sections / indicator values T
1-4
Throttle curve
Rotor speed
Warning: altering the indicated values
under menu points T1, T2, T3 and T4
is only recommended to be carried out
by experienced hobby-pilots!
In the setting menu, select the menu point
T
1
, T
2
, T
3
or T
4
. By pressing the „SEL“
button, you confirm selection of the menu
point T
1
, T
2
, T
3
or T
4
. The indicator value to
the right alongside the menu point T
1
, T
2
,
T
3
or T
4
begins to flash. You can now alter
the indicated value by using the „UP“ or
„DN“ buttons.
The standard distribution is T1 = 25 %,
T2 = 50 %, T3 = 75 %, T4 = 100 %.
By altering the respective values, the
response behaviour of the throttle is
altered. You confirm the indicated value by
pressing the „SEL“ button again. Finally, to
confirm the settings press on the menu
button again.
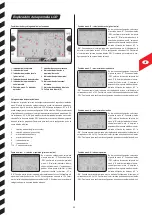
Menu-point: T1-4 - Throttle curve
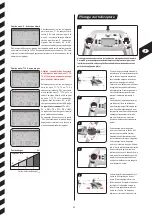
In the setting menu, select the menu point
„C“. By pressing the „SEL“ button, you
confirm selection of the menu point „C“.
The indicator value to the right alongside
the menu point „C“ begins to flash. You
can now alter the indicated value by using
the „UP“ or „DN“ buttons. The greater the
indicated value, the more the model will bank to the right the value can lie between 0
and 100. You confirm the indicated value by pressing the „SEL“ button again. Finally,
to confirm the settings press on the menu button again.
Menu-point: C - right banking

