1
2
4
7
8
9
6
3
5
10
11
12
15
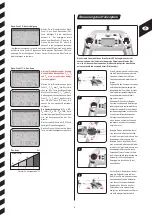
In the setting menu, select the menu point
„A“. By pressing the „SEL“ button, you
confirm selection of the menu point „A“.
The indicator value to the right alongside
the menu point „A“ begins to flash. You
can now alter the indicated value by using
the „UP“ or „DN“ buttons. The greater the
indicated value, the more the model will bank to the left the value can lie between 0
and 100. You confirm the indicated value by pressing the „SEL“ button again. Finally,
to confirm the settings press on the menu button again.
Menu-point: A - left banking
Menu-point: F – forwards movement
Menu-point: b – backwards movement
In the setting menu, select the menu point
„b“. By pressing the „SEL“ button, you
confirm selection of the menu point „b“.
The indicator value to the right alongside
the menu point „b“ begins to flash. You can
now alter the indicated value by using the
„UP“ or „DN“ buttons. The greater the
indicated value, the more the model will head backwards the value can lie between 0
and 100. You confirm the indicated value by pressing the „SEL“ button again. Finally,
to confirm the settings press on the menu button again.
In the setting menu, select the menu point
„F“. By pressing the „SEL“ button, you
confirm selection of the menu point „F“.
The indicator value to the right alongside
the menu point „F“ begins to flash. You
can now alter the indicated value by using
the „UP“ or „DN“ buttons. The greater the
indicated value, the more the model will head forwards; the value can lie between 0
and 100. You confirm the indicated value by pressing the „SEL“ button again. Finally,
to confirm the settings press on the menu button again.
Menu-point: R – right rotation (circling)
In the setting menu, select the menu point
„R“. By pressing the „SEL“ button, you
confirm selection of the menu point „R“.
The indicator value to the right alongside
the menu point „R“ begins to flash. You
can now alter the indicated value by using
the „UP“ or „DN“ buttons. The greater the
indicated value, the more sharply the model veers right; the value can lie between 0
and 100. The standard setting is 100. You confirm the indicated value by pressing the
„SEL“ button again. Finally, to confirm the settings press on the menu button again.
Menu-point: L - left rotation (circling)
In the setting menu, select the menu point
„L“. By pressing the „SEL“ button, you con-
firm selection of the menu point „L“. The
indicator value to the right alongside the
menu point „L“ begins to flash. You can
now alter the indicated value by using the
„UP“ or „DN“ buttons. The greater the
indicated value, the more sharply the model veers left; the value can lie between 0 and
100. The standard setting is 100. You confirm the indicated value by pressing the
„SEL“ button again. Finally, to confirm the settings press on the menu button again.
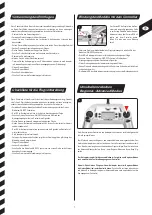
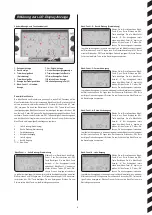
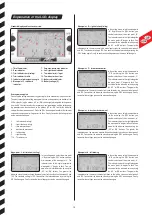
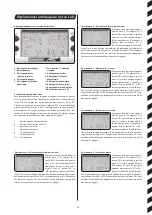
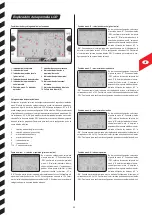
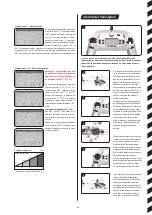
Standard display and function overview
Overview menu points
You call up the setting menu points by pressing for three seconds on the menu button.
The most recently-used setting menu point flashes and appears at the bottom of the
LCD display. Using the buttons „UP“ or „DN“, you navigate through the setting menu.
Use the „SEL“ button to select the respective menu point shown and the correspond-
ing indicator value then flashes. Use the buttons „UP“ or „DN“ to alter the indicated
value of the selected menu point. Press the „SEL“ button again to confirm the indicator
value and the menu point will again start to flash. Finally, to confirm the settings press
on the menu button again.
L
– left rotation (circling))
R – right rotation (circling)
F
– forwards movement
b
– backwards movement
A – left banking
C – right banking
T1-4 – Throttle curve
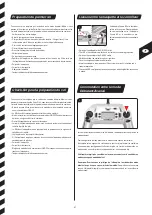
Explanation of the LCD-display
1. Throttle indicator
2. Rear indicator
3. Trim indicator rear (circling)
4. Trim indicator throttle
5. Indicator of radio signal strength
6. Menu-point, Y = standard
indicator
7. Forwards-backwards indicator
8. Left / right bank indicator
9. Trim indicator left / right
10. Trim indicator front / rear
11. Battery status indicator
12. Battery voltage (V)


