2
1
13
1
2
1
2
2
1
2
3
4
5
8
6
9
7
10
11
13
12
1
4
2
3
1
5
14
15
16
17
17
18
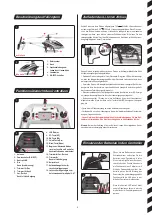
Please make sure that you charge the provided 7.4 V
650 mAh Li-ion rechargeable
battery only with the provided 8.4 V
1000 mA Li-ion battery charger. In case you try
to charge the rechargeable battery with a different Li-ion battery charger or any other
battery charger, this might cause serious damages. Please carefully read the previous
chapter about warnings and guidelines on the usage of rechargeable batteries before
proceeding.
Please proceed as follows when charging the rechargeable battery in the helicopter
with the appropriate battery charger:
• Connect the battery charger to the power socket. The green LED on the power
supply unit indicates that the charger has correctly been connected to the power
socket or that the rechargeable battery has been fully recharged.
• Connect the rechargeable battery in the helicopter to the charger. The green LED
on the power supply unit indicates that the charger has correctly been connected to
the power socket or that the rechargeable battery has been fully recharged
• Has the discharged battery been inserted correctly, the red LED on the charger will
light up to indicate that the battery is now being recharged.
• It takes approximately 1 hour to recharge a discharged battery (not exhaustively
discharged). As soon as the battery is completely charged the LED on the charger
lights up green.
• Undo the plugged connection between the helicopter and the charger unit.
• In order to fly after charging, make the plugged connection to be found on
the helicopter.
• Undo the plugged connection on the helicopter if you are not going to use the
helicopter. Failure to observe this precaution may cause battery damage!
Note:
when supplied, the li-ion-battery is already partially charged. so the first charg-
ing cycle may well take less time.
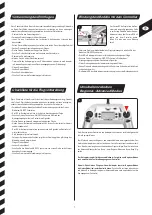
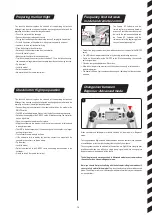
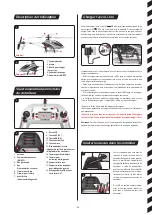
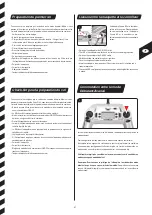
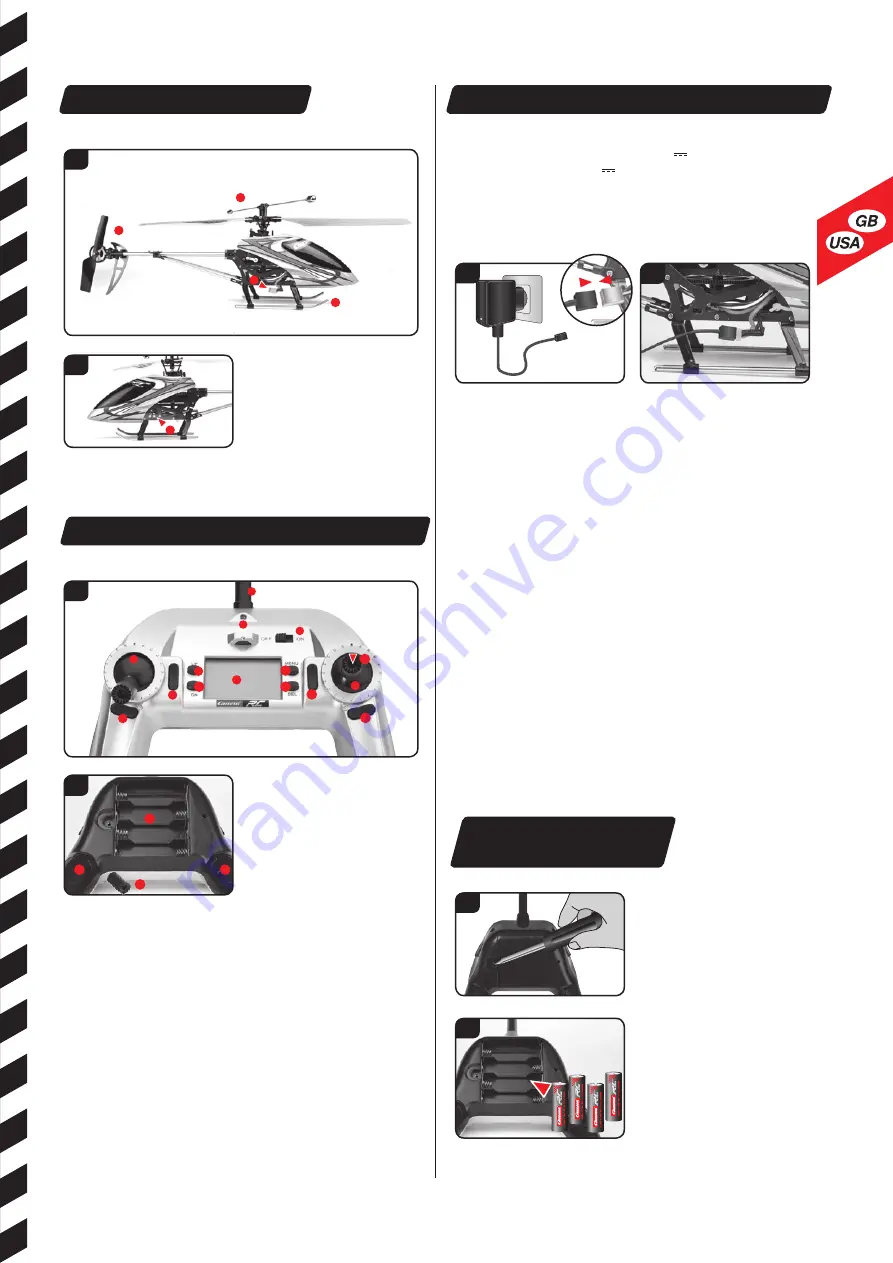
Open the battery compartment with a
screwdriver and insert the batteries in
the remote control. Please keep in mind
the correct polarity. After having closed
the compartment you can check all
functions of the remote control with the
help of the power-switch on the front.
With the power-switch turned ON and
proper functioning, the top center LED
on the remote control will light up red.
When the control LED flashes rapidly,
the batteries in the controller must be
changed.
Recharging the Li-ion rechargeable battery
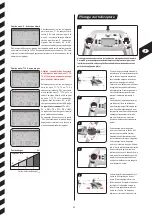
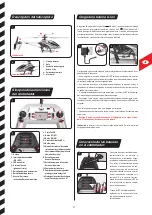
1. Antenna
2. Power switch (ON / OFF)
3. Control LED
4. Gas · tail (spinning in circles)
5. Trimmer for gas
6. Trimmer for tail
7. Forward/backward
right/left pitch
8. LCD display
9. UP-button (UP)
10. DN-button (DN)
11. Select button (SEL)
12. Menu-button (Menu)
13. Beginner / Advanced mode
(press the right joystick on the con-
troller down vertically from above)
14. Trimmer for forward/backward
15. Trimmer for right/left pitch
16. Battery compartment
17. Slot for keeping
Joystick extensions
18. Joystick extensions
to screw on lever 4. & 7.
Range of functions of the remote control
Left side
Right side
1. Rotor system
2. Tail rotor
3. Plugged connection for
charging the li-ion battery
4. Landing skids
5. ON-/OFF switch
Description of helicopter
Inserting the batteries
in the remote control


