Using a Memory Card
34
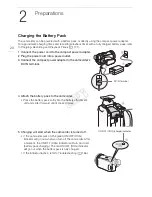
Inserting and Removing a Memory Card
Make sure to initialize (
A
36) all memory cards before using them with this camcorder.
1 Turn off the camcorder.
• Make sure the
ON/OFF (CHG)
indicator is off.
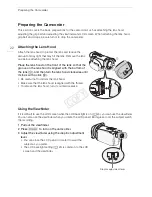
2 Open the double memory card slot cover.
3 Insert the memory card straight, with the label facing the
front of the camcorder, all the way into one of the
memory card slots until it clicks.
• You can also use two memory cards, one in each memory
card slot.
• To use the wireless communication features of an Eye-Fi
card, insert it into memory card slot
3
. Be sure you
understand the information provided in
Eye-Fi Cards
(
A
33) before using an Eye-Fi card.
4 Close the double memory card slot cover.
• Do not force the cover closed if the memory card is not
correctly inserted.
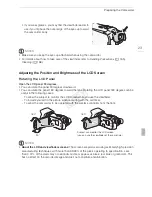
To remove the memory card
Push the memory card once to release it. When the memory card springs out, pull it all the way out.
IMPORTANT
• Observe the following precautions while the ACCESS indicator is flashing. Failure to do so may
result in permanent data loss.
- Do not disconnect the power source or turn off the camcorder.
- Do not remove the memory card.
• Turn off the camcorder before inserting or removing a memory card. Inserting or removing the
memory card with the camcorder on may result in permanent data loss.
• Memory cards have front and back sides that are not interchangeable. Inserting a memory card
facing the wrong direction can cause a malfunction of the camcorder. Be sure to insert the memory
card as described in step 3.
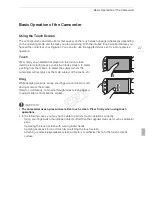
Selecting the Memory for the Recordings
You can select to record your movies and photos in the built-in memory or on a memory card. The
default memory for recording both is the built-in memory.
* Only [Rec Media for Photos] is available from the date index screen or gallery.
POINTS TO CHECK
• Be sure you understand the information provided in
Eye-Fi Cards
(
A
33) before using an Eye-Fi
card.
Operating modes:
*
COP
Y
Содержание VIXIA HF G20
Страница 18: ...Names of Parts 18 1 Serial number 2 Tripod socket A 26 3 BATTERY RELEASE switch A 21 3 2 1 Bottom view COPY ...
Страница 185: ......
Страница 186: ......
Страница 187: ......
Страница 188: ......
Страница 189: ......
Страница 190: ......
Страница 192: ......
Страница 193: ......
Страница 194: ......
Страница 195: ......
Страница 196: ......

