Uploading Recordings to the Web
134
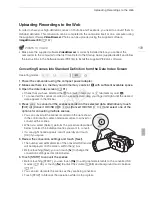
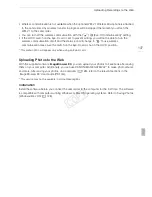
7 When the conversion is completed, a confirmation screen will appear.
• Continue the procedure if you want to connect the camcorder to the computer and upload your
videos immediately.
• Alternatively, you can touch [End Without Connecting] to connect the camcorder to a computer
at a later time. When you are ready to upload your movies, set the camcorder to
mode and
save your movies and SD movies (
A
127). Then, use the supplied software
VideoBrowser
to
upload your recordings to the Web.
8 Connect the camcorder to the computer using the supplied USB cable.
• Connection
$
. Refer to
Connection Diagrams
(
A
118).
9 Computer:
VideoBrowser
will start up automatically.
• Follow the software's instructions to upload your SD movies to the Web. For details about using
the software, click
to open the Software Guide (PDF file).
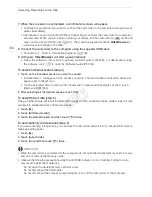
To select individual scenes (step 4)
1 Touch on the individual scenes you want to convert.
• A checkmark
!
will appear on the scenes you touch. The total number of selected scenes will
appear next to the
"
icon.
• Touch a selected scene to remove the checkmark. To remove all checkmarks at once, touch
[Remove All]
>
[Yes].
2 After selecting all the desired scenes, touch [OK].
To select the bit rate (step 5)
Using a higher bit rate will result in better video quality for the converted scenes, while a lower bit rate
will result in smaller file sizes and faster uploads.
1 Touch [
w
].
2 Touch [Bit Rate (Quality)].
3 Touch the desired option and then touch [
K
] twice.
To automatically divide scenes (step 5)
If you are converting a long scene, you can have the camcorder divide it into 10-minute SD movies to
make uploading easier.
1 Touch [
w
].
2 Touch [Auto Divide].
3 Touch [On] and then touch [
K
] twice.
IMPORTANT
• While the camcorder is connected to the computer, do not open the double memory card slot cover
and do not remove the memory cards.
• Observe the following precautions while the ACCESS indicator is on or flashing. Failing to do so
may result in permanent data loss.
- Do not open the double memory card slot cover.
- Do not disconnect the USB cable.
- Do not disconnect the compact power adapter or turn off the camcorder or the computer.
COP
Y
Содержание VIXIA HF G20
Страница 18: ...Names of Parts 18 1 Serial number 2 Tripod socket A 26 3 BATTERY RELEASE switch A 21 3 2 1 Bottom view COPY ...
Страница 185: ......
Страница 186: ......
Страница 187: ......
Страница 188: ......
Страница 189: ......
Страница 190: ......
Страница 192: ......
Страница 193: ......
Страница 194: ......
Страница 195: ......
Страница 196: ......


