background image

Chapter 1

1-13

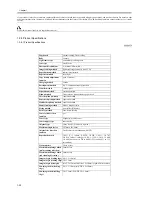
1.2.3.6 Copier Specifications

0009-2290

*Factory default.

**Indicated when the appropriate accessory is installed.

T-1-8

memory reception end time**: by day, by day of week, *no specification

enable/disable 
remote UI

*ON/OFF


use SSL: ON/*OFF

limit target**

address book ID No.: 7 characters max.
address book access No. control: ON/*OFF
new target limit: ON/*OFF

device information 
setup

device name: 32 characters, or 16 2-byte characters
installation site: 32 characters, or 16 2-byte characters

transfer setup**

reception method, enable/disable condition, registration, unconditional transfer registration, 
e-mail priority, detail/edit, delete, list print

delete bulletin

delete

auto on-line/off-line 
shift**

auto on-line shift: ON/*OFF
auto off-line shift: ON/*OFF
date/time setup: set (12 numeric characters)
time zone: GMT -12:00 to GMT +12:00 (GMT +*9:00)
daylight saving time: ON/*OFF

adjust date/time

set (12 characters)
time zone: GMT -12:00 to GMT +12:00 (GMT +*9:00)
daylight saving time: ON, *OFF

register LDAP 
server**

register, detail/edit, delete, list print

register license

24 characters

set print expansion

ON/*OFF
group ID:  ON/*OFF
date: ON/*OFF
text: ON/*OFF

MEAP setup

use HTTP: *ON/OFF
use SSL: ON/OFF
print system info: print

set machine 
information 
distribution

- register recipient:
auto search/register, register, detail info, delete
- auto distribution:
every day, by day of week, *no specification
user mode setting: ON/*OFF
network setup: include, do not include
group ID:  ON/*OFF
address book: ON/*OFF
- manual distribution setup: 
user mode settings; ON/*OFF
network setup: include, do not include
group ID: ON/*OFF
address book: ON/*OFF
- limit reception according to original
ON/*OFF
- recover data:
user mode settings, group ID, address book
- time reception according to machine:
user mode settings; ON/*OFF
group ID: ON/*OFF
address book: ON/*OFF
- distribution/reception history:
detail info, list print

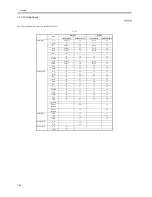
Mode

Description

screen display setup

simple only/ quick*/quick only
  priority indication of single screen: ON*/OFF

quick screen paper select key setup

large* (manual feed/manual feed paper change reservation/(paper source) 
1*/(paper source) 2*/(paper source) 3*/(paper source) 4*/(paper source) 5/
small

single screen preference key 1 setup *no setting, individual modes
simple scan preference key 2 setup

*no setting, individual modes

Mode

Description

Содержание iR6570 series

Страница 1: ...Mar 29 2005 Service Manual iR6570 5570 Series...

Страница 2: ......

Страница 3: ...need arises In the event of major changes in the contents of this manual over a long or short period Canon will issue a new edition of this manual The following paragraph does not apply to any countri...

Страница 4: ...uiring care to avoid combustion fire Indicates an item prohibiting disassembly to avoid electric shocks or problems Indicates an item requiring disconnection of the power plug from the electric outlet...

Страница 5: ...ed to indicate Low The voltage value however differs from circuit to circuit In addition the asterisk as in DRMD indicates that the DRMD signal goes on when 0 In practically all cases the internal mec...

Страница 6: ......

Страница 7: ...x Settings 1 15 1 2 3 9 Printer Settings 1 15 1 2 3 10 Address Book Settings 1 16 1 2 3 11 Voice Guide Settings 1 17 1 2 4 Maintenance by the User 1 18 1 2 4 1 Cleaning 1 18 1 2 4 2 Checks 1 19 1 2 5...

Страница 8: ...chine 2 21 2 5 3 Installation Procedure for the Copy Tray L1 2 22 2 6 Installing the Card Reader 2 24 2 6 1 Installation Procedure for the Card Reader 2 24 2 6 2 Checking the Contents 2 24 2 6 3 Turni...

Страница 9: ...the Rear Cover upper 4 16 4 7 1 2 Removing the Main Controller Box 4 16 4 7 2 Main Controller PCB 4 17 4 7 2 1 Removing the Main Controller PCB 4 17 4 7 2 2 After Replacing the Main Controller PCB 4 1...

Страница 10: ...moving the Copyboard Glass 5 20 5 4 3 2 Removing the Right Cover upper 5 21 5 4 3 3 Removing the Reader Right Cover 5 21 5 4 3 4 Removing the Left Cover upper 5 21 5 4 3 5 Removing the Reader Left Cov...

Страница 11: ...ntrol Panel 5 37 5 4 12 11 Removing the Scanner Drive Cable 5 38 5 4 12 12 Fitting the Scanner Drive Cable 5 41 5 4 12 13 Adjusting the Position of the No 1 No 2 Mirror Base 5 41 Chapter 6 Laser Expos...

Страница 12: ...Supply 7 19 7 8 Transfer Mechanism 7 21 7 8 1 Transfer Charging Mechanism 7 21 7 8 1 1 Outline 7 21 7 8 1 2 Controlling the Output to Suit the Environment fuzzy control 7 21 7 8 1 3 Transfer Charging...

Страница 13: ...7 42 7 10 8 1 Points to Note When Handling the Photosensitive Drum 7 42 7 10 8 2 Removing the Primary Fan Duct 7 42 7 10 8 3 Removing the Developing Assembly 7 42 7 10 8 4 Removing the Process Unit 7...

Страница 14: ...fications and construction 8 1 8 1 2 Arrangement of Rollers and Sensors 8 1 8 1 3 Outline of the Pickup Control System 8 3 8 1 4 Outline of the Pickup Assembly Motor Control System 8 5 8 2 Basic Seque...

Страница 15: ...troller Box 8 38 8 10 3 4 Removing the Right Cover lower rear 8 39 8 10 3 5 Removing the Waste Toner Bottle Holder 8 39 8 10 3 6 Removing the Motor Driver PCB Base 8 40 8 10 3 7 Removing the Cassette...

Страница 16: ...Corona Assembly 8 56 8 10 17 3 Removing the Registration Clutch 8 56 8 10 17 4 Removing the Registration Roller 8 56 8 10 18 Pre Registration Motor 8 57 8 10 18 1 Removing the Rear Cover upper 8 57 8...

Страница 17: ...79 8 10 27 8 Removing the Duplex Pre Registration Sensor 8 79 8 10 27 9 Removing the Reversal Sensor 1 8 80 8 10 27 10 Removing the Reversal Sensor 2 8 80 8 10 27 11 Removing the Left Deck Feed Paper...

Страница 18: ...r 9 27 9 5 4 2 Points to Note When Mounting the Fixing Roller 9 29 9 5 4 3 Applying Grease After Replacing the Fixing Roller 9 31 9 5 4 4 Adjusting the Nip Width 9 31 9 5 5 External Delivery Roller 9...

Страница 19: ...hapter 10 External and Controls 10 1 Control Panel 10 1 10 1 1 Overview 10 1 10 1 2 LCD Indication Processing 10 1 10 1 3 Adjusting the LCD Contrast 10 1 10 1 4 Functions of the Control Panel CPU 10 1...

Страница 20: ...el 10 23 10 5 7 1 Removing the Right Cover upper 10 23 10 5 7 2 Removing the Reader Right Cover 10 23 10 5 7 3 Removing Copyboard Glass 10 23 10 5 7 4 Removing the Left Cover upper 10 24 10 5 7 5 Remo...

Страница 21: ...4 Removing the Printer Power Supply PCB 10 37 10 5 19 5 DC Power Supply Fan 10 37 10 5 20 Fixing Heater Power Supply Cooling Fan 10 38 10 5 20 1 Removing the Left Cover upper 10 38 10 5 20 2 Removing...

Страница 22: ...t Non Image Width 13 20 13 2 6 Adjusting the Leading Edge Non Image Width 13 20 13 3 Scanning System 13 21 13 3 1 After Replacing the Reader Controller PCB 13 21 13 3 2 When Replacing the CCD Unit 13...

Страница 23: ...tor M20 M21 of the Cassette 3 cassette 4 13 32 Chapter 14 Correcting Faulty Images 14 1 Making lnitial Checks 14 1 14 1 1 Site Environment 14 1 14 1 2 Checking the Originals for Symptoms 14 1 14 1 3 C...

Страница 24: ...16 12 16 3 1 Outline 16 12 16 3 2 R CON 16 12 16 3 3 FEEDER 16 14 16 3 4 SORTER 16 14 16 3 5 MN CON 16 20 16 3 6 P CON 16 20 16 4 ADJUST Adjustment Mode 16 25 16 4 1 COPIER 16 25 16 4 1 1 COPIER List...

Страница 25: ...tline 17 21 17 4 3 2 Downloading Procedure 17 21 17 4 4 Downloading MEAPCONT 17 22 17 4 4 1 Outline 17 22 17 4 4 2 Downloading Procedure 17 22 17 4 5 Downloading KEY 17 24 17 4 5 1 Outline 17 24 17 4...

Страница 26: ...Contents...

Страница 27: ...Chapter 1 Introduction...

Страница 28: ......

Страница 29: ...gs 1 10 1 2 3 2 Timer Settings 1 11 1 2 3 3 Adjustment Cleaning 1 11 1 2 3 4 Report Output 1 11 1 2 3 5 System Control Settings 1 12 1 2 3 6 Copier Specifications 1 13 1 2 3 7 Transmission Reception S...

Страница 30: ......

Страница 31: ...ows a typical system configuration F 1 1 T 1 1 1 1 2 System Configuration with Printing Transmission Accessories 230V 0009 6170 The following shows a typical system configuration 1 Finisher T1 2 Saddl...

Страница 32: ...Kit A1 11 Web Access Software A1 license certificate 12 Remote Operators Software Kit A1 license certificate 1 1 3 Functions and Printing Transmission Accessories 230V 0009 6183 The following shows th...

Страница 33: ...PDF Encryption Kit B1 searchable PDF function Univrsal Send Kit D1 Universal Send Searchable PDF Kit A1 encryption PDF function searchable PDF function Univrsal Send Kit D1 Universal Send PDF Encrypt...

Страница 34: ...Toner access cover 4 Front cover 5 Right front deck 6 Cassette 3 7 Cassette 4 8 Left front deck 9 Left cover paper 10 Environment switch 11 Cassette heater switch 12 Leakage breaker 13 Left cover mid...

Страница 35: ...r 21 Right cover upper rear 22 Rear cover lower 23 Main power switch 24 Right cover lower rear 25 Right cover lower 26 Right door unit lower 27 Right door unit upper 28 Manual feed pickup tray 29 Righ...

Страница 36: ...unit 16 Dust proofing glass 17 Developing cylinder 18 Pre transfer charging assembly 19 Manual feed pull out roller 20 Manual feed feed roller 21 Manual feed separation roller 22 Registration roller...

Страница 37: ...glass 52 Scanning lamp 1 2 2 Using the Machine 1 2 2 1 Turning On the Power Switch 0008 8707 The machine is equipped with 2 power switches main power switch and control panel power switch Normally i...

Страница 38: ...hard disk 1 Hold down the control panel power switch for 3 sec or more 2 Go through the down sequence instructions indicated on the touch panel so that the main power switch may be turned off 3 Turn...

Страница 39: ...itch 8 Counter key 9 Clip recess 10 Stop key 11 Start key 12 Main power lamp 13 Error lamp 14 Execute Memory lamp 15 Clear key 16 ID key 17 Display contrast dial O N O F F OFF ON Enargy Saver Counter...

Страница 40: ...ide Japan punched paper outside Japan cassettes 3 cassette 4 plain paper colored paper recycled paper bond paper outside Japan letterhead plain paper outside Japan letterhead heavy paper outside Japan...

Страница 41: ...cation copier box other for each ON OFF output tray paper mix ON OFF original reading area cleaning prompt ON OFF function limit mode ON OFF shut down mode execute key reset common settings Do you rea...

Страница 42: ...u want to print the user data list yes no Mode Description set system administrator information system control group ID 7 characters max system control ID set 7 characters system administrator name 32...

Страница 43: ...icense 24 characters set print expansion ON OFF group ID ON OFF date ON OFF text ON OFF MEAP setup use HTTP ON OFF use SSL ON OFF print system info print set machine information distribution register...

Страница 44: ...FF number of retries 3 times 0 to 5 times change transmission function standard mode read mode black and white machine default black at 200 dpi black at 300 dpi black at 600 dpi black at 400 dpi Note...

Страница 45: ...ssion dial tone check ON OFF fax reception function setup ECM reception ON OFF select reception mode fax tel switchover at ring start 0 to 30 sec 8 ring length 15 to 300 sec 17 post ring operation end...

Страница 46: ...position 5 locations upper left lower left upper right lower right print start character 1 to 9999 1 print size small at 12 point medium at 24 point large at 36 point density 1 to 5 3 Delivery side sp...

Страница 47: ...stered in address book fax e mail i fax remote file system jet SEND box local printer save in box select box 00 to 99 delete search for address server simple search server to search from pull down fro...

Страница 48: ...F 1 11 2 Platen Roller Clean the platen roller 1 with a cloth moistened with water or solution of mild detergent well wrung then dry wipe it with a dry soft cloth F 1 12 3 Platen Board Glass ADF Readi...

Страница 49: ...o check for over current and leakage current requiring the user to check the operation of the breaker on a periodical basis e g at least once a month Also ask the user to keep a record of checks made...

Страница 50: ...t is shielded in a protective housing and by external covers so that its light will not escape outside the machine as long as the machine is used in normal operating conditions 1 2 5 2 CDRH Regulation...

Страница 51: ...Remove watches and rings before starting the work to avoid reflection of laser light to the eye The machine s laser light is red and its covers that may reflect laser light are identified by a warning...

Страница 52: ...hod from cassette manual feeder paper deck Cassette pickup method separation retard Paper deck pickup method separation retard Multifeeder pickup method separation retard Drum cleaning method blade ma...

Страница 53: ...c pressure 0 8 to 1 0 atm Noise standby 55 dB or less printing 78 dB or less Hard disk 20GB Power supply rating 100V 120V 230V Sleep mode yes Power consumption maximum 1500W or less 100V Power consump...

Страница 54: ...3 20 19 B4 39 33 19 16 A3 32 29 16 14 STMTR 35 35 17 17 LTR 65 55 46 32 27 23 LTRR 50 43 39 25 21 19 LGL 39 33 19 16 LDR 31 29 15 14 heavy paper A4 55 46 27 23 A5R 28 28 14 14 B5 55 46 27 23 B5R 46 41...

Страница 55: ...Chapter 2 Installation...

Страница 56: ......

Страница 57: ...2 2 18 Adjusting Side Registration 2 15 2 2 19 Adjusting Leading Edge Registration 2 17 2 2 20 Getting the Machine Ready for Installation 2 17 2 3 Checking the Connection to the Network 2 19 2 3 1 Ove...

Страница 58: ...Contents 2 9 3 Mounting the Cassette Heater 2 34...

Страница 59: ...function and errors in display 2 The site must not be near a source of fire or subject to dust or ammonium gas If exposed to direct rays of the sun provide curtains 3 The amount of ozone generated by...

Страница 60: ...nes are placed in the room be aware that the machine will not be placed to suck the exhaust from other machines otherwise the life of the corona wire may be shortened especially in the low humidity en...

Страница 61: ...f the following contents is missing F 2 6 T 2 1 1 Developing assembly 1 2 Toner Bottle 1 3 Grip 1 4 Grip assembly cover large 3 5 Latch face cover 1 6 Grip assembly cover small 1 7 Drum rotating tool...

Страница 62: ...locking plate 1 13 Developing assembly locking plate unit 1 14 Wire saddle 1 15 Binding screw M4X4 4 16 Binding screw M4X6 1 17 RS tightening screw M4X8 1 18 Service book case 1 19 Touch Pen 1 20 Ind...

Страница 63: ...Front right deck 6 Cassette 3 7 Cassette 4 8 Front left deck 9 Left cover Lower 10 Environment switch 11 Cassette heater switch 12 Breaker 13 Left cover Middle 14 Delivery cover 15 Left cover Upper 1...

Страница 64: ...er 20 Rear cover Upper 21 Right cover Upper rear 22 Rear cover Lower 23 Main power switch 24 Right cover Lower rear 25 Right cover Lower 26 Lower right cover 27 Manual feed tray cover 28 Manual feed t...

Страница 65: ...t of the site separately from the main body 2 Lift the machine with the four corners at the bottom not with right and left grips 3 grips 3 The machine weighs about 215kg Be sure to lift the machine in...

Страница 66: ...be dropped out of the skid 8 Remove the grips attached using an appropriate tool e g a flat blade screwdriver while pushing the leaf spring F 2 13 9 Remove the tape from the machine 10 Check to see if...

Страница 67: ...1 and open the fixing delivery assembly 2 F 2 17 4 Remove the two nip pressure release screws 2 connecting to the cable of tag F 2 18 5 Close the fixing delivery assembly 2 2 5 Checking the Corona Ass...

Страница 68: ...lever remains released 7 Open the toner supply cover 8 Remove the toner supply cover 2 using the two screws 1 F 2 22 9 Remove the connector cover 2 using the screw 1 F 2 23 10 Remove the two screws 1...

Страница 69: ...e sure to inlet the connector 2 2 6 Installing the Developing Assembly 0008 7955 1 Open the manual feed tray cover 1 remove the screw 2 from the door tape and fully open the manual feed tray cover 1 F...

Страница 70: ...cassette remain set F 2 34 3 After removing the spacers close the deck cassette and the lower right cover 4 Attach the door tape of the manual feed tray cover using the screw and close the tray cover...

Страница 71: ...ine before turning on the switch of the main power 2 2 10 Connecting the Reader Communication Cable 0009 4282 1 Attach the cable clip 1 in the package to the upper rear cover F 2 40 2 Connect the read...

Страница 72: ...Press the key 2 and 8 at the same time and the key once again 2 Make the following selections COPIER FUNCTION INSTALL TONER S 3 Make sure that the message CHECK THE DEVELOPER appears 4 Check to see i...

Страница 73: ...2 types Side registration margin at the left edge of image 2 5 1 5mm Leading edge registration margin at the leading edge of image 4 0 1 5mm 1 0mm Refer to Adjusting Side Registration or Adjusting Le...

Страница 74: ...ent and register the value Cassette 4 COPIER FUNCTION CST C4 STMTR A4R This operation is similar to cassette 3 Front Deck Left Right 1 Press the release button to draw out the front deck left right 2...

Страница 75: ...ore it inside the waste toner case cap in the hole of the drawer grip at the top of the waste toner case 2 2 Grip included in the package Store it in the grip storage area 3 F 2 60 The drum rotation t...

Страница 76: ...ning Label 1 Pick out the Shut Down Warning Label 1 prepared in the appropriate language and attach it to the bottom left side 3 of the main power switch 2 of the machine s right cover lower rear F 2...

Страница 77: ...ucceeds but NG is displayed if it ends in failure F 2 68 1 Result OK NG 2 IP address entry 2 3 3 Checking with Remote Host Address 0008 8562 You can check whether a network connection is available by...

Страница 78: ...heck TCP IP settings of the machine again and re execute Ping If OK is displayed perform the next check 2 4 3 Checking with Local Host Address 0008 8565 The local host address is the IP address of the...

Страница 79: ...n strict sequence to protect the machine s hard disk 1 Hold down on the power switch on the control panel for 3 sec or more 2 Operate on the touch panel according to the shut down sequence indicated s...

Страница 80: ...When attaching the shift tray or the finisher to the machine however do not perform the following steps 1 Open the front cover and draw out the fixing feeder unit Remove the 2 screws 1 and detach the...

Страница 81: ...the front cover 4 Remove the 2 screws 1 and detach the left cover upper 2 F 2 74 5 Attach the left magnet catch 1 to the left cover upper and bend the claws 2 of the magnet catch in the direction of a...

Страница 82: ...hment C2 is required to install the card reader 2 6 2 Checking the Contents 0009 2174 Card Reader C1 T 2 5 F 2 77 Card Reader Attachment C2 T 2 6 1 Card Reader C1 1 pc 2 RS Tightening Screw M4x10 1 pc...

Страница 83: ...k 1 Hold down on the power switch on the control panel for 3 sec or more 2 Operate on the touch panel according to the shut down sequence indicated so that the main power switch may be turned off 3 Tu...

Страница 84: ...h the 2 screws 2 included in the package F 2 81 3 Attach the card reader to the joint plate 1 with the screw and binding washer 2 included in the package F 2 82 4 Pass the card reader cable 1 through...

Страница 85: ...plate attached 1 to the card reader mount using the screw 2 included in the package F 2 84 6 Detach the cable 1 from the machine F 2 85 7 Connect the card reader cable to the connector 1 F 2 86 8 Pass...

Страница 86: ...r setting the control card 13 Select the following service mode COPIER FUNCTION INSTALL CARD and enter the card number of use 1 to 2001 Of the cards used by user enter the minimum card number 1000 car...

Страница 87: ...oints to note 1 Remove the upper cover of the controller refer to the Installation Manual 2 Connect the AC adapter plug to the controller refer to the Installation Manual 3 Remove the 4 screws 1 and d...

Страница 88: ...Chapter 2 2 30 F 2 91 6 Refer to the Installation Manual for the NE controller A1 and make various settings and check operations 2 1...

Страница 89: ...edure 0009 2170 1 Attach the 2 stepped screws 1 included in the package to the right upper cover F 2 93 2 Hook the document tray 1 on the stepped screws attached in step 1 1 Document Tray 1 pcs 2 Step...

Страница 90: ...Chapter 2 2 32 F 2 94 If it is difficult to attach the document table loosen the 2 stepped screws once and tighten them back after attaching the document tray...

Страница 91: ...equence to protect the machine s hard disk 1 Hold down on the power switch on the control panel for 3 sec or more 2 Operate on the touch panel according to the shut down sequence indicated so that the...

Страница 92: ...power plug before starting the work 1 Open the cable clamp 1 and disconnect the reader unit communications cable 2 F 2 97 2 Remove the 6 screws 1 and detach the upper rear cover 2 F 2 98 3 Remove the...

Страница 93: ...and disconnect the connector 2 then detach the heat discharge fan 3 together with the filter F 2 100 5 Press the release button 1 and slide out the cassette 4 2 F 2 101 6 Lift the inside unit 1 of the...

Страница 94: ...nd at the tip on the long hole B of the machine then fit the cassette stay 1 in place F 2 103 Check to make sure that the claw A of the cassette stay is securely in place from the machine rear F 2 104...

Страница 95: ...ing 2 screws 1 F 2 106 11 Lead the cassette heater connector 1 through the long hole A At the same time hook the metal plate B of the rear of the cassette heater 2 on the hole C of the cassette stay C...

Страница 96: ...107 12 Lift the cassette heater 1 until it butts against the machine then secure it in place using the 2 included screws 2 F 2 108 13 Connect the cassette heater connector 1 to the connecter 2 of the...

Страница 97: ...ilter lower rear cover upper rear cover and reader unit communications cable back in place 15 Fit the inside units back inside the cassettes then put the cassettes back in the machine 16 Connect the p...

Страница 98: ......

Страница 99: ...Chapter 3 Basic Operation...

Страница 100: ......

Страница 101: ...Main Motor M2 3 2 3 2 Basic Sequence 3 4 3 2 1 Basic Sequence of Operation at power on 30 sec start up mode 3 4 3 2 2 Basic Sequence of Operation at power on low temperature start up mode 3 4 3 2 3 B...

Страница 102: ......

Страница 103: ...ay Paper Deck option Pickup Feeding System Photo sensitive drum Pickup control Separation Fixing Transfer Lower feeding assembry Deck left Deck right Cassette 3 Cassette 4 HDD Control panel DC control...

Страница 104: ...e motor to a specific speed Error detection code E010 Main controller PCB DC controller PCB Hard disk BD PCB CCD AP PCB Motor driver PCB Potential control PCB Environment sensor PCB Cassette 3 paper l...

Страница 105: ...circuit Reference signal generation circuit Clock pulse generation circuit J631 J4005 DC controller PCB DC power supply PCB 1 2 1 2 24V GND Main motor M2 J632 J108 1 2 3 4 A8 A7 A6 A5 MAIN_M_GND MAIN...

Страница 106: ...ower is turned on CNTR control rotation The machine executes potential control for the photosensitive drum In the case of 30 sec start up mode the machine measure the potential for a single rotation o...

Страница 107: ...drum ends CNTR control rotation The machine executes potential control of the photosensitive drum For each mode i e copier printer the machine executes VD control to adjust the primary discharge curr...

Страница 108: ...0 sec passes from power on CNTR control rotation The machine executes potential control of the photosensitive drum For each mode i e copier printer it executes VD control to adjust the primary dischar...

Страница 109: ...until the image signal is generated PRINT print The machine is in a state in which a toner image is transferred to paper and the paper is discharged LSTR last rotation The machine is in a state in wh...

Страница 110: ......

Страница 111: ...Chapter 4 Main Controller...

Страница 112: ......

Страница 113: ...Copy Functions 4 12 4 6 2 Flow of Image Data for the Box Function 4 12 4 6 3 Flow of Image Data for the SEND Function 4 13 4 6 4 Flow of Image Data for the Fax Transmission 4 13 4 6 5 Flow of Image D...

Страница 114: ......

Страница 115: ...ering color LCD controller card printer unit interface fax image processing etc SRAM Retains service mode settings by SRAM HDD management information Image memory SDRAM Temporarily retains image data...

Страница 116: ...onnection slot J1005 Fax connector 2 port J1010 Boot ROM connector slot J1013 Riser board connection slot J1014 Scanner DDI J1015 Printer DDI J1017 USB port J1018 Control panel connector J1026 Hard di...

Страница 117: ...ont etc BOOTDEV Stores execution module message data file RUI content etc FSTCDEV Chasing not used System Software Description Location Remarks System System module controls mechanism as a whole HDD B...

Страница 118: ...Chapter 4 4 4 F 4 4 1 1 port FAX 2 2 port FAX Reader Unit BOOT DCON RCON G3FAX 2 SYSTEM Language RUI MEAP G3FAX 1 SDICT KEY Main Controller PCB DC Controller PCB HDD G3 FAX Unit...

Страница 119: ...Sequence 0009 3794 Boot ROM Area Self Diagnosis Program interval 1 The self diagnosis program is run by the CPU on the main controller PCB when the main power switch is turned on The program is used...

Страница 120: ...bar 3 2 Image memory SDRAM CPU HDD System area Image data area BootROM Self diagnosis program Boot program access to the program during execution access for checking Main controller PCB While the Self...

Страница 121: ...mory SDRAM CPU HDD System area Image data area BootROM Main controller PCB Self diagnosis program Boot program access to the program during execution flow of the system program While the Boot Program...

Страница 122: ...ration 0009 3796 The following diagram shows the flow of shut down operation F 4 9 Press on the control panel power switch 3 sec or more HDD protection check mode HDD protection execution mode Main po...

Страница 123: ...e s functions F 4 10 4 5 2 Construction of the Image Processing Module 0009 3798 The machine s major image processing is executed by the main controller PCB The following shows the construction of the...

Страница 124: ...Reader unit input processing block Processes image data for output to the printer unit Printer unit output image processing block Main controller PCB DC controller PCB Reader unit Film photo mode Bin...

Страница 125: ...the printer unit for output to the printer unit F 4 14 Main controller PCB to printer unit output image processing block Enlargement reduction Rotation Integration Compression Expansion Printer unit i...

Страница 126: ...or the Box Function 0009 3803 The following is the flow of image data when the Box function is in use F 4 16 Image processing block for printer unit Image processing block for printer unit Printer uni...

Страница 127: ...s in use F 4 17 4 6 4 Flow of Image Data for the Fax Transmission 0009 3805 The following is the flow of image data when the fax transmission function is in use Image processing block for printer unit...

Страница 128: ...0009 3806 The following is the flow of image data when the fax reception function is in use Image processing block for reader unit Image processing block for fax Super G3 Fax Board Resolution conversi...

Страница 129: ...F 4 20 Image processing block for printer unit Image processing block for fax Super G3 Fax Board Main controller PCB Data compression Data rotation Data expansion SDRAM HDD DC controller PCB Renderin...

Страница 130: ...pper rear cover 2 F 4 22 4 7 1 2 Removing the Main Controller Box 0009 2895 1 Remove the 4 screws 1 and detach the main controller box cover 2 F 4 23 2 Disconnect the connector 1 of the reader unit co...

Страница 131: ...dle 1 of the upper rear cover then disconnect the connector 2 F 4 27 2 Remove the 6 screws 1 and detach the upper rear cover 2 F 4 28 3 Remove the 4 screws 1 and detach the main controller box cover 2...

Страница 132: ...B be sure to transfer the following components from the old to new PCB F 4 34 1 Boot ROM 2 HDD 3 image memory SDRAM 4 counter memory PCB 4 7 3 SDRAM 4 7 3 1 Removing the SDRAM 0009 2908 1 Remove the u...

Страница 133: ...hile holding down the 2 and 8 keys turn on the main power Using the HD format function of the SST format all partitions for details see the descriptions given for upgrading 2 Download the system softw...

Страница 134: ...se band 1 and disconnect the connector 2 then lift the right door to detach F 4 42 5 Disconnect the connector 1 and free the fan harness from the clamp then remove the 2 screws 2 and detach th control...

Страница 135: ...Chapter 5 Original Exposure System...

Страница 136: ......

Страница 137: ...rol 5 13 5 3 5 1 Dust Detection in Stream Reading Mode 5 13 5 3 5 2 White Plate Dust Detection Control 5 14 5 3 6 Image Processing 5 15 5 3 6 1 Overview 5 15 5 3 6 2 CCD Drive 5 16 5 3 6 3 CCD Output...

Страница 138: ...emoving the ADF Open Closed Sensor 5 31 5 4 9 Scanner HP Sensor 5 31 5 4 9 1 Removing the Reader Unit Rear Cover 5 31 5 4 9 2 Removing the Mirror Base Home Position Sensor 5 32 5 4 10 Original Size Se...

Страница 139: ...ith image processing by reader block 50 or higher and lower than 100 in combination with image processing in reader block and controller block lower than 50 2 ADF mode 25 to 200 main scanning directio...

Страница 140: ...ng lamp CCD unit collects image data performs analog image processing Reader controller PCB controls the reader unit as a whole performs digital image processing Item Notation Description Interface PC...

Страница 141: ...rward reverse Scanner motor Light blocking plate No 2 mirror base scanning lamp No 1 mirror base Scanner HP sensor J312 J305 J313 J303 J306 J309 J203 J204 J601 J202 J602 J205 J206 J308 J201 J209 J307...

Страница 142: ...used for connection with the inverter PCB J207 used for connection with the original size sensor AB J208 used for connection with the original size sensor inch J209 not used J210 not used IC Descripti...

Страница 143: ...tion shift shading fixed shading white plate dust detection control shading correction HP shading position Main power switch ON Reader motor Scanning lamp HP sensor Start key ON STBY STBY SREADY SCFW...

Страница 144: ...to start stop the scanner motor and to control the direction and speed of its rotation F 5 10 a Reverse Movement After a Scan After an image scan the No 1 mirror base is moved in reverse as far as the...

Страница 145: ...in sub scanning direction the machine changes the speed at which it moves the scanner original For reduction the machine also performs image data skipping on main controller PCB and reader controller...

Страница 146: ...d by the reader controller PCB thus turning on the scanning lamp 2 Detecting an Error The machine identifies an error in the intensity of light as an activation error occurring when the lamp is initia...

Страница 147: ...es to ensure correct identification even in the event that the original is displaced while the ADF is being closed for main scanning direction by the CCD for AB 8 points for inch configuration 6 point...

Страница 148: ...machine will identify the size of the original upholding the result of detection at the front Result of movement Result of identification A B no no original absent yes no original present no yes orig...

Страница 149: ...sensor off Point of detection Result of detection present absent Result of identification 1 present present 2 absent present 3 present present 4 absent absent B5 Document size sensor 1 CCD original de...

Страница 150: ...amp and checks the CCD 4 points for external light For sub scanning direction the machine starts to operate the original sensor F 5 21 F 5 22 4 ADF Fully Closed 5 deg or less No 1 mirror base at point...

Страница 151: ...the End of a Job changing the stream reading dust read position The machine measures the light reflected by the surface of the platen roller and detects the presence absence of dust with reference to...

Страница 152: ...achine does not move the scanning lamp on account of dust detection If dust is detected between sheets the machine corrects the fact with reference to the pixels on both sides of the area of dust SERV...

Страница 153: ...dust it corrects the shading correction coefficient of the area of dust by means of a correction coefficient used for both sides of the area with dust thus limiting the effects of the dust F 5 29 5 3...

Страница 154: ...CB Reader controller PCB CCD A D conversion Shading processing Analog image processing Analog image processing block Controller block Digital image processing block CCD 1 line each for R G and B Analo...

Страница 155: ...vice mode target value or shading correction executed for every job 5 3 6 6 Shading Adjustment 0008 7519 In shading adjustment the machine measures the density of a white sheet of paper and the standa...

Страница 156: ...Chapter 5 5 18 F 5 34 CCD output Original density Standard white plate Characteristics before correction Target value Measurement Characteristics after correction White...

Страница 157: ...oiling can cause lines in the image If soiled clean it using lint free paper moistened with alcohol Take care not to deform the sponge attached to the right glass retainer 1 F 5 36 5 4 1 2 Removing th...

Страница 158: ...ainer 2 then detach the copyboard glass 3 F 5 42 When detaching the copyboard glass take care not to touch the white plate attached to its back Soiling can cause lines in the image If soiled clean it...

Страница 159: ...moving the Right Cover upper 0008 7611 1 Open the toner supply cover 1 2 Remove the 2 screws 2 and detach the right cover upper 3 F 5 46 5 4 3 3 Removing the Reader Right Cover 0008 7613 1 Remove the...

Страница 160: ...moving the Reader Unit Rear Cover 0008 7625 1 Open the cable clamp 1 2 Disconnect the 2 connectors 2 3 Remove the 2 screws 3 F 5 53 4 Bend up the rubber cover 1 and remove the 2 screws 2 each then det...

Страница 161: ...e snap band 4 2 Open the ferrite core 5 to detach 100 230V machine F 5 59 When replacing the scanning lamp be sure to fit the removed ferrite core to the new lamp 100 230V machine 3 Slide the No 1 mir...

Страница 162: ...oving the Copyboard Glass 0008 7628 1 Open the ADF 2 Remove the 2 screws 1 and detach the right glass retainer 2 then detach the copyboard glass 3 F 5 62 When detaching the copyboard glass take care n...

Страница 163: ...If you are initializing the RAM on the reader controller without replacing the PCB Using the SST upload the backup data of R CON initialize the RAM and then download the data thus eliminating the nee...

Страница 164: ...adjustment COPIER FUNCTION CCD CCD ADJ d ADF white level adjustment COPIER FUNCTION CCD DF WLVL1 COPIER FUNCTION CCD DF WLVL2 Be sure to perform white plate data adjustment before performing ADF whit...

Страница 165: ...face PCB 2 F 5 77 5 4 6 Inverter PCB 5 4 6 1 Removing the Copyboard Glass 0008 7650 1 Open the ADF 2 Remove the 2 screws 1 and detach the right glass retainer 2 then detach the copyboard glass 3 F 5 7...

Страница 166: ...verter PCB 0008 7654 Execute the following service mode items 1 white plate data adjustment COPIER FUNCTION CCD CCD ADJ 2 ADF white level adjustment COPIER FUNCTION CCD DF WLVL1 2 Be sure to perform w...

Страница 167: ...2 Removing the Scanner Motor 0008 7859 1 Remove the 4 screws 1 and detach the cover 2 F 5 87 2 Remove the 2 harness retainers 2 for the back of the cover 1 to free the cover F 5 88 3 Remove the 3 scr...

Страница 168: ...5 4 8 1 Removing the Reader Unit Rear Cover 0009 2996 1 Open the cable clamp 1 2 Disconnect the 2 connectors 2 3 Remove the 2 screws 3 F 5 93 4 Bend up the rubber cover 1 and remove the 2 screws 2 eac...

Страница 169: ...3 Remove the hook 1 and detach the ADF open closed sensor 1 2 F 5 99 5 4 9 Scanner HP Sensor 5 4 9 1 Removing the Reader Unit Rear Cover 0009 1972 1 Open the cable clamp 1 2 Disconnect the 2 connecto...

Страница 170: ...the 4 screws 1 and detach the plate 2 F 5 104 2 Remove the screw 1 and detach the sensor base 2 F 5 105 3 Disconnect the connector 1 and detach the home position sensor 1 F 5 106 4 Remove the hook 1 a...

Страница 171: ...care not to deform the sponge attached to the right glass retainer 1 F 5 109 5 4 10 2 Removing the CCD Unit Cover 0008 7864 1 Remove the 9 screws 1 and detach the CCD unit cover 2 F 5 110 F 5 111 5 4...

Страница 172: ...the 2 screws 3 F 5 115 4 Bend up the rubber cover 1 and remove the 2 screws 2 each then detach the 2 angle guide plates 3 F 5 116 F 5 117 5 Fully open the ADF 6 Remove the 3 screws 1 and slide the re...

Страница 173: ...care not to touch the white plate attached to its back Soiling can cause lines in the image If soiled clean it using lint free paper moistened with alcohol Take care not to deform the sponge attached...

Страница 174: ...0008 7875 1 Remove the screw 2 1 pc each from the left and right of the reader front cover 1 F 5 126 F 5 127 2 Detach the reader front cover 1 in upward direction 1 F 5 128 5 4 12 8 Removing the Reade...

Страница 175: ...ake care not to damage the ADF open closed sensor arm 3 F 5 132 5 4 12 9 Removing the ADF 0008 7876 1 Remove the 3 knurled screws 1 then slide it to the front and lift it to detach F 5 133 5 4 12 10 R...

Страница 176: ...Remove the reading glass 3 3 Remove the 3 screws 4 and detach the left glass retainer 5 F 5 138 When mounting the reading glass retainer be sure to hold down both edges of the left spring A while fix...

Страница 177: ...face PCB cover F 5 143 7 Disconnect the 9 connectors 1 and remove the 5 screws 2 then detach the interface PCB 3 together with its base F 5 144 8 Open the 2 wire saddles 1 9 Remove the 4 screws 2 and...

Страница 178: ...front F 5 148 13 Disconnect the 2 connectors 1 and remove the snap band 2 then free the harness from the wire saddle 3 F 5 149 14 Free the harness from the 3 wire saddles 1 and remove the 6 screws 2...

Страница 179: ...d wind the cable 4 times inside 5 times outside then tape it in place At this time make sure that the cable fixing 2 is on the inside 2 Fit the cable on the pulleys then fit one end on the left side h...

Страница 180: ...ositioning tool front 2 rear 3 into the appropriate holes of the No 1 No 2 mirror base F 5 157 F 5 158 4 Secure the end of the cable that has temporarily been fixed in place on the hook of the reader...

Страница 181: ...Chapter 6 Laser Exposure...

Страница 182: ......

Страница 183: ...3 1 1 Generating the Sync Signal 6 4 6 3 1 2 Flow of the Sync Signal 6 4 6 3 2 Controlling the Intensity of Laser Light 6 4 6 3 2 1 Controlling the Laser Intensity 6 4 6 3 2 2 APC Control 6 5 6 3 3 Co...

Страница 184: ......

Страница 185: ...ccurs as a result In addition the laser beam is also used for blank exposure applied to non imaging areas T 6 1 6 1 2 Major Components 0009 4059 The machine s laser exposure system consists of the fol...

Страница 186: ...er light about 660 nm single beam Laser scanner motor DC motor 2 speed control at full speed about 34300 rpm Polygon mirror 12 facets BD mirror BD PCB laser beam detection laser driver PCB Laser activ...

Страница 187: ...quence of Operation laser exposure 0009 4067 F 6 2 Main power switch ON Start key ON Image leading edge signal PTOP Laser PRINT INTR WMUP CNTR WLSTR LSTR STBY STBY BD signal BD Laser scanner motor M15...

Страница 188: ...0009 4070 The laser driver circuit serves to drive the semi conductor laser with reference to the laser drive signal LD coming from the DC controller PCB The laser drive circuit is associated with the...

Страница 189: ...ed to turn on laser light 6 3 2 2 APC Control 0009 5252 The machine executes APC control so that the laser light will remain at a constant level by adjusting the output of the laser diode mounted on t...

Страница 190: ...ine switches over speed detection to suit the current printer state thereby reducing the time used to control the scanner motor The FG signal is a detection signal used for rough adjustment of the mot...

Страница 191: ...screw 2 6 Remove the 2 screws 3 together with the inside spacer then detach the 2 leaf springs 4 7 Hold the front of the laser scanner unit 5 and lift and slide it out F 6 9 6 4 1 2 When Replacing the...

Страница 192: ......

Страница 193: ...Chapter 7 Image Formation...

Страница 194: ......

Страница 195: ...nism 7 13 7 5 4 1 Outline 7 13 7 5 4 2 Controlling the Output to Suit the Environment fuzzy control 7 13 7 5 4 3 Pre Transfer Charging Assembly Cleaning Mechanism 7 14 7 5 4 4 Others 7 14 7 6 Drum Cle...

Страница 196: ...5 7 10 6 Drum Cleaner Unit 7 35 7 10 6 1 Construction 7 35 7 10 6 2 Removing the Primary Fan Duct 7 35 7 10 6 3 Removing the Developing Assembly 7 36 7 10 6 4 Sliding Out the Process Unit 7 36 7 10 6...

Страница 197: ...15 1 Removing the Transfer Separation Charging Assembly 7 53 7 10 15 2 Mounting the Transfer Separation Charging Assembly 7 53 7 10 16 Separation Claw Separation Claw Drive Assembly 7 54 7 10 16 1 Rem...

Страница 198: ......

Страница 199: ...charging wire Primary charging control DC constant current control set by result of potential control Grid bias control fixed voltage control fixed by varistor Developing bias control AC constant vol...

Страница 200: ...pre exposure step 2 primary charging positive DC step 3 laser exposure step 4 development AC positive DC step 5 transfer negative DC step 6 separation AC positive DC step 7 fixing step 8 drum cleanin...

Страница 201: ...Primary charging Pre transfer charging bias AC Grid bias Developing clutch CL4 Developing bias AC Developing bias DC Dust collecting roller bias DC Separation charging bias DC Laser activation Main m...

Страница 202: ...sequence of operation 1 The machine executes a series of charging operations prior to an image formation session thus stabilizing the potential of the drum 2 The machine executes image formation 1 3 T...

Страница 203: ...of potential control is as follows T 7 3 If enabled in service mode potential control starts 10 min and 60 min after the main power switch is turned on or when the door is opened and closed The timin...

Страница 204: ...ion to the rate it obtained at time of power on and after power on The following is the sequence of operation used for short mode F 7 7 Standard Mode as enabled in service mode The machine executes bo...

Страница 205: ...site of installation between 30 and 99 default being 35 COPIER FUNCTION DPC DPC forcing potential control ON execute potential control COPIER ADJUST V CONT EPOTOFST setting potential sensor offset val...

Страница 206: ...ded to attain the target potential F 7 10 7 4 5 Determining the Developing Bias 0009 3544 The machine determines the developing bias VDC as follows with reference to the drum surface potential VL2 VDC...

Страница 207: ...achine computes the average drum potential in peripheral direction The machine uses the result of computation to obtain the appropriate laser output correction value 3 Last Rotation APC Control Purpos...

Страница 208: ...light images if decreased in excess on the other hand the background can developing fogging In light of this the machine executes density processing using changes in the developing bias and image proc...

Страница 209: ...ltage level of the grid bias fixed to 850 V by a The following shows the construction of the control system associated with the primary charging control system F 7 14 The following signals are associa...

Страница 210: ...75 SERVICE MODE COPIER FUNCTION CLEANING WIRE CLN Use it so that the machine causes the wire cleaner to make 5 round trips to automatically clean the charging wire when the primary charging wire or th...

Страница 211: ...gnals are associated with the mechanism 1 Pre transfer separation charging leakage detection signal when the current is too high or too low 0 2 Pre transfer charging control signal controls the DC bia...

Страница 212: ...ransfer charging wire has been replaced 2 The default cleaning interval may be changed in service mode COPIER OPTION BODY W CLN P F 7 19 The following signals are associated with the mechanism 1 Pre t...

Страница 213: ...er PCB Enter the value indicated on the label attached to the new DC controller PCB if you have replaced the DC controller PCB or initialized the RAM on the DC controller PCB COPIER OPTION BODY W CLN...

Страница 214: ...um cleaner unit F 7 20 7 6 2 Detecting the State full of the Waste Toner Case 0009 4122 The following shows the control mechanism used to see if the waste toner case has become full Pre exposure lamp...

Страница 215: ...oner counter when its reading reaches 250 000 the machine will issue an alarm on the User screen Dispose of the waste toner and reset the error code MEMO The waste toner bottle can hold toner good for...

Страница 216: ...ff the developing bias current output SERVICE MODE COPIER ADJUST DEVELOP BIAS entering developing bias Enter the value indicated on the service label if you have initialized the DC controller PCB sett...

Страница 217: ...de the developing assembly reaches a specific level and as a result the developing assembly toner level signal remains 1 for 0 7 sec or more the hopper supply motor stops When the toner inside the hop...

Страница 218: ...DE E020 0000 Indicated while the output of the hopper toner sensor TS2 points to the presence of toner and the output of the toner sensor TS1 inside the developing assembly points to the absence of to...

Страница 219: ...mote signal turns on off the transfer current output 7 8 1 2 Controlling the Output to Suit the Environment fuzzy control 0009 5215 The transfer charging current is optimized to suit the environment i...

Страница 220: ...COPIER ADJUST HV TR D HV TR entering the offset value for the transfer high voltage output of the DC controller PCB Enter the value indicated on the label attached to the new DC controller PCB if you...

Страница 221: ...g of the environment sensor and the deposit of toner either of 3 levels low average high as determined by the count of black pixels F 7 30 1 In a low humidity environment paper tends to become dry thu...

Страница 222: ...eparation high voltage output of the DC controller PCB Enter the value indicated on the label attached to the new DC control PCB if you have replaced the DC controller PCB or initialed the RAM on the...

Страница 223: ...o damage the developing cylinder When the developing assembly is outside the machine be sure not to mount the developing assembly locking assembly The toner collecting in the path from the hopper to t...

Страница 224: ...be sure to open the right upper cover and the right lower cover so that there will be space 3 Turn the fixing feed unit releasing lever 1 counterclockwise to release the lock then hold the lever 1 an...

Страница 225: ...F 7 45 5 Remove the two screws 1 and the connector 2 and pull out the primary fan duct 3 F 7 46 7 10 2 2 Removing the Developing Assembly 0009 7474 The machine s developing assembly is not equipped wi...

Страница 226: ...nterclockwise insert a screwdriver into the center opening 4 in the drum rotating tool to remove the drum fixing screw F 7 51 If the drum is let to rotate coun terclockwise the cleaning blade will not...

Страница 227: ...ire or the primary charging assembly be sure to execute the following in service mode to clean the wire COPIER FUNCTION CLEANING WIRE CLN Further be user to use a strengthened polishing pad blue holde...

Страница 228: ...ing the screw 1 F 7 62 5 Remove the two screws 1 and the connector 2 and pull out the primary fan duct 3 F 7 63 7 10 3 2 Removing the Primary Charging Assembly 0009 5556 1 Loosen the screw 1 move the...

Страница 229: ...orate depending on how and where it is placed requiring the following 1 Whenever the process unit is removed from the machine or the photosensitive drum is removed from the process unit be sure to pro...

Страница 230: ...ocking assembly The toner collecting in the path from the hopper to the developing assembly can start to move astray because of the vibration occurring during inspection or repair work 1 Open the manu...

Страница 231: ...is re leased but not removed be sure to open the right upper cover and the right lower cover so that there will be space 3 Turn the fixing feed unit releasing lever 1 counterclockwise to release the...

Страница 232: ...ly 3 F 7 81 When you have mounted the pre transfer charging assembly be sure to execute wire cleaning in user mode 7 10 5 7 Removing the Potential Sensor Assembly 0009 5593 Disconnect the connector 1...

Страница 233: ...lint free paper relatively strongly against the photosensitive drum wipe the surface of the drum from the front to the rear and from the rear to the front F 7 87 Keep the widths of cleaning to 5 to 10...

Страница 234: ...he developing assembly locking assembly The toner collecting in the path from the hopper to the developing assembly can start to move astray because of the vibration occurring during inspection or rep...

Страница 235: ...over so that there will be space 3 Turn the fixing feed unit releasing lever 1 counterclockwise to release the lock then hold the lever 1 and slide out the fixing feed unit 2 toward the front until it...

Страница 236: ...m fully F 7 106 After mounting the cleaning blade check to make sure that the edge of the blade is not appreciably bent Further be sure to clean the groove in the blade support plate before mounting t...

Страница 237: ...ler clockwise viewing from the front 5 Repeat steps 3 through 5 until the area from which toner was removed in step 3 is once again coated with an even layer of toner 7 10 7 Drum Motor 7 10 7 1 Removi...

Страница 238: ...9 3958 1 Remove the 4 screws 1 and detach the main controller box cover 2 F 7 113 2 Disconnect the connector 1 of the reader unit communications cable F 7 114 3 Remove the 3 screws 1 and detach the up...

Страница 239: ...main power switch base 3 to the side F 7 117 3 Disconnect the 2 connectors 1 and remove the 2 screws 2 then detach the connector base 3 F 7 118 4 Remove the 2 screws 1 and detach the waste toner bottl...

Страница 240: ...e process unit or the photosensitive drum in an area subject to dust ammonium gas or organic solvent gas The foregoing requirements commonly apply to all photosensitive drums 7 10 8 2 Removing the Pri...

Страница 241: ...rewdriver into the center opening 4 in the drum rotating tool to remove the drum fixing screw F 7 129 If the drum is let to rotate coun terclockwise the cleaning blade will not come into contact with...

Страница 242: ...r the primary charging assembly be sure to execute the following in service mode to clean the wire COPIER FUNCTION CLEANING WIRE CLN Further be user to use a strengthened polishing pad blue holder as...

Страница 243: ...r and the gear at the front of the drum need not be removed If the temperature of the fixing assembly is 50 deg C or higher when replacing the drum unit be sure to execute the following in service mod...

Страница 244: ...ner supply cover 2 using the two screws 1 F 7 143 4 Remove the connector cover 2 using the screw 1 F 7 144 5 Remove the two screws 1 and the connector 2 and pull out the primary fan duct 3 F 7 145 7 1...

Страница 245: ...rew 1 F 7 150 5 Remove the two screws 1 and the connector 2 and pull out the primary fan duct 3 F 7 151 7 10 10 2 Removing the Right Cover upper 0009 5504 1 Open the toner supply cover 1 2 Remove the...

Страница 246: ...emove the 2 screws 1 and detach the hopper supply motor 2 together with the base plate F 7 156 5 Remove the screw 1 and detach the hopper supp motor 2 F 7 157 7 10 11 Hopper Strring Motor 7 10 11 1 Re...

Страница 247: ...mbly 7 10 12 1 Removing the Developing Assembly 0009 5616 The machine s developing assembly is not equipped with a cover to protect the developing cylinder If you must remove the developing assembly b...

Страница 248: ...er If you must remove the developing assembly be sure to exer cise care not to damage the developing cylinder When the developing assembly is outside the machine be sure not to mount the developing as...

Страница 249: ...Cylinder 0009 5626 1 Remove the two mounting screws 1 and detach the gear unit 2 together with the gear F 7 173 When removing the gear unit be sure to take care as the gear attached to the screw will...

Страница 250: ...he vibration occurring during inspection or repair work 1 Open the manual feed tray cover 1 remove the screw 2 from the door tape and fully open the manual feed tray cover 1 F 7 180 2 Remove the mount...

Страница 251: ...d the fixture 2 and then remove the connector 3 F 7 187 4 Pushing the front and the rear of the transfer separation charging assembly pull out the assembly to the front and remove it in the direction...

Страница 252: ...1 F 7 193 4 Remove the connector cover 2 using the screw 1 F 7 194 5 Remove the two screws 1 and the connector 2 and pull out the primary fan duct 3 F 7 195 7 10 16 2 Removing the Developing Assembly...

Страница 253: ...ounterclockwise insert a screwdriver into the center opening 4 in the drum rotating tool to remove the drum fixing screw F 7 200 If the drum is let to rotate coun terclockwise the cleaning blade will...

Страница 254: ...nit includes the following 4 parts potential control PCB potential sensor potential sensor relay harness between relay connector and potential control PCB potential sensor harness between potential se...

Страница 255: ...7 208 7 10 17 5 Removing the Potential Control PCB 0009 4584 1 Remove the two screws 1 and detach the potential control PCB 2 with the frame F 7 209 2 Disconnect the 2 connectors 1 and remove the four...

Страница 256: ...To prevent deformation slack in the primary charging assembly be sure to work separately for the left shielding plate and the right shielding plate i e do not loosen the mounting screws 1 of both shie...

Страница 257: ...g wire around a hex key once and turn the hex key three to four times then twist the charging wire 5 Cut the twisted charging wire excess with nippers 6 Hook the loop on stud A 7 After routing the wir...

Страница 258: ...nce 2 mm 4 Separation Charging assembly Height of charging wire F 7 226 Tolerance 2 mm MEMO The height position of the pri mary charging wire and the transfer charging wire may be adjusted by turning...

Страница 259: ...Chapter 8 Pickup Feeding System...

Страница 260: ......

Страница 261: ...5 Identifying the Size of Paper cassette 3 4 8 16 8 4 6 Markings on the Width Guide Rail 8 16 8 4 7 Paper Size 8 17 8 5 Manual Feed Pickup Unit 8 19 8 5 1 Pickup Operation 8 19 8 5 2 Detecting the Siz...

Страница 262: ...per 8 42 8 10 6 2 Removing the Rear Cover lower 8 42 8 10 6 3 Removing the Main Controller Box 8 43 8 10 6 4 Removing the Right Cover lower rear 8 43 8 10 6 5 Removing the Waste Toner Bottle Holder 8...

Страница 263: ...2 Removing the Vertical Path Roller 1 8 62 8 10 21 3 Removing the Vertical Path Roller 3 4 8 63 8 10 22 Vertical Path Motor 8 63 8 10 22 1 Removing the Rear Cover upper 8 63 8 10 22 2 Removing the Rea...

Страница 264: ...9 8 10 27 9 Removing the Reversal Sensor 1 8 80 8 10 27 10 Removing the Reversal Sensor 2 8 80 8 10 27 11 Removing the Left Deck Feed Paper Sensor 8 80 8 10 27 12 Removing the Duplex Driver PCB 8 81 8...

Страница 265: ...deck right left 1 500 sheets each 80 g m2 front cassette 3 4 550 sheets each 80 g m2 manual feed tray 50 sheets 80 g m2 Paper size switchover paper deck right left by service person front cassette 3 4...

Страница 266: ...34 duplex paper sensor PS23 manual feed paper sensor PS35 inside delivery sensor PS24 vertical path 1 sensor PS36 outside delivery sensor PS25 vertical path 2 sensor PS37 reversal sensor 1 PS26 vertic...

Страница 267: ...epping motor enables the machine to slow down pickup speed The following is a diagram of the pickup control system used for the deck 2 manual feed separation roller 18 duplexing outlet roller 3 manual...

Страница 268: ...lutch drive signal Vertical path duplexing feed motor drive signal Left deck pull off clutch signal Left deck feed paper detection signal Left deck pickup motor Left deck pickup solenoid drive signal...

Страница 269: ...r motor M26 same as above vertical path lower motor M27 same as above vertical path duplex feed motor M25 same as above Reversal duplexing system reversal motor M14 same as above duplexing feed left m...

Страница 270: ...Chapter 8 8 6 F 8 4 Motor driver PCB M12 A7 A8 J104 4 5 6 3 2 1 J2104 DC controller PCB CPU A A B B 24V 24V A9 A10 A14 A10 A13 J2101 A12 A9 A11 24V...

Страница 271: ...STR STBY STBY 1 stops to arch the paper at the registration roller Right deck pickup solenoid SL6 Right deck pickup motor M11 Right deck retry sensor PS19 Vertical path duplexing feed motor M25 Pre re...

Страница 272: ...assette 3 retry sensor PS21 Vertical path 3 paper sensor PS26 Vertical path 2 paper sensor PS25 Vertical path duplexing feed motor M25 Pre registration motor M17 Vertical path 1 paper sensor PS24 Vert...

Страница 273: ...p roller DOWN solenoid Pickup roller Retry sensor 1 Vertical path sensor Retry started Delay detected 1 Period of detection determined by the clock pulses from the motor Thereafter same as normal pick...

Страница 274: ...22 yes no no Right deck pull off sensor PS32 yes yes yes Left deck pull off sensor PS33 yes yes yes Vertical path 1 sensor PS24 yes yes yes Vertical path 2 sensor PS25 yes yes yes Vertical path 3 sens...

Страница 275: ...ngth of time during which paper is moved from the sensor N 1 to the appropriate delay jam sensor N is monitored If the appropriate delay jam sensor Inside delivery sensor PS35 yes yes yes Outside deli...

Страница 276: ...ll off sensor PS33 vertical path 1 sensor PS24 vertical path 2 sensor PS25 vertical path 3 sensor PS26 vertical path 4 sensor PS27 write check sensor PS28 registration sensor PS29 fixing outlet sensor...

Страница 277: ...sor PS4 inside delivery sensor PS35 outside delivery sensor PS36 reversal sensor 1 PS37 reversal sensor 2 PS38 duplexing paper sensor PS34 duplexing pre registration sensor PS30 Sensor right deck pull...

Страница 278: ...he cassette pickup unit F 8 13 8 4 2 Detecting the Presence Absence of Paper 0009 3167 The presence absence of paper inside the deck or the cassette is checked by the cassette paper sensor Paper Prese...

Страница 279: ...n cassette 3 4 0009 3172 The machine checks the amount of paper remaining based on the reading of a variable resistor that operates in conjunction with the movement of the lifter drive shaft F 8 16 3...

Страница 280: ...boss pushing the paper size sensor works in conjunction with the guide plate inside the cassette and its location is determined when the guide plate is set to suit a specific paper size Identifying t...

Страница 281: ...T 8 14 G A4 R H LGL LTR R I FLSC U2 J B4 B5 K G LTR U1 L 279 4 x 431 8mm U4 11 x 17 LTR M A3 A4 Group Size U1 G LTR K LGL U2 FOOLSCAP OFFICIO E OFFI A OFFI M OFI U3 G LGL FOLIO AUS FLS Marking Paper...

Страница 282: ...al x horizontal mm A3 A3 297 1 x 420 1 A4R A4R 210 1 x 297 1 A4 A4 297 1 x 210 1 A5 A5 210 1 x 148 5 1 A5R A5R 148 5 1 x 210 1 B4 B4 257 1 x 364 1 B5R B5R 182 1 x 257 1 B5 B5 257 1 x 182 1 11 x 17 11...

Страница 283: ...ay to suit the width of paper he she is using The reading of the variable resistor that operates in conjunction with the movement of the side guide is monitored by the DC controller PCB for detection...

Страница 284: ...OPIER ADJUST CSRT ADJ MF A6R Use it to change the paper width basic value for A6R in the manual feed tray COPIER ADJUST CST ADJ MF A4 Use it to change the paper width basic value for A4 in the manual...

Страница 285: ...sor the deck lifter detection signal arrives at the CPU causing the CPU to stop the deck lifter drive motor The machine is equipped with a deck limit sensor to make sure that the lifter will not go aw...

Страница 286: ...6 B8 J112 J2105 Right deck lifter limit signal 1 J2113 7 J105 Right deck lifter sensor PS6 Right deck lifter detection signal A2 J112 Limit detection circuit Right deck lifter drive motor M5 Motor dri...

Страница 287: ...states on off The machine uses a special sensor to check the presence absence of paper F 8 26 T 8 18 3 bars 100 to about 50 of capacity 2 bars about 50 to about 10 of capacity 1 bar 10 or less of cap...

Страница 288: ...ut the size of paper as follows A4 B5 LTR 1 The position of the paper size guide plate of the cassette is changed 2 A paper size is registered in service mode SERVICE MODE COPIER OPTION CST P SZ C1 Us...

Страница 289: ...at the print paper and the image on the drum will match at a specific point The timing at which the registration roller clutch goes on may be varied in service mode ADJUST FEED ADJ REGIST 8 7 2 Contro...

Страница 290: ...S37 PS46 Reversing flapper Delivery flapper PS29 M14 SL8 SL5 Reversing flapper solenoid drive signal Delivery assembly jam detection signal Delivery flapper solenoid drive signal Inside paper sensor d...

Страница 291: ...feed left right roller which is operated by the drive from the duplexing feed left right motor M19 M18 When the paper reaches the duplexing repickup point before 40mm of the curling roller the parer...

Страница 292: ...188 The following cites through path operation when making duplex prints of 10 originals 1 The 1st sheet is picked up from the right deck F 8 31 2 The 1st side is printed on the 1st sheet The 2nd shee...

Страница 293: ...33 4 The 1st sheet is moved to the duplexing feed assembly F 8 34 5 The 1st sheet is moved to the duplexing wait point The 2nd sheet is moved to the reversing assembly The 5th side is printed on the...

Страница 294: ...d up F 8 37 8 The 7th side is printed on the 4th sheet and the 1st sheet is delivered F 8 38 9 The 4th side is printed on the 2nd side and the 3rd sheet is kept on hold at the duplexing wait point The...

Страница 295: ...is kept on hold at the duplexing wait point F 8 41 12 The 3rd sheet is delivered F 8 42 13 The 8th side is printed on the 4th sheet F 8 43 14 The 4th sheet is delivered and the 10th side is printed o...

Страница 296: ...izontal registration sensor PS31 Timing of start of detection after duplexing paper sensor PS34 goes on Source of drive duplexing horizontal registration motor M16 Position measurement by controlling...

Страница 297: ...ction is to be started a point about 10 mm from the edge of paper assuming ideal movement of paper The start position is used as the point of reference and the machine identifies the paper position ta...

Страница 298: ...ling edge of paper is moved in the direction of delivery F 8 50 4 When the trailing edge of paper moves past the reversing roller coinciding with the activation of the outside delivery sensor PS36 the...

Страница 299: ...Chapter 8 8 35 F 8 51 PS36 M19 M14 Reversing flapper Outside delivery roller Point of reversal PS37...

Страница 300: ...ide out the left deck 2 Remove the two screws 1 found on the left and right sides of the left deck 2 then detach the left deck 2 F 8 53 3 Open the front cover 4 Disconnect the connector 1 from inside...

Страница 301: ...Assembly 0009 5119 The removal procedure of a right door and a left door is the same An illustration makes a right door an example and explains it 1 Slide out the right deck cassette3 cassette4 2 Open...

Страница 302: ...09 3858 1 Remove the 4 screws 1 and detach the main controller box cover 2 F 8 63 2 Disconnect the connector 1 of the reader unit communications cable F 8 64 3 Remove the 3 screws 1 and detach the upp...

Страница 303: ...Holder 0009 3860 1 Remove the waste toner bottle 2 Remove the 2 screws 1 and remove the 2 clamps 2 then move the main power switch base 3 to the side F 8 68 3 Disconnect the 2 connectors 1 and remove...

Страница 304: ...Cassette Lifter Motor 8 10 4 1 Removing the cassette right cover 0009 5117 1 Slide out the right deck and the cassette 3 4 2 Remove the bucket 1 of the cassette3 F 8 73 3 Open the right lower cover 4...

Страница 305: ...ette 4 is pressed halfway The expression pressing the release button halfway means the following The separation roller moves down The cassette is about to slide out F 8 79 5 If the filter drive gear i...

Страница 306: ...k lifter drive assembly 5 F 8 83 3 Remove the 3 screws 1 and detach the left deck lifter motor 2 F 8 84 8 10 6 Right Deck Lifter Motor 8 10 6 1 Removing the Rear Cover upper 0009 3896 1 Open the cable...

Страница 307: ...mmunications cable F 8 89 3 Remove the 3 screws 1 and detach the upper rear right cover 2 F 8 90 4 Disconnect all connectors of the main control PCB and free all harnesses from the 4 wire saddles 1 th...

Страница 308: ...waste toner bottle holder 2 Take care not to spill the waste toner F 8 95 8 10 6 6 Removing the Motor Driver PCB Base 0009 3868 1 Disconnect the 10 connectors and free the harness 1 from the 9 wire sa...

Страница 309: ...eck Cassette Pickup Assembly 0009 5095 The removal procedure of a right door and a left door is the same An illustration makes a right door an example and explains it 1 Slide out the right deck casset...

Страница 310: ...h the two pickup fixing plates 2 then detach the left deck pickup assembly 3 Keep supporting the pickup assembly otherwise the pickup assembly could drop when the fixing plate is removed F 8 105 8 10...

Страница 311: ...10 10 1 Removing the Rear Cover upper 0009 3911 1 Open the cable clamp 1 and free the reader unit communications cable 2 F 8 109 2 Remove the 6 screws 1 and detach the upper rear cover 2 F 8 110 8 10...

Страница 312: ...of the main control PCB and free all harnesses from the 4 wire saddles 1 then detach the main controller box 3 F 8 115 8 10 10 4 Removing the Right Cover lower rear 0009 3913 1 Remove the 2 screws 1 a...

Страница 313: ...t the connector 2 remove the two screw 1 and detach the right deck pickup motor 3 F 8 120 8 10 11 Left Deck Pickup Solenoid 8 10 11 1 Removing the Rear Cover lower 0009 3888 1 Remove the 6 screws 1 an...

Страница 314: ...ether with the mounting plate F 8 123 8 10 12 Manual Feed Unit 8 10 12 1 Removing the Manual Feed Unit 0009 5085 1 Remove the 2 screws 1 and detach the upper right cover 2 F 8 124 2 Open the right doo...

Страница 315: ...stop rings 1 left right and shift the two bushings 2 then detach the manual feed pull out roller unit F 8 129 8 10 13 2 Removing the Manual Feed Pull Out Roller 0009 5094 1 Remove the two E rings 1 l...

Страница 316: ...out roller unit F 8 132 8 10 14 2 Removing the Manual Feeding Roller 0009 5089 1 Remove the stop rings 1 and detach the feeding roller 2 F 8 133 8 10 15 Manual Separation Roller 8 10 15 1 Removing the...

Страница 317: ...spring of the separation roller 1 Remove the right upper cover 2 Remove the upper guide 1 F 8 138 If double feeding occurs remove the mounting screw 1 and lower the mounting base 2 then tighten the m...

Страница 318: ...kwise to release the lock then hold the lever 1 and slide out the fixing feed unit 2 toward the front until it stops At this time the duplexing feed unit will also slide out F 8 145 3 Remove the 2 jam...

Страница 319: ...pushing the 2 stopper plates 1 of the rail assembly of the fixing feed unit toward the inside slide out the fixing feed unit 2 to the front F 8 148 6 Remove the 2 screws 1 and detach the fixing feed...

Страница 320: ...on corona assembly pull out the assembly to the front and remove it in the direction of upper left F 8 152 Be aware not to cut the nylon wire by coming into contact the transfer separation corona asse...

Страница 321: ...ve the registration roller 8 F 8 156 8 10 18 Pre Registration Motor 8 10 18 1 Removing the Rear Cover upper 0009 3920 1 Open the cable clamp 1 and free the reader unit communications cable 2 F 8 157 2...

Страница 322: ...main control PCB and free all harnesses from the 4 wire saddles 1 then detach the main controller box 3 F 8 162 8 10 18 3 Removing the Pre Registration Motor 0009 3922 1 Disconnect the connector 1 an...

Страница 323: ...1 of the duplexing feed unit then remove the 3 screws 2 and detach the duplexing feed front cover 3 F 8 166 4 While pushing the hook shaft 1 found at the rear of the fixing feed unit in the direction...

Страница 324: ...0009 5128 1 Disconnect the connector 1 and remove the E ring 2 then remove the registration clutch 3 F 8 170 8 10 20 Feeding Roller 8 10 20 1 Removing the Right Deck Cassette Pickup Assembly 0009 5107...

Страница 325: ...ft deck 2 F 8 172 3 Open the front cover 4 Disconnect the connector 1 from inside the machine and remove the locking support 2 F 8 173 5 Remove the two screws 1 and detach the two pickup fixing plates...

Страница 326: ...s it 1 Slide out the right deck cassette3 cassette4 2 Open the right upper cover and the right lower cover An attempt to remove the pickup assembly without removing the deck will cause the lifter to g...

Страница 327: ...181 8 10 22 Vertical Path Motor 8 10 22 1 Removing the Rear Cover upper 0009 3905 1 Open the cable clamp 1 and free the reader unit communications cable 2 F 8 182 2 Remove the 6 screws 1 and detach th...

Страница 328: ...all harnesses from the 4 wire saddles 1 then detach the main controller box 3 F 8 188 8 10 22 4 Removing the Right Cover lower rear 0009 3908 1 Remove the 2 screws 1 and detach the right cover lower r...

Страница 329: ...F 8 192 8 10 22 6 Removing the Vertical Path Upper Motor 0009 3910 1 Disconnect the connector 2 remove the two screws 1 and detach the vertical path upper motor 3 F 8 193 8 10 23 Vertical Path Duplex...

Страница 330: ...09 3901 1 Remove the 4 screws 1 and detach the main controller box cover 2 F 8 197 2 Disconnect the connector 1 of the reader unit communications cable F 8 198 3 Remove the 3 screws 1 and detach the u...

Страница 331: ...e Holder 0009 3903 1 Remove the waste toner bottle 2 Remove the 2 screws 1 and remove the 2 clamps 2 then move the main power switch base 3 to the side F 8 202 3 Disconnect the 2 connectors 1 and remo...

Страница 332: ...ar Cover upper 0009 3914 1 Open the cable clamp 1 and free the reader unit communications cable 2 F 8 206 2 Remove the 6 screws 1 and detach the upper rear cover 2 F 8 207 8 10 24 2 Removing the Rear...

Страница 333: ...all harnesses from the 4 wire saddles 1 then detach the main controller box 3 F 8 212 8 10 24 4 Removing the Right Cover lower rear 0009 3917 1 Remove the 2 screws 1 and detach the right cover lower r...

Страница 334: ...1 Disconnect the connector 2 remove the 3 screws 1 and detach the vertical path lower motor 3 F 8 217 8 10 25 Fixing Feeding Unit Releasing Lever Sensor 8 10 25 1 Removing the Fixing Feed Unit 0009 51...

Страница 335: ...ushing the hook shaft 1 found at the rear of the fixing feed unit in the direction of the arrow i e toward the machine s front turn the fixing feed unit releasing lever 2 clockwise to lock it in place...

Страница 336: ...the rail F 8 223 8 10 25 2 Removing the fixing Feed unit front cover 0009 5158 1 Remove the screw 1 and detach the knob 2 then remove the screw 3 and detach the fixing feed unit releasing lever 4 F 8...

Страница 337: ...move the two mounting screws 1 and detach the fixing feeding unit releasing lever support 2 F 8 228 3 Remove the mounting screw 1 and detach the releasing lever switch 2 F 8 229 8 10 26 Feeding Belt 8...

Страница 338: ...ushing the hook shaft 1 found at the rear of the fixing feed unit in the direction of the arrow i e toward the machine s front turn the fixing feed unit releasing lever 2 clockwise to lock it in place...

Страница 339: ...the rail F 8 235 8 10 26 2 Removing the fixing Feed unit front cover 0009 5140 1 Remove the screw 1 and detach the knob 2 then remove the screw 3 and detach the fixing feed unit releasing lever 4 F 8...

Страница 340: ...en remove the 3 screws 2 and detach the fixing drive assembly 3 F 8 240 3 Release the 3 locks of the harness guide 1 and free the harness from the harness guide then disconnect the 6 connectors F 8 24...

Страница 341: ...bearing 6 then detach the feeding belt unit 7 F 8 246 5 Remove the mounting screw 1 and detach the cover 2 6 Detach the feeding belt 3 and the postcard belt 4 F 8 247 8 10 27 Duplexing Unit 8 10 27 1...

Страница 342: ...hen the solenoid turns on i e when the plunger is drawn F 8 250 8 10 27 4 Removing the Reversal Motor 0009 5164 1 Disconnect the connector 1 2 Remove the three mounting screws 2 and detach the reversa...

Страница 343: ...and remove the two screws 2 then detach the duplex feeding left motor 3 F 8 256 8 10 27 7 Removing the Duplex Feeding Right Motor 0009 5170 1 Disconnect the connector 1 and remove the two screws 2 th...

Страница 344: ...sor 2 0009 5179 1 Remove the two mounting screws 1 and detach the sensor together with its base 2 F 8 263 2 Disconnect the connector 1 and remove the sensor 2 F 8 264 8 10 27 11 Removing the Left Deck...

Страница 345: ...ect the connector 2 then detach the fan together with its base 3 F 8 268 2 Remove the two mounting screws 1 and detach the duplex feeding fan 2 Be sure that the arrow indicating the direction of air i...

Страница 346: ...free the cable 2 from the two clamps 3 9 Remove the two mounting screws 4 and detach the horizontal registration motor 5 F 8 276 10 Disconnect the connector 1 and detach the horizontal registration s...

Страница 347: ...4 Disconnect the connector 1 from inside the machine and remove the locking support 2 F 8 280 5 Remove the two screws 1 and detach the two pickup fixing plates 2 then detach the left deck pickup asse...

Страница 348: ...Orientation of the Separation Roller 0009 5116 When replacing the separation roller be sure it is oriented as follows Mounting the separation roller in the wrong orientation will lead to interference...

Страница 349: ...Chapter 8 8 85 F 8 290 1 Feeding roller 2 Separation roller 3 Pressure lever 4 Pressure spring 1 2 A B 3 4...

Страница 350: ......

Страница 351: ...Chapter 9 Fixing System...

Страница 352: ......

Страница 353: ...13 9 3 1 4 Controlling the Reciprocating Mechanism of the Upper Separation Claw 9 14 9 3 1 5 Controlling the Drive of the Shutter 9 15 9 3 1 6 Controlling the Shutter Position 9 15 9 3 2 Cleaning 9 18...

Страница 354: ...ensor 9 41 9 5 15 1 Removing the Inside Delivery Sensor 9 41 9 5 16 Fixing Inlet Sensor 9 41 9 5 16 1 Removing the Fixing Inlet Sensor 9 41 9 5 16 2 Adjusting the Fixing Inlet Guide 9 42 9 5 17 Fixing...

Страница 355: ...ter 12 mm reciprocating width temperature control error detection Sub Thermistor THM2 contact fixing roller rear no reciprocating mechanism shutter control error detection Shutter thermistor THM3 cont...

Страница 356: ...ssure roller 8 Web feed roller 3 Heater unit 9 Upper separation claw 4 Heater assembly coil core 10 Lower separation claw 5 Fixing cleaning web 11 Fixing inlet guide 6 Web roller 12 Static eliminator...

Страница 357: ...er PCB IH DRIVER fixing heater driver PCB MEMO The term IH stands for induction heating When high frequency current is supplied to a coil arranged inside a heater unit a high frequency magnetic field...

Страница 358: ...aper is used the temperature of the areas of the fixing roller surface with which the paper will not come into contact will increase overheating of the edges To limit such a rise to a minimum the mach...

Страница 359: ...is mode is used when all the following conditions exist the site is in a high humidity environment the temperature of the fixing roller is 70 deg C or lower Recovery mode The temperature of the fixing...

Страница 360: ...s to move from power on to standby states reference only F 9 7 1 Fixing roller 1 4 speed rotation 2 Fixing roller 1 1 speed rotation 9 2 4 High Humidity Environment Start Up Mode 0009 1233 Conditions...

Страница 361: ...on to standby states F 9 9 1 Fixing roller 1 4 speed rotation 2 Fixing roller 1 1 speed rotation 9 2 6 Standby Mode 0009 1236 Characteristics The machine decreases the target temperature by 5 deg C a...

Страница 362: ...or the fixing roller to suit the selected rate of power saving in user mode The machine uses the appropriate target temperature for the fixing roller to suit the selected rate of power saving in user...

Страница 363: ...environment temperature is 17 deg C or higher F 9 13 1 temperature of the fixing roller deg C 2 control temperature during copying 9 2 10 Down Sequence 0009 4225 The machine does not have a down sequ...

Страница 364: ...eg C the machine executes idle rotation of the fixing roller for 1 min to collect heat in the fixing assembly before starting copying printing operation If heavy paper exists together with plain paper...

Страница 365: ...ansparency mode you can improve separation by decreasing the fixing target temperature for transparency mode using the following service mode item SERVICE MODE COPIER OPTION BODY OHP TEMP Category 2 0...

Страница 366: ...DC POWER DC power supply PCB ERROR CODE E014 fixing motor error 0000 After the fixing motor has gone on the machine does not detect the phase lock signal for the fixing motor for 2 sec or more 9 3 1 2...

Страница 367: ...3 Controlling the Reciprocating Movement of the Thermistor 0007 6725 To prevent damage to the fixing roller by the main thermistor THM1 or the shutter thermistor THM3 the thermistor is moved in the ax...

Страница 368: ...prevent damage to the fixing roller by the upper separation claw the upper separation claw is moved back and forth over a distance of 3 mm in the axial direction of the fixing roller The following sh...

Страница 369: ...dicates that the HP sensor signal is not detected when the shutter is operating after executing 3 retry operations 0002 The interval of ON OFF detection by the sensor in response to shutter operation...

Страница 370: ...on PS53 shutter HP sensor The following shows the position of the shutter 3 steps The machine moves the shutter to the appropriate position to suit the size of the paper and the reading of the thermis...

Страница 371: ...on shutter operation when the machine is making A5R prints in continuous mode F 9 24 1 When printing starts the readings of the sub thermistor THM2 and the shutter thermistor THM3 are both above spec...

Страница 372: ...ed by the size of the paper used and the number of prints within a single job T 9 8 1 A4 A4R B5 B5R A5R LTR LTRR 2 A3 B4 LGR LGL If paper exits in the fixing assembly because of a jam or error the mac...

Страница 373: ...web length warning message on the control panel when the fixing web solenoid goes on 4 times after the sensor has gone on F 9 26 WEB_SENSOR fixing web length detection signal 1 Web length detecting ar...

Страница 374: ...ler the machine will execute an emergency stop on the fixing motor if paper exits inside the fixing assembly with a delay jam at the outlet of the assembly The presence absence of paper inside the fix...

Страница 375: ...for 2 sec 0003 the reading is not 150 deg C or higher or 210 deg C or lower within 30 sec at time of a remedial job 0010 the power has been turned off and then on without resetting of the error in qu...

Страница 376: ...ed unit will also slide out F 9 29 3 Remove the 2 jam removal levers 1 of the duplexing feed unit then remove the 3 screws 2 and detach the duplexing feed front cover 3 F 9 30 4 While pushing the hook...

Страница 377: ...5 2 1 Removing the Fixing Upper Unit 0009 2876 1 Open the front cover 1 F 9 34 2 Turn the fixing feed unit releasing lever 1 counterclockwise to release the lock then hold the lever 1 and slide out t...

Страница 378: ...e sliding out farther of the fixing feed unit in step 5 4 While pushing the hook shaft 1 found at the rear of the fixing feed unit in the direction of the arrow i e toward the machine s front turn the...

Страница 379: ...t cover 2 F 9 40 8 Remove the 2 screws 1 and detach the fixing feed unit front cover 2 then remove the 2 screws 3 and detach the fixing feed unit middle cover 4 F 9 41 9 Open the delivery unit 1 then...

Страница 380: ...m the shutter sensor base plate or damage the connector 12 Remove the 2 screws 1 ad detach the fixing upper unit 2 in the direction of the arrow F 9 45 9 5 3 Pressure Roller 9 5 3 1 Removing the Press...

Страница 381: ...t 3 Remove the fixing web At this time clean the surface of the silicone oil tray 4 Remove the screw 1 and detach the pin 2 You will be using the removed screw and pin later in step 6 F 9 48 5 Turn th...

Страница 382: ...e surface of the shutter may become discolored because of heat or show scratches because of friction These symptoms however are least likely to affect the performance of the shutter 11 Remove the 2 sc...

Страница 383: ...ver will not affect the performance of the roller The color of the roller varies depending on its manufacture but the performance of the roller is the same 9 5 4 2 Points to Note When Mounting the Fix...

Страница 384: ...3 of the fixing roller Such will eliminate the gap A in the joint between the bearing and the fixing frame The presence of a gap at the joint is likely to cause fixing faults or paper to wrinkle Be su...

Страница 385: ...68 There will likely be adhesion of grease on the ends 1 of the fixing roller when the bushing is fitted to the roller Be sure to remove the adhesion F 9 69 9 5 4 4 Adjusting the Nip Width 0009 4874 T...

Страница 386: ...3 9 5 6 Internal Delivery Roller 9 5 6 1 Removing the Inside Delivery Roller 0009 4876 1 Remove the fixing feeding unit from the machine 2 Detach the lower separation claw support plate Note Of the fo...

Страница 387: ...ed at the rear of the machine 7 Remove the 4 screws 1 and disconnect the connector 3 found inside of the delivery motor 2 F 9 78 F 9 79 8 Remove the 3 screws 1 and shift the connector support plate 2...

Страница 388: ...m be sure to put them back on F 9 82 9 5 7 Main Thermistor 9 5 7 1 Removing the Main Thermistor Shutter Thermistor 0009 2916 1 Remove the fixing upper unit 2 Remove the fixing web 3 Remove the screw 1...

Страница 389: ...llel and in contact with the fixing roller If not start over the mounting work F 9 89 Be sure to route the harness of the thermistor as shown seeing to it that the harness 1 is outside rear of the gui...

Страница 390: ...009 7631 After mounting the sub thermistor 1 check to be sure that it is parallel and in contact with the fixing roller If not start over the mounting work F 9 97 9 5 9 Thermal Switch 9 5 9 1 Removing...

Страница 391: ...le 4 in the plate F 9 101 4 Fit the pin 1 you removed in step 2 in the hole 2 then fix it in place using the screw 3 F 9 102 When you have finished the foregoing series of steps be sure to put the pin...

Страница 392: ...to detach F 9 110 The shutter is thin 0 5 mm thick and therefore can easily deform Deformation will cause it to interfere with the fixing roller leading to damage on the roller surface Be sure to take...

Страница 393: ...0007 7181 Fit the fixing web back on using the steps to detach it but only in reverse 1 Wind the web 2 around the fixing takeup roller 1 2 to 3 times While winding it at the front make sure that the...

Страница 394: ...Fixing Jam Sensor 9 5 12 1 Removing the Delivery Jam Sensor 0009 4849 1 Remove the fixing feeding unit from the machine 2 Remove the outside delivery roller 3 Remove the 2 screws 1 and pull out the se...

Страница 395: ...emove the inside delivery roller 2 Remove the screw 1 and remove the protrusion 2 then pull out the sensor support plate 3 toward the outside F 9 125 3 Disconnect the connector 1 and detach the inside...

Страница 396: ...ess As necessary adjust the height of the inlet guide by loosening the fixing screw on the height adjusting support plate 9 5 17 Fixing web sensor 9 5 17 1 Removing the Fixing Web Sensor 0009 2913 1 S...

Страница 397: ...and front covers 3 Disconnect the connector 1 and remove the screw 2 then free the harness from the clamp of the harness support plate 3 F 9 134 4 Remove the 2 screws 1 and detach the fixing feeding...

Страница 398: ...ntion to the spatial relationship between the arm 1 of the delivery flapper solenoid and the arm 2 of the sensor F 9 139 9 5 22 Fixing Cleaning Web Solenoid 9 5 22 1 Removing the Fixing Web Solenoid S...

Страница 399: ...he drive lever 1 is 8 6 mm F 9 145 b If the fixing web has been used at all Before removing the solenoid check the position of the drive lever as found when the solenoid goes on After replacing the so...

Страница 400: ...aw Unit 0009 2911 1 Remove the fixing upper unit 2 Free the harness from the clamps and disconnect the connector 1 F 9 150 3 Remove the 2 screws 1 and detach the lower separation claw unit 2 F 9 151 9...

Страница 401: ...Chapter 10 External and Controls...

Страница 402: ......

Страница 403: ...h Voltage Power Supply PCB 10 12 10 5 1 3 Left Deck Drive Assembly 10 12 10 5 2 Manual Feed Pickup Drive Assembly 10 12 10 5 2 1 Removing the Rear Cover upper 10 12 10 5 2 2 Removing the Rear Cover lo...

Страница 404: ...Cover middle 10 27 10 5 10 4 Removing the Lower Left Cover 10 28 10 5 10 5 Accessories Power Supply PCB 10 28 10 5 11 Fixing Heater Power Supply PCB 10 28 10 5 11 1 Removing the Left Cover upper 10 28...

Страница 405: ...he Left Cover middle 10 38 10 5 20 3 Removing the Fixing Heater Power Supply Unit 10 38 10 5 20 4 Removing the Fixing Heater Power Supply Cooling Fan 10 39 10 5 21 Circulation Duct Fan 10 39 10 5 21 1...

Страница 406: ......

Страница 407: ...with a density control volume VR6801 on its keypad PCB so that the user can adjust the contrast of the LCD to suit individual needs 10 1 4 Functions of the Control Panel CPU 0009 2473 Monitoring Key I...

Страница 408: ...ice mode The following shows the default counter types valid at time of shipment T 10 3 100V T 10 4 120 V 230 V outside Europe T 10 5 Copier printer operation Counter name Simplex mode inside delivery...

Страница 409: ...nged or counter display may be enabled or disabled in service mode not applicable to counter 1 Counter Description 1 Default Change counter 1 total A through L ON not possible counter 2 total large AC...

Страница 410: ...arges exhaust of fans outside the machine yes 24 12 V E805 0001 FM4 controllercooling fan cools the laser unit developing block drive block and controller yes 24 12 V E121 0001 FM5 curl removing fan r...

Страница 411: ...are controlled to 2 different speeds switched over by the voltage switchover circuit of individual fans F 10 3 10 3 3 Sequence of Operation 0009 2577 FM3 FM1 FM4 FM7 FM9 FM6 FM5 FM8 FM2 FM501 Voltage...

Страница 412: ...t discharge fan FM3 Primary charging cooling fan FM2 Curl removing fan FM5 Controller cooling fan FM4 Fixing power supply cooling fan FM7 WMUP Printer unit status WMUPR Standby Printing Power save Doo...

Страница 413: ...heater H4 and deck heater H5 Environment switch SW3 turns on off the drum heater H3 cassette heater H4 and deck heater H5 Cassette heater switch SW4 turns on off the cassette heater H4 and the deck he...

Страница 414: ...r OFF OFF OFF OFF OFF OFF OFF OFF OFF OFF Reader unit heater OFF OFF OFF OFF OFF OFF OFF OFF OFF OFF Main power supply switch OFF Sleep Warm up other than initial Standby power save Copying printing E...

Страница 415: ...controller PCB Main controller PCB Main power switch SW1 Drum temperature control PCB AC input 3 3VA 12VU3 24VU3 24V 12V 3 3VB 3 3VA2 12VU 5V HVT PCB Fixing feed unit 24V 24V 5V 5 7V 24V 5V Laser dri...

Страница 416: ...m battery that serves as a source of backup power to retain various data in the event of a power outage or disconnection of the power plug T 10 17 You must always be sure that the battery is replaced...

Страница 417: ...CB Operation set AC off Sleep 3 Front door open Sleep 1 Standby copying power save Input Main power switch OFF ON ON ON ON ON Front door switch OFF OFF ON ON RMT1 0 1 1 RMT2 0 0 1 0 1 Output 3VB OFF O...

Страница 418: ...9 connectors 3 3 Remove the 4 screws 4 and detach the high voltage power supply PCB 5 F 10 8 10 5 1 3 Left Deck Drive Assembly 0009 3838 1 Remove the 4 screws 1 and disconnect the connector 2 then de...

Страница 419: ...Remove the 4 screws 1 and detach the main controller box cover 2 F 10 13 2 Disconnect the connector 1 of the reader unit communications cable F 10 14 3 Remove the 3 screws 1 and detach the upper rear...

Страница 420: ...nnect the 3 connectors 2 then detach the manual feed pickup drive assembly 3 F 10 18 10 5 3 Vertical Path Drive Assembly 10 5 3 1 Removing the Rear Cover upper 0009 3928 1 Open the cable clamp 1 and f...

Страница 421: ...ommunications cable F 10 23 3 Remove the 3 screws 1 and detach the upper rear right cover 2 F 10 24 4 Disconnect all connectors of the main control PCB and free all harnesses from the 4 wire saddles 1...

Страница 422: ...F 10 28 4 Remove the 2 screws 1 and detach the waste toner bottle holder 2 Take care not to spill the waste toner F 10 29 10 5 3 6 Removing the Motor Driver PCB Base 0009 3933 1 Disconnect the 10 con...

Страница 423: ...communications cable 2 F 10 32 2 Remove the 6 screws 1 and detach the upper rear cover 2 F 10 33 10 5 4 2 Removing the Rear Cover lower 0009 3945 1 Remove the 6 screws 1 and detach the rear cover lowe...

Страница 424: ...PCB and free all harnesses from the 4 wire saddles 1 then detach the main controller box 3 F 10 38 10 5 4 4 Removing the Waste Toner Bottle Holder 0009 3947 1 Remove the waste toner bottle 2 Remove t...

Страница 425: ...m the wire saddle 2 Remove the 8 screws 1 and detach the DC controller base 2 then turn it over F 10 42 3 Disconnect the 3 connectors 1 and free the harness 3 from the 2 cable clamps 2 then detach the...

Страница 426: ...in drive belt 2 Pickup drive belt F 10 47 10 5 6 Cassette Pickup Drive Assembly 10 5 6 1 Removing the Rear Cover upper 0009 3936 1 Open the cable clamp 1 and free the reader unit communications cable...

Страница 427: ...s of the main control PCB and free all harnesses from the 4 wire saddles 1 then detach the main controller box 3 F 10 54 10 5 6 4 Removing the Right Cover lower rear 0009 3939 1 Remove the 2 screws 1...

Страница 428: ...se 3 F 10 59 10 5 6 7 Cassette Pickup Assembly 0009 5221 The removal procedure of a right door and a left door is the same An illustration makes a right door an example and explains it 1 Slide out the...

Страница 429: ...y cover 1 2 Remove the 2 screws 2 and detach the right cover upper 3 F 10 62 10 5 7 2 Removing the Reader Right Cover 0009 7332 1 Remove the 2 screws 1 and detach the reader right cover 2 F 10 63 10 5...

Страница 430: ...1 and detach the left cover upper 2 F 10 66 10 5 7 5 Removing the Reader Left Cover 0009 7335 1 Remove the 2 screws 1 and detach the reader left cover 2 F 10 67 10 5 7 6 Removing the Reader Front Cove...

Страница 431: ...sconnect the connector 3 F 10 74 10 5 8 DC Controller PCB 10 5 8 1 Removing the Rear Cover upper 0009 3965 1 Open the cable clamp 1 and free the reader unit communications cable 2 F 10 75 2 Remove the...

Страница 432: ...the existing to new PCB Take full care Failure to connect the shorting connector will cause the control panel display to fail F 10 78 10 5 9 Printer Power Supply PCB 10 5 9 1 Removing the Left Cover...

Страница 433: ...pply PCB 2 F 10 84 10 5 10 Option Power Supply PCB 10 5 10 1 Removing the Rear Cover lower 0009 3883 1 Remove the 6 screws 1 and detach the rear cover lower 2 F 10 85 10 5 10 2 Removing the Left Cover...

Страница 434: ...essories Power Supply PCB 0009 3821 1 Remove the 5 screws 1 and disconnect the 5 connectors 2 then slide the power cord base 3 F 10 89 2 Disconnect the 3 connectors 1 and detach the power cord base 2...

Страница 435: ...4558 1 Remove the 5 screws 1 and detach the PCB cover 2 F 10 94 2 Open the 2 wire saddles 1 3 Disconnect the 7 connectors 2 4 Remove the 3 screws 3 and detach the fixing heater power supply unit 4 F...

Страница 436: ...ntion PCB 0009 3951 1 Disconnect the 27 connectors and free the harness from the wire saddle 2 Remove the 8 screws 1 and detach the DC controller PCB base 2 then turn it over F 10 100 3 Disconnect the...

Страница 437: ...ransfer unit 3 to the left to detach F 10 104 2 Remove the 2 screws 1 and disconnect the connector 2 then detach the transformer 3 F 10 105 10 5 13 4 When Replacing the HVT PCB 0009 3824 Enter the val...

Страница 438: ...emoving the Right Cover lower rear 0009 3895 1 Remove the 2 screws 1 and detach the right cover lower rear 2 F 10 109 10 5 14 4 Removing the Main Controller Box 0009 3844 1 Remove the 4 screws 1 and d...

Страница 439: ...the 2 screws 1 and detach the PCB cover 2 F 10 114 3 Remove the 6 screws 1 and disconnect the 10 connectors then detach the motor diver PCB 2 F 10 115 10 5 15 Primary Charging Assembly Fan 10 5 15 1...

Страница 440: ...2 F 10 120 10 5 16 De Curling Fan 10 5 16 1 Removing the Curl Removing Fan 0009 6812 1 Slide out the fixing feed unit 2 Remove the fixing front cover 3 Disconnect the 3 connectors 1 and remove the 3...

Страница 441: ...Base 0009 3962 1 Disconnect the 27 connectors and free the harness from the wire saddle 2 Remove the 8 screws 1 and detach the DC controller base 2 then turn it over F 10 126 3 Disconnect the 3 connec...

Страница 442: ...and disconnect the connector 2 then detach the exhaust fan duct 3 F 10 130 2 Remove the 2 screws 1 and disconnect the connector 2 then detach the fan grid 3 and detach the exhaust fan 4 F 10 131 10 5...

Страница 443: ...deck 2 cassette 3 3 and cassette 4 4 3 Remove the 6 screws 5 and detach the left cover lower 6 F 10 134 10 5 19 4 Removing the Printer Power Supply PCB 0009 3829 1 Remove the 5 screws 1 and detach the...

Страница 444: ...e 3 screws 1 and detach the delivery cover 2 2 Disconnect the reader power cable 3 3 Open the front cover 4 4 Open the hopper cover 5 5 Remove the 6 screws 6 and detach the left cover middle 7 F 10 14...

Страница 445: ...emove the 2 screws 1 and detach the left cover upper 2 F 10 146 10 5 21 2 Removing the Left Cover middle 0009 4577 1 Remove the 3 screws 1 and detach the delivery cover 2 2 Disconnect the reader power...

Страница 446: ...ree the reader unit communications cable 2 F 10 150 2 Remove the 6 screws 1 and detach the upper rear cover 2 F 10 151 10 5 22 2 Removing the Right Cover lower rear 0009 3924 1 Remove the 2 screws 1 a...

Страница 447: ...tors 1 and detach the main motor 2 F 10 155 10 5 23 Fixing Driver Motor 10 5 23 1 Removing the Fixing Motor 0009 2912 1 Slide out the fixing feed unit 2 Remove the fixing front cover 3 Disconnect the...

Страница 448: ......

Страница 449: ...Chapter 11 MEAP...

Страница 450: ......

Страница 451: ...Contents Contents 11 1 MEAP 11 1 11 1 1 Overview 11 1 11 1 2 MEAP Counter 11 1 11 1 3 Construction of the MEAP Platform 11 1...

Страница 452: ......

Страница 453: ...pplication sends instructions or it may be of a type that increases independently of the host device thus increasing solely in response to the application being run specifics are as follows T 11 1 MEM...

Страница 454: ...ce Control Block installed as part of the system software 3 Operating System installed as part of the system software 4 Java VM installed as part of the system software 5 MEAP System Services includes...

Страница 455: ...Chapter 12 Maintenance and Inspection...

Страница 456: ......

Страница 457: ...ervicing Basic Procedure 12 4 12 3 1 Scheduled Servicing Basic Procedure 12 4 12 3 2 Periodical Servicing Chart Reader Unit 12 4 12 3 3 Periodical Servicing Chart Printer Unit 12 5 12 3 4 Points to No...

Страница 458: ......

Страница 459: ...rt name Part No Q ty Life Remarks 1 Primary pre transfer transfer separation charging wire FB4 3687 000 AR 500 000 2 Primary grid wire FY1 0883 000 AR 500 000 3 thermistor unit FK2 0809 000 1 500 000...

Страница 460: ...oth edges are used each for 500 000 apply toner upon replacement 5 Primary corona assembly FM2 3069 000 1 1 000 000 6 Transfer separation corona assembly FG6 5911 000 1 1 000 000 7 Pre transfer corona...

Страница 461: ...discolor The change however will not affect its performance or output images Further the physical properties of the roller can permit its surface to start to wrinkle The roller however is free of wrin...

Страница 462: ...uthorities Do not dispose of waste toner in a fire Doing so may cause an explosion 5 Clean the copyboard glass and the reading glass 6 Make test copies 7 Make sample copies 8 Check the operation of th...

Страница 463: ...ss Clean Charging assembly Charging wire primary pre transfer transfer separation Clean Replace After replace ment execute wire cleaning 5 times Charging wire primary pretransfer transfer separation R...

Страница 464: ...oner box Inspect Inspect case and remove toner Pickup feeding assembly Transfer guide Clean Registration roller upper lower Clean Feeding belt Clean Feeding rollers Clean Unit name Part Intervals Rema...

Страница 465: ...the Developing Anti Stray Sheet 0009 5629 1 Remove the developing assembly and clean the developing anti stray sheet 1 F 12 4 12 4 3 Cleaning the Cleaner Side Scraper 0009 5651 1 Remove the cleaning b...

Страница 466: ...embly 1 Slide out the process unit 2 Take out the photosensitive drum 3 Moisten lint free paper 1 with 5 to 10 cc of alcohol 2 then pour 0 2 to 0 3 g of drum cleaning powder CK 0429 3 on the lint free...

Страница 467: ...cing the lint free paper will not affect the life of the drum 5 When the alcohol has evaporated dry wipe the surface with lint free paper If the area is uneven go back to step 4 and increase the back...

Страница 468: ......

Страница 469: ...Chapter 13 Standards and Adjustments...

Страница 470: ......

Страница 471: ...n Replacing the Inverter PCB 13 22 13 4 Laser Exposure System 13 23 13 4 1 When Replacing the Scanner Unit 13 23 13 5 Image Formation System 13 24 13 5 1 Outline of the Charging Wire 13 24 13 5 2 Rout...

Страница 472: ...Flapper Solenoid SL5 13 31 13 8 8 Adjusting the Position of the Right Deck Pickup Solenoid SL6 13 31 13 8 9 Adjusting the Position of the Left Deck Pickup Solenoid SL7 13 31 13 8 10 Adjusting the Posi...

Страница 473: ...des a AE mode 2 text mode 3 text photo mode Generate several prints of the following test prints 1 PGTYPE 4 blank 2 PGYTPE 5 halftone Generate several prints each of printer PDL images that match the...

Страница 474: ...ference in density between front and rear Is the rear lighter Turn the adjusting screw found at the front of the primary charging assembly clockwise 2 full turns Turn the adjusting screw found at the...

Страница 475: ...DPOT VDM for copier image COPIER DISPLAY DPOT VDM P for printer image B Check the following and replace them if necessary 1 Laser for output 2 Potential control system 3 Photosensitive drum Check the...

Страница 476: ...alue in service mode COPIER DISPLAY DPOT VL1M for copier image COPIER DISPLAY DPOT VL1M P for printer image Check the following readings VD target value in service mode COPIER DISPLAY DPOT VDM for cop...

Страница 477: ...IER ADJUST V CONT VD OFST for copier image COPIER ADJUST V CONT VD VD OFST P for printer image Default Lighter image Darker image 5 4 3 2 1 0 1 2 3 4 5 C D Is there a difference in density between fro...

Страница 478: ...lack Density Checking for Fogging YES NO NO NO Perform the instructions under Checking the Solid Black Density for the printer unit YES Is the density of gray scale No 1 solid black too low light Make...

Страница 479: ...ackground foggy Decrease the value of AE density adjustment in service mode COPIER ADJUST AE AE TBL Execute shading adjustment in service mode COPIER FUNCTION CCD CCD ADJ Execute shading adjustment in...

Страница 480: ...nsity for the printer unit Is the density of gray scale No 8 halftone different If it is too dark If it is too light When the A3 Chart is copied in text photo mode is the density of No 8 optimum when...

Страница 481: ...NAL BODY PO CNT 1 short CP33 on the controller PCB and GND 2 disconnect the connector used between DC controller PCBs of the potential control PCB Make the following selections in service mode COPIER...

Страница 482: ...er unit NO YES YES NO Checking the Laser Output B Is the laser output a limit value Make the following selections in service mode and enter 1 COPIER FUNCTION DPC DPC Switch off and on the main power s...

Страница 483: ...e it to find out if the level shift circuit on the DC controller PCB is free of a fault Method 2 use it to find out if the potential control circuit is free of a fault 1 Method 1 1 Turn off the main p...

Страница 484: ...initial rotation is between 0 and 30 If not suspect a fault in the DC controller PCB 9 Turn off the main power switch 10 Remove the jumper wire found on the DC control PCB 11 Connect the connector of...

Страница 485: ...sure never to touch the potential sensor 9 Make the following selections in service mode COPIER DISPLAY DPOT DPOT K Then check to see that the indication during initial rotation is between 0 and 30 M...

Страница 486: ...68 56 30 398 43 3 80 1 260 60 33 396 40 3 85 1 251 63 35 393 36 3 90 1 242 67 37 390 32 3 95 1 233 71 39 387 28 4 00 1 225 75 41 385 25 4 05 1 216 78 43 382 21 4 10 1 207 82 45 379 17 4 15 1 198 86 47...

Страница 487: ...138 255 151 6 40 805 255 140 253 155 6 45 796 258 142 250 158 6 50 787 262 144 247 162 6 55 778 266 146 244 166 6 60 770 270 148 242 170 6 65 761 273 150 239 173 6 70 752 277 152 236 177 6 75 743 281...

Страница 488: ...8 85 376 438 241 118 338 8 90 367 442 243 115 342 8 95 358 446 245 112 346 9 00 350 450 247 110 350 9 05 341 453 249 107 353 9 10 332 457 251 104 357 9 15 323 461 253 101 361 9 20 315 465 255 99 365...

Страница 489: ...en 1 is set for the foregoing service mode item 0 if the user primarily uses originals with a low image ratio text original default 1 if the user primarily uses originals with a high image ratio photo...

Страница 490: ...registration 3 Adjusting the left right non image width CCD read start position 4 Leading edge non image width scanner image leading edge position 13 2 3 Adjusting Side Registration 0009 4593 Cassett...

Страница 491: ...re L1 2 5 1 5mm respectively F 13 26 1 Paper feed direction 5 Tighten the 2 screws 2 and 2 fixing screws 3 of the deck front cover 1 F 13 27 6 Put back the front deck left right to the machine Manual...

Страница 492: ...width in service mode so that it is as indicated COPIER ADJUST ADJ XY ADJ X F 13 32 2 5mm 2 0 Edge of image Increasing the ADJ Y setting An increase by 10 will increase the non image width by 1 mm Dec...

Страница 493: ...never you have replaced the reader controller or initialized the RAM b original stop position adjustment FEEDER ADJSUT DOCST c original feed speed magnification adjustment FEEDER ADUST LA SPEED 4 Make...

Страница 494: ...before performing ADF white level adjustment 13 3 5 When Replacing the Reading Glass 0009 1987 Execute the following in service mode 1 ADF white level adjustment COPIER FUNCTION CCD DF WLVL1 2 13 3 6...

Страница 495: ...her when the main power switch is tuerned on the machine will not execute potential control If such is the case after replacing the scanner unit manually execute potential control in service mode as f...

Страница 496: ...Hook the loop on the stud F 13 38 6 At the rear hook the charging wire on the charging wire positioner then hook the charging wire tension spring on the charging wire where indicated to the following...

Страница 497: ...are laid at equal intervals i e the wire is in the groove of the block 13 5 4 Adjusting the Height of the Charging Wire 0009 5712 1 Primary Charging assembly Height of charging wire F 13 45 Tolerance...

Страница 498: ...as follows When replacing the side seal 1 at the front push the magnet roller 2 toward the rear and then make sure that the inner end of the side seal is within the area 3 of the washer When replacing...

Страница 499: ...o that the shift distance of the drive lever 1 is 8 6 mm F 13 54 b If the fixing web has been used at all Before removing the solenoid check the position of the drive lever as found when the solenoid...

Страница 500: ...g Adjustments in th Field The inlet guide is in low position when the solenoid SL1 goes on The height of the inlet guide must be such that the difference between the front and the rear must be 0 2 mm...

Страница 501: ...icated on the label of the HVT PCB using the following service mode items COPIER ADJUST HV TR H PRE TR COPIER ADJUST HV TR HVT TR COPIER ADJUST HV SP HVT SP COPIER ADJUST DEVELOP HVT DE 13 7 3 After R...

Страница 502: ...ation Roller 0009 5519 When replacing the separation roller be sure it is oriented as follows Mounting the separation roller in the wrong orientation will lead to interference against crimping washer...

Страница 503: ...position of the solenoid using the two screws 3 so that the distance from the bottom of the pickup assembly to A of the roller arm is 36 0 5 mm when 1 and 2 are op erated F 13 68 13 8 7 Adjusting the...

Страница 504: ...e right tighten the screw 2 temporarily F 13 74 2 Set the cassette 3 cassette 4 in the machine without paper 3 Check to make sure that the lifter drive gear 1 is engaged with the lifter motor gear 2 f...

Страница 505: ...Chapter 14 Correcting Faulty Images...

Страница 506: ......

Страница 507: ...the Periodically Replaced Parts 14 1 14 1 8 Image Adjustment Basic Procedure 14 2 14 1 9 Others 14 2 14 2 Outline of Electrical Components 14 3 14 2 1 Clutch Solenoid 14 3 14 2 1 1 Clutches and Soleno...

Страница 508: ......

Страница 509: ...eck the copyboard cover copyboard glass and standard white plate for dirt and scratches If soiled clean it with mild detergent or alcohol if scratched replace it 14 1 4 Checking the Charging Assemblie...

Страница 510: ...n a machine from a cold to warm room in winter for installation can cause condensation inside the machine leading to various problems MEMO 1 Condensation in the scanner glass mirror lens can cause dar...

Страница 511: ...SL3 cassette 3 pickup solenoid drives the cassette 3 pickup SL4 cassette 4 pickup solenoid drives the cassette 4 pickup SL5 delivery flapper solenoid drives the delivery flapper SL6 right deck pickup...

Страница 512: ...746 Reader Unit T 14 3 T 14 4 Notation Name Description Parts No E code M501 scanner motor drives the No 1 No 2 mirror base FK2 0237 E202 Notation Connector I F PCB reader controller PCB M501 J306 307...

Страница 513: ...ght deck pickup M12 cassette 3 4 pickup motor drives cassette 3 4 pickup M13 delivery motor drives the delivery assembly M14 reversal motor drives the reversing assembly M15 shutter motor drives the f...

Страница 514: ...M18 FK2 0826 MTR 13 M19 FK2 0826 MTR 16 M20 FK2 0814 MTR 27 M21 FK2 0814 MTR 28 M22 FM2 3670 MTR 1 E110 0001 M24 FH6 1717 MTR 6 M25 FK2 0824 MTR 8 M26 FK2 0820 MTR 10 M27 FK2 0822 MTR 9 Notation Dupl...

Страница 515: ...Unit T 14 8 Notation Name Description Parts No Connector Interface PCB Reader controller PCB FM501 reader unit cooling fan cools the reader unit FH5 1061 J313 J308 J202 M12 M1 M17 M25 M26 M24 M11 M27...

Страница 516: ...ower supply for fixing FM8 duplexing feed fan cools the duplexing feed motor FM9 circulation duct fan cools the inside of the machine Notation Parts No I O Error FM1 FK2 0837 P020 6 1 ON E805 0002 FM2...

Страница 517: ...Interface PCB Reader controller PCB PS501 ADFopen closed1 sensor detects the state open closed of the ADF FK2 0149 J310 307 J203 PS502 Scanner HP sensor detects scanner home position FK2 0149 J310 30...

Страница 518: ...r detects the left deck re try PS21 Cassette 3 re try sensor detects the cassette 3 re try PS22 Cassette 4 re try sensor detects the cassette 4 re try PS23 Manual feed paper sensor detects the Manual...

Страница 519: ...resent J112 PS8 FK2 0149 P002 4 1 present J112 PS9 FK2 0149 P009 12 0 open J115 PS10 FK2 0149 J115 PS11 FK2 0149 P001 9 1 present J115 PS12 FK2 0149 P008 4 1 present J115 PS13 FK2 0149 P001 3 1 presen...

Страница 520: ...FG5 6289 J108 UN14 FG6 1941 P009 5 1 present J113 UN15 FG6 1941 P009 6 1 present J113 UN16 FG5 1957 J111 UN17 FG5 1957 J125 UN18 FM2 3786 J111 UN19 FM2 3786 J125 Notation Parts No I O DC controller P...

Страница 521: ...tch turns on off the drum heater WC1 5179 SW4 cassette heater switch turns on off the cassette heater WC1 5179 SW5 waste toner feedscrew lock detection switch detects the state locked of the waste ton...

Страница 522: ...Name Description Parts No H501 lens heater prevents condensation on the lens F26 4601 100V option F26 4611 230V service part H502 mirror heater prevents condensation on the mirror F26 4601 100V optio...

Страница 523: ...THM2 fixing sub thermistor performs fixing temperature control detects error FM2 4161 THM3 shutter thermistor performs fixing temperature control detects error FK2 0809 thermistor unit TH5 drum thermi...

Страница 524: ...iption Parts No 1 interface PCB serves as the interface with the printer and ADF FM2 3624 2 reader controller PCB controls the reader unit FM2 3623 3 CCD AP PCB performs analog image processing FM2 31...

Страница 525: ...drive PCB controls the laser drive FM2 3670 laser scanner unit 11 BD developing PCB detects the laser beam 12 control panel keypad PCB controls the keys and LEDs FM2 1250 13 control panel CPU PCB con...

Страница 526: ...Chapter 14 14 18 F 14 13 14 2 8 Connectors 14 2 8 1 Connectors 0009 7598 4 8 5 1 18 20 15 10 2 13 6 19 17 14 12 11 9 16 3 22 7 21...

Страница 527: ...59 J270 J274 J258 J268 J263 CON1 CON2 J260 J254 J255 J261 J262 J271 J251 J251 J251 J128 J118 J106 J119 J3005 J3005 J256 J3004 J304 J303 J3001 J257 J3009 J1004 J1003 J1006 J1005 J3003 J3002 J3008 J3007...

Страница 528: ...0 J112 J115 J565 J569 J116 J101 J102 J573 J2106 J574 J115 J804 J9004 J9003 J9006 J802 J810 J806 J9008 J805 J809 J8508 CN1 J1521 J801 J571 J572 J5701 J5700 J534 J5370 J537 J532 J535 J536 J533 J544 J547...

Страница 529: ...3 J1502 J2 J408 J103 J1504 J2002 J3 J1 J203 J3230 J1405 J191 J192 J193 J162 J161 J1610 J163 J151 J165 J1761 J203 J103 J227 J229 J236 J224 J225 J234 J222 J1513 J231 J223 J228 J235 J230 J1518 J233 J2305...

Страница 530: ...J6801 J1112 J6801 J6802 J1533 J1062 J1060 J1024 J1018 J9011 J1354 J1355 J3 J2 J1 J4001 J4016 J3501 J2054 J754 J114 J123 J124 J1541 J1542 J1 J3 J1015 J753 J9 J1113 J1111 J1110 J511 J9012 J9000 J1023 J3...

Страница 531: ...03 J4505 J4502 J566 J102 J119 J7371 J705 J704 J2055 J2055 J3504 J9013 J3502 J707 J701 J1021 J703 J3001 J4015 J4017 J104 J414 J412 J2122 J2102 J2104 J2101 J2113 J2103 J2110 J413 J411 J417 J105 J2052 J2...

Страница 532: ...J104 J103 J1030 J726 J303 J1040 J2109 J5770 J577 J5500 J550 J4006 J4003 J4009 J718 J1401 J101 J111 J125 J719 J325 J702 J124 J251 J1404 J902 J903 J108 J107 J322 J6310 J6320 CON1 CON2 CON1 J713 CON2 J2...

Страница 533: ...Chapter 14 14 25 F 14 20 J1 J1403 J2 J8400 J4007 J505 J202 J101 J102 J306 J305 J303 J308 J312 J203 J307 J301 J313 J310 J7 J6 J8 J5100 J309 J5101 J2053 J201 J5102 J206 J205 CN2 J207 CN1 J204...

Страница 534: ...Chapter 14 14 26 F 14 21 G3 FAX BOARD 100V 1 LINE J5200 J5100 J5101 J5201 J3 J4 J2 J31 J260 J261 J2032 J5011 J741 J1000 J911 J1030 J1059 J5010 J4019 J5127 J2004 J381 J380 J401 J101 J1 J105 J104 J102...

Страница 535: ...Chapter 14 14 27 F 14 22 G3 FAX BOARD 100V 2 LINE J10 J2 J1 J10 J2 J31 J260 J261 J132 J2011 J841 J7000 J911 J1059 J2010 J4019 J2127 J2004 J101 J202 J1 J201 J105 J106 J206 J104 J102 J1005...

Страница 536: ...Chapter 14 14 28 F 14 23 G3 FAX BOARD 120V 1 LINE J3 J4 J2 J31 J260 J261 J3030 J6011 J6001 J911 J1030 J1059 J6010 J4019 J6127 J281 J232 J101 J1 J105 J104 J102...

Страница 537: ...Chapter 15 Self Diagnosis...

Страница 538: ......

Страница 539: ...Error Code 15 3 15 2 2 E602 in Detail 15 13 15 3 Error Code SEND 15 15 15 3 1 Results of Self Diagnosis 15 15 15 3 2 Error Codes 15 16 15 4 Jam Code 15 21 15 4 1 Jam Code machine proper 15 21 15 4 2 J...

Страница 540: ......

Страница 541: ...he intensity of light E227 there is an error in the power supply 24 V E240 there is an error in the communication between the main controller PCB and the DC controller PCB E248 there is an EEPROM erro...

Страница 542: ...munication is faulty E733 the printer communication is faulty E740 the Ethernet board is faulty E743 the DDI communication is faulty E744 the language file boot ROM is faulty E745 the TokenRing board...

Страница 543: ...er PCB 0001 The reading of the main thermistor is not 150 deg C 15 after it has exceeded 100 deg C 0010 The power has been turned off and then back on without resetting the error Reset the error COPIE...

Страница 544: ...n operation has been under way for the supply of toner to the developing assembly Check the connector of the developing toner sensor for any fault in connection Replace the developing toner sensor Rep...

Страница 545: ...of light is inadequate 0001 At time of shading the intensity if below a specific level Check the connector for any fault in connection Replace the scanning lamp Replace the inverter PCB Replace the re...

Страница 546: ...ted for a specific period of time E530 There is a front alignment error finisher 8001 The home position sensor does not go off even when the front alignment motor has rotated for a specific period of...

Страница 547: ...Is it normal 3 Is there a fault in the shutter mechanism 4 Try replacing the stack edging motor and the shutter open close clutch Is the problem corrected 0002 The shutter open sensor does not go on...

Страница 548: ...n sensor does not go off even when the guide motor has been driven for 1 sec guide motor M3S guide home position sensor PI13S E5F3 There is a saddle alignment error 0001 The aligning plate home positi...

Страница 549: ...r switch MS2S or the delivery cover switch MS3S is open inlet cover switch MS1S front cover switch MS2S delivery cover switch MS3S Check the inlet cover switch MS1S front cover switch MS2S and the del...

Страница 550: ...on processing area 0301 The attempt to create an ID key has failed 0302 A fault has been detected in the encryption key Turn off and then on the main power This error will reset all content on the HDD...

Страница 551: ...e is a fault in video connection with an external controller A006 absence of PDL response there is no PDL response because of a fault in or the absence of Subbootable Execute PDL resetting Turn off an...

Страница 552: ...000 The DC power supply fan stop signal has been detected for 5 sec or more even when the DC power fan is on Check the connection of the connector Replace the fan 0001 The IH power supply cooling fan...

Страница 553: ...sector repair routine starts and the control panel goes black 2 See the progress of operation on the display at the start the upper left cursor will flash When the display goes white turn off and the...

Страница 554: ...art download mode from service mode then execute full formatting using the SST and re install the system software Thereafter turn off and then back on the power 7 1 Execute HD CLEAR by setting 1 2 3 a...

Страница 555: ...gs The IP address in question cannot be identified 1 In user mode check the DNS settings 2 On the DNS side check the DNS data settings If the login information for the LDAP server is set to use securi...

Страница 556: ...aper The cassette is not fitted properly Fit the cassette correctly 011 The original to be transmitted is not placed properly Start over from the beginning 012 The target is out of recording paper and...

Страница 557: ...nt is being used Start over once again 711 All memory of the Box is used Delete files from the Box 712 The Box is full of files Remove file from the Box 713 The file has been removed from the Box befo...

Страница 558: ...wrong Change the user name or the password of the address The address specified for e mail i fax transmission is wrong Check the address of the e mail i fax in question 810 When an attempt is made to...

Страница 559: ...onditions 835 The number of text lines is more than the maximum number of lines permitted for i fax Ask the target to decrease the number of text lines and try once again 837 A request has been made b...

Страница 560: ...multiple servers and there is no way of finding out whether the transmission has reached the target 1 Check with the target to see if the transmission has arrived 2 Check to see if an error notice has...

Страница 561: ...r PS21 xx0E cassette 4 delivery sensor PS22 xx0F fixing claw jam sensor PS4 xx10 inside delivery sensor PS35 xx11 outside delivery sensor PS36 xx12 delivery assembly jam sensor PS46 xx13 reversal sens...

Страница 562: ...of No 2 registration 0006 read sensor PI8 The read sensor detects paper a feed length of 500 mm if extra length 200 mm after the start of feed resumed after a temporary stop for reading At time of LTR...

Страница 563: ...7 PI8 PI9 Paper has been detected in the path while the 1st sheet is being picked up 0095 original set sensor DF cover open closed sensor ADF open closed sensor 1 PI5 PI6 PS502 With no paper in the tr...

Страница 564: ...rum cleaner system waste toner collection system 0001 waste other case full 30 high voltage system 0001 primary charging assembly leakage 0002 transfer charging assembly leakage 0003 separation chargi...

Страница 565: ...Chapter 16 Service Mode...

Страница 566: ......

Страница 567: ...16 3 5 MN CON 16 20 16 3 6 P CON 16 20 16 4 ADJUST Adjustment Mode 16 25 16 4 1 COPIER 16 25 16 4 1 1 COPIER List 16 25 16 4 2 FEEDER 16 28 16 4 2 1 FEEDER List 16 28 16 4 3 SORTER 16 29 16 4 3 1 SOR...

Страница 568: ......

Страница 569: ...item screen Level 1 User screen Initial screen Level 2 Reset key Previous next page 2 8 Select a main item from the top of screen The corresponding intermediate items are then displayed and can be sel...

Страница 570: ...he display returns to the user screen standard screen When using the ADJUST FUNCTION or OPTION service mode be sure to turn the main power switch ON OFF after exiting the mode 16 1 4 Backing Up Servic...

Страница 571: ...5963 F 16 5 16 1 6 Main intermediate item screen 0009 5965 F 16 6 16 1 7 Sub item screen 0009 5966 COPIER FEEDER SORTER BOARD Initial items Touch an item to select it VERSION USER ACC STS ANALOG CST S...

Страница 572: ...TONER No toner WTNR FUL Waste toner full NO PAPER No paper ALERM Alarm READY JAM SERVICE WAITING DOOR COPYING ERROR Adjust Function Option Test Counter I O PREV NEXT OK xxxxx yyyyy aaaaa to bbbbb Togg...

Страница 573: ...n of OCR of the Chinese language file simplified 1 OCR JP indicates the version of OCR of the Japanese language file 1 OCR KR indicates the version of OCR of the Korean language file 1 OCR TW indicate...

Страница 574: ...ler PCB 256 MB 512 MB 1 COINROBO indicates the connection of a coin vendor 0 not connected 1 connected 1 NIB indicates the connection of a network board 0 not connected 1 Ethernet board connected 2 To...

Страница 575: ...in increments of 1 deg C 1 FIX UE fixing roller edge temperature sub thermistor THM2 indicates the temperature of the edge of the fixing roller between 0 and 255 deg C in increments of 1 deg C 1 FIX...

Страница 576: ...he higher the number the older the jam DATE indicates the date of occurrence of the error in question TIME1 indicates the time of occurrence of the error in question TIME2 indicates the recovery time...

Страница 577: ...alue for printer image in V 1 VDT P dark area potential target value for printer image in V 1 LLMT P laser output limit check for printer 0 normal 1 error 2 PLMT P primary charging current limit value...

Страница 578: ...ted as a history of changes in the following machine inside temperature deg C humidity fixing roller surface middle deg C F 16 12 T 16 10 Memo The interval at which data is acquired may be changed usi...

Страница 579: ...ent 179 or higher 1 RDSN LMN read sensor light emission level indicates the manual adjustment value light emission voltage of the read sensor optimum range 179 or lower 1 RDSN RCV read sensor light re...

Страница 580: ...12 16 3 I O I O Display Mode 16 3 1 Outline 0009 6063 The following provides a guide to the screen appearing in response to the following COPIER I O F 16 13 F 16 14 A bit 0 B bit 15 C address 16 3 2 R...

Страница 581: ...ent 2 original size detection 2 0 original present 3 original size detection 3 0 original present 4 DF connection detection 5 DDIS IF SRTS 0 permit reception 6 scanner motor Vref output 7 not used P00...

Страница 582: ...tch drive 1 ON 6 original detection LED 1 ON 7 fan motor drive 1 ON P003 0 pickup motor current setting CUT 1 feed motor current setting CUT 2 engagement motor current setting 3 feed motor mode settin...

Страница 583: ...pe feed motor CLK IRQ0 1 not used 2 saddle connection detection 0 connected 3 upper tray FG IRQ3 4 swing lock HP sensor 1 HP 5 not used 6 front cover open closed sensor 0 open 7 not used P005 0 TxD fo...

Страница 584: ...5 EEPROM output signal 6 EEPROM enable signal 7 EEPROMCLK P014 0 EEPROM input signal 1 aligning plate FHP sensor 1 HP 2 aligning plate RHP sensor 1 HP 3 handling tray paper sensor 1 paper present 4 tr...

Страница 585: ...ignal 3 stack edging motor phase B signal 4 upper tray paper surface sensor 1 paper present 5 stapler interlock 1 open 6 shutter HP sensor 1 HP 7 swing guide interlock 1 open P022 0 DIPSW_8 0 ON 1 DIP...

Страница 586: ...0 0 1 not used 2 saddle folding motor FWD CW 1 ON 3 saddle folding motor RV CCW 1 ON 4 saddle folding CLK sensor IRQ0 5 saddle butting CLK sensor IRQ1 6 saddle rear stapler HP sensor IRQ2 1 HP 7 saddl...

Страница 587: ...cted 3 24V detection signal 0 detected 4 for revision control 5 for revision control 6 for revision control 7 for revision control P038 0 download ON signal 1 ON 1 not used 4 LED3 0 ON 5 LED2 0 ON 6 L...

Страница 588: ...esent 1 registration paper sensor signal 1 paper present 2 right deck retry sensor signal 1 paper present 3 cassette 3 paper sensor signal 1 paper present 4 vertical path 3 paper sensor signal 1 paper...

Страница 589: ...ction signal 0 3 cassette 4 size detection signal 1 4 fixing shutter thermistor overheating detection signal 1 overheating 5 fixing sub thermistor overheating detection signal 1 overheating 6 fixing m...

Страница 590: ...gnal 0 ON 11 right deck open closed sensor signal 0 open 12 left deck open closed signal 0 open 13 lower right door open closed sensor signal 0 open 14 bottle cover sensor signal 0 open 15 front door...

Страница 591: ...speed ON signal 1 ON 6 lower fan half speed ON signal 1 ON 7 lower fan full speed ON signal 1 ON P014 0 IH power supply cooling fan half speed ON signal 1 ON 1 IH power supply cooling fan full speed...

Страница 592: ...eed sensor signal 1 paper present 5 deck pickup clutch ON signal 1 ON 6 not used 7 deck paper supply position sensor signal 1 ON P026 0 deck paper level sensor signal 1 paper present 1 deck lifter low...

Страница 593: ...on adjustment range 1 to 100 default 20 1 ADJ Y Use it to adjust the image read start position Y direction adjustment range 47 to 131 default 90 1 ADJ S Use it to adjust the point at which data is col...

Страница 594: ...n Level BLANK T Use it to enter the image leading edge non image width 1 adjustment range 1 to 500 default 118 If you have initialized the RAM on the DC controller PCB or replaced the PCB enter the va...

Страница 595: ...0 to 100 default 0 1 D PRE TR Use it to enter the pre transfer charging assembly high voltage offset value for the DC controller PCB adjustment range 50 to 50 default 0 1 D HV TR Use it to enter the t...

Страница 596: ...255 1 C3 LVOL Use it to enter the capacity of the cassette 3 50 sheets adjustment range 0 to 255 1 C3 HVOL Use it to enter the capacity of the cassette 3 275 sheets adjustment range 0 to 255 1 C4 LVO...

Страница 597: ...29 16 4 3 SORTER 16 4 3 1 SORTER List 0009 6360 T 16 31 COPIER SORTER ADJUST Sub item Description Level PNCH HLE Use it to adjust the length from the edge of paper to the punch hole settings range 4 t...

Страница 598: ...e item to highlight and press the OK key 2 See where a connection has been made The result will be indicated as OK or NG OK connection possible NG connection not possible 1 COM LOG Use it to indicate...

Страница 599: ...form potential control at power on recovery mode if the temperature of the fixing assembly is 70 deg C or higher If you have replaced the photosensitive drum or the laser unit or if you have changed t...

Страница 600: ...ts 2 Put A4 plain or recycled paper in the manual feed tray 3 Select the item to highlight and press the OK key 4 See that the paper is picked from the manual feed tray held in the fixing nip area and...

Страница 601: ...eck range 1 to 5 Procedure 1 Select the item 2 Using the keypad type in the code of the clutch 3 Press the OK key 4 Press CL on to check the operation 1 CL ON Use it to start a check on the clutch Pro...

Страница 602: ...p motor M11 6 left deck pickup motor M24 7 cassette 3 4 pickup motor M12 8 vertical path duplexing feed motor M25 9 vertical path lower motor M27 10 vertical path upper motor M26 11 side deck main mot...

Страница 603: ...ings will be initialized when you turn off and then on the main power switch Procedure 1 Print out the service mode particulars using the following COPIER FUNCTION MISC P P PRINT 2 Select the item and...

Страница 604: ...inted out using P PRINT 1 CARD Use it to reset the data related to card ID group The card ID related data will be reset when the main power switch is turned off and then back on Procedure 1 Select the...

Страница 605: ...ronment sensor 1 Select the item 2 Press the OK key to generate a printout 1 KEY HIST Use it to print out the history of control panel key inputs 1 Select the item 2 Press the OK key to generate a pri...

Страница 606: ...tment of paper width detection reference print 2 of the ADF original pickup tray A5R 1 TRY LTR Use it to execute automatic adjustment of paper width detection reference point 1 of the ADF original pic...

Страница 607: ...n to stop the operation The operation will stop automatically in about 5 sec however the indication will not be STOP unless the OK key is pressed once again 1 MTR ON Use it to start the operation of t...

Страница 608: ...r switch 1 TR_SP_C1 Use it to change the transfer separation output settings when the right deck is used as the source of paper by way of providing a remedial measure Setting 0 normal default 1 double...

Страница 609: ...erence to clock time setting 0 15 to 1440 default 0 in min 1 CBLTINVL Use it to change the number of times the fixing web solenoid goes on Make use of it when image faults occur as the result of soili...

Страница 610: ...elect the particular language using the and keys 2 HI HUME Use it to change the developing bias frequency If a separation fault occurs in a high humidity environment set it to 1 setting 0 2700 Hz defa...

Страница 611: ...n speed when a connector is made to a service network setting 0 auto default 1 100Base Tx 2 10Base T 2 STS PORT Use it to enable disable the port for TOT synchronous command communications setting 0 d...

Страница 612: ...User Mode key 2 SSH SW Use it to enable disable the SSH server function Setting 0 off default 1 on 2 RMT LGIN Use it to turning the SSH server function ON or OFF Setting 0 off default 1 on 2 RE PKEY U...

Страница 613: ...it to set soft counter 6 of the user mode screen setting 0 to 999 1 CONTROL Use it to limit the use of the control card for PDL jobs setting 0 do not limit default 1 limit 1 B4 L CNT Use it to specify...

Страница 614: ...SP Use it to enable disable indication of a serial number in response to a press on the Counter Check key setting 0 display serial number default 1 do not display serial number 2 PH D SEL Select the n...

Страница 615: ...ission size limit valid using server not using server 1 keep transmission size limit invalid only when not using server default 2 IFAX PGD Use it o enable disable page based division transmission only...

Страница 616: ...color 1 106 total full color 2 108 total black and white 1 Yes 109 total black and white 2 Yes 110 total mono color large 111 total mono color small 112 total back and white large Yes 113 total black...

Страница 617: ...B mono color 2 168 total B full color large 169 total B full color small 170 total B full color mono color large 171 total B full color mono color small 172 total B full color mono color 2 173 total...

Страница 618: ...ll Yes 257 copy A full color mono color large 258 copy A full color mono color small 259 copy A full color mono color 2 260 copy A full color mono color 1 261 copy A full color large duplex 262 copy A...

Страница 619: ...mote copy full color large duplex 019 remote copy full color small duplex 020 remote copy mono color large duplex 021 remote copy mono color small duplex 022 remote copy black and white large duplex 0...

Страница 620: ...04 copy print black and white small 405 copy print black and white 2 406 copy print black and white 1 407 copy print full color mono color large 408 copy print full color mono color small 409 copy pri...

Страница 621: ...ack and white small duplex 701 reception print total 1 Yes 702 reception print total 2 Yes 703 reception print large Yes 704 reception print small Yes 705 reception print full color 1 706 reception pr...

Страница 622: ...nt black and white large duplex 826 report print black and white small duplex 901 copy scan total 1 color 902 copy scan total 1 black and white 903 copy scan total 2 color 904 copy scan total 2 black...

Страница 623: ...ission scan box color 958 transmission scan box black and white COPIER OPTION CST Sub item Description Level P SZ C1 Use it to set the paper size right deck setting 6 A4 default 15 B5 18 LTR 1 P SZ C2...

Страница 624: ...mit not permit printing from application PrintMe built into the PS print server unit setting 0 permit printing using unspecific ID default 1 permit printing using specific account 2 reject printing 2...

Страница 625: ...ite function of encryption PDF searchable PDF as part of transfer invalidation 2 TR EXPDF Use it to obtain a transfer license key for the PDF expansion kit composite function of encryption PDF searcha...

Страница 626: ...etting 0 stamp absent 1 stamp present default 1 COPIER SORTER OPTION Sub item Description Level BLNK SW Use it to set the margin width on both sides of a crease when the saddle stitcher is in use sett...

Страница 627: ...halftone 60H error diffusion T BIC 12 halftone 60H dither screen 13 halftone 30H error diffusion T BIC 14 halftone 30H dither screen 15 17 gradations text mode 16 17 gradations text photo mode 17 17 g...

Страница 628: ...NG suspect a fault in the IP address of the machine or of the network controller Ask the system administrator for a check on the IP address or replace the main controller PCB If the indication is OK...

Страница 629: ...Increases the count when paper is discharged outside the machine or duplex stacking occurs to suit the charge counter in remote print mode in the case of a blank sheet the count remains unchanged for...

Страница 630: ...cription Level FEED ADF original pick total counter 1 DFOP CNT Indicates the number of times the ADF hinge has opened closed setting 0 OFF default 00000000 to 99999999 1 COPIER COUNTER JAM Sub item De...

Страница 631: ...4 SP RL cassette 4 separation roller counter 1 C4 FD RL cassette 4 feed roller counter 1 LD PU RL left front deck pickup roller counter 1 LD SP RL left front deck separation roller counter 1 LD FD RL...

Страница 632: ...ADF dust collecting tape for both simplex and duplex modes the count is increased by 1 for each original read not its sides 1 LNT TAP4 Indicates the number of sheets moving past the ADF dust collectin...

Страница 633: ...Chapter 17 Upgrading...

Страница 634: ......

Страница 635: ...dure 17 19 17 4 3 Downloading SDICT 17 21 17 4 3 1 Outline 17 21 17 4 3 2 Downloading Procedure 17 21 17 4 4 Downloading MEAPCONT 17 22 17 4 4 1 Outline 17 22 17 4 4 2 Downloading Procedure 17 22 17 4...

Страница 636: ......

Страница 637: ...wing functions Type Type of system software Method of upgrading Remarks SST ROM DIMM replacement Machine System main controller Yes No The machine controller is also used to control the Super G3 Fax B...

Страница 638: ...main power while holding down 1 7 then make the following selections in service mode COPIER FUNCTION SYSTEM DOWNLOAD Safe Mode download mode A turn on the main power while holding down 2 8 Initialize...

Страница 639: ...ST in use T 17 2 Function Download mode Normal mode download mode B Safe mode download mode A Formatting the HDD Entire HDD BOOTDEV FSTDEV TMP_GEN TMP_PSS TMP_FAX APL_SEND APL_MEAP APL_GEN PDL_DEV FST...

Страница 640: ...wnloading backup data SramImg Meapback Function Download mode Normal mode download mode B Safe mode download mode A Boot ROM FLASH ROM HDD System Software System Software Download Mode iR2270i JPjaxxx...

Страница 641: ...Chapter 17 17 5 F 17 4 HDD Boot ROM Flash ROM System Software...

Страница 642: ...D to the SST Preparatory Work Items to Prepare PC to which the SST version 3 11 or later has been installed System CD for the iR6570 5570 Series Registering the System Software 1 Start up the PC 2 Set...

Страница 643: ...F 17 6 6 The list of system software found on the System CD appears Remove the check from the folders and software you will not need then click REGISTER F 17 7 7 When the result of registration is ind...

Страница 644: ...d pair cross cable 10Base T Category 3 or 5 100Base TX Category 5 Procedure 1 Start up the PC 2 Check the network settings of the PC At the command prompt type IPCONFIG and press the Return key Check...

Страница 645: ...make the following selections COPIER FUNCTION SYSTEM DOWNLOAD Safe Mode Turn on the main power switch while holding down 2 8 6 Start up the Service Support Tool 7 Select the model of the machine to co...

Страница 646: ...Chapter 17 17 10 F 17 11 8 Click START F 17 12...

Страница 647: ...eeded for partition settings is stored under HDFormat of the iRXXXX F 17 13 1 HDD service part without partition setup 2 Formatting of all partitions in safe mode only 3 HDD after formatting 4 Partiti...

Страница 648: ...ALL you may execute formatting without registering HDFormat 2 An attempt to format after selecting TMP_FAX in the absence of a fax board will cause an error 17 3 3 Formatting the Partitions 0009 5914...

Страница 649: ...Chapter 17 17 13 F 17 16 3 Click Start 4 When the Confirmation screen has appeared click Execute Formatting F 17 17 5 When the session has ended click OK...

Страница 650: ...Start a download session Or turn off and then on the machine to end the work If you have formatted all partitions or formatted BOOTDEV be sure to download System newly Otherwise E602 will occur when...

Страница 651: ...an Unlike previous iR controllers however there is only one type of system software Previously one type supported NetWare while the other did not There is now only one type for the machine supporting...

Страница 652: ...turn off and then on the main power 6 See the upgrade status indicated on the control panel When a message appears asking you to turn off and then on the switch turn off and then on the main power Be...

Страница 653: ...at and then download system software to be stored in the HDD such as System Language and RUI 17 4 2 Downloading RUI and Language 17 4 2 1 Outline 0008 7410 download shell SYSTEM JPja m SYSTEM ZZ SYSTE...

Страница 654: ...correct E744 will be indicated and System Language will be used when the main power is turned off and then on RUI Display Language Select using the RUI You can select a different language for a differ...

Страница 655: ...download session in either normal or safe mode In the Case of Language 1 Select the version of Language to download F 17 26 2 Click Start Download iR Language XXen XXja RUI XXen XXja SST Service PC iR...

Страница 656: ...control panel When a message appears asking you to turn off and then on the machine turn off and then on the main power Be sure never to turn off the power while the machine is executing a downloading...

Страница 657: ...eader unit into character code OCR processing This function is used in conjunction with the PDF Generation Expansion Kit 17 4 3 2 Downloading Procedure 0009 5919 You can run a downloading session in e...

Страница 658: ...ng a downloading session or writing downloaded software Otherwise the ongoing session will be suspended and the machine may fail to start up If the machine fails to start up format BOOTDEV using HDFor...

Страница 659: ...Chapter 17 17 23 F 17 32 2 Click Start F 17 33 3 When the downloading session has ended click OK...

Страница 660: ...oaded software Otherwise the ongoing session will be suspended and the machine may fail to start up If the machine fails to start up format BOOTDEV using HDFormat and then download system software to...

Страница 661: ...Chapter 17 17 25 F 17 35 2 Click Start F 17 36 3 When the downloading session has ended click OK...

Страница 662: ...is executing a downloading session or writing downloaded system software Otherwise the ongoing write operation will be suspended and the machine may fail to start up If the machine fails to start up f...

Страница 663: ...Chapter 17 17 27 F 17 38 2 Click Start F 17 39 3 When the downloading session has ended click OK...

Страница 664: ...re never to turn off the machine while it is executing a downloading session or writing downloaded system software Otherwise the ongoing write operation will be suspended and the machine may fail to s...

Страница 665: ...n in either normal or safe mode 1 Select the version of BOOT to download F 17 42 PC for service SST Boot ROM Flash ROM DIMM iR iR Boot may be upgraded by DIMM replacement Download Main controller bloc...

Страница 666: ...ontrol panel of the machine When a message appears asking you to turn off and then on the switch turn off and then on the main power Be sure never to turn off the machine while it is executing a downl...

Страница 667: ...software It is a good idea to download both types of system software F 17 45 You will not be able to download Rcon unless the DC controller has started up normally as otherwise the power supply contr...

Страница 668: ...Chapter 17 17 32 F 17 46 2 Click Start F 17 47 3 When the downloading session has ended click OK...

Страница 669: ...r writing downloaded system software Otherwise the machine may not be able to start up If the machine fails to start up format BOOTDEV using HDFormat and then download system software to be stored in...

Страница 670: ...have to replace the flash ROM DIMM 17 4 9 2 Downloading Procedure 0009 5927 You will have to use normal mode for downloading 1 Select the version of G3FAX you want to download F 17 50 2 Click Start F...

Страница 671: ...ard fails to function be sure to replace the flash ROM DIMM found on the G3 fax board 17 4 10 Uploading and Downloading Backup Data 17 4 10 1 Outline 0008 7845 SramImg is data that is stored in the SR...

Страница 672: ...for uploading 1 Select Upload Data F 17 54 2 Select the data you want to back up Service PC Main controller unit Main controller PCB SramImg bin iR XXXX SramImg Meapback SST HDD Meapback bin System Pr...

Страница 673: ...Chapter 17 17 37 F 17 55 3 Click Start F 17 56 4 Enter a name of the file to be saved and fill out a memo as needed Then click the save button...

Страница 674: ...Chapter 17 17 38 F 17 57 5 Click OK F 17 58 17 4 10 3 Downloading Procedure 0009 5931 Use safe mode for downloading 1 Select Download Data...

Страница 675: ...Chapter 17 17 39 F 17 59 2 Select the data to download F 17 60 3 Click Start...

Страница 676: ...you to turn off and then on the switch turn off and then on the main power Be sure not to turn off the machine while it is executing a downloading session or writing downloaded system software The wr...

Страница 677: ...Chapter 18 Service Tools...

Страница 678: ......

Страница 679: ...Contents Contents 18 1 Service Tools 18 1 18 1 1 List of Special Tools 18 1 18 1 2 List of Solvents Oils 18 2...

Страница 680: ......

Страница 681: ...93 A 3 Mirror positioning tool front rear FY9 3009 B Used when positioning the No 1 No 2 mirror 4 NA 3 Test Sheet FY9 9196 A Used when adjusting checking images 5 Potential sensor electrode FY9 3012 B...

Страница 682: ...eaning metal part oil toner Fluorescent family hydrocarbon chlorine family hydrocarbon alcohol Do not bring near fire Procure locally 3 Heat resisting grease Lubrication fixing drive parts Mineral fam...

Страница 683: ...Mar 29 2005...

Страница 684: ......

Отзывы: