•
Borderless Printing at Actual Size (Mac OS)
Borderless Printing at Actual Size (Windows)
Borderless Printing at Actual Size (Windows)
This topic describes how to print borderlessly at actual size based on the following example.
Important
•
When borderless printing is used, the edge of the paper is cut during printing. Thus, ink density may be uneven at
the edges. If you require higher image quality, select
No
from the
Automatic Cutting
list in the
Roll Paper Op-
tions
dialog box. In this case, the paper can be printed without borders on the left and right sides only. Once
printed and cut, please cut the upper and lower bands with scissors.
•
Document: Any type
•
Page size: 10×12 inches (254.0×304.8 mm)
•
Paper: Roll
•
Paper type:
Canon Glossy Photo Paper 170gsm
•
Roll paper width: 10 inches (254.0 mm)
1
Create the original in the source application 3 mm (0.12 in) larger on each side than 254.0×304.8 mm (10 ×
12 in) —that is, 260.0×310.8 mm (10.2 × 12.2 in)
Note
•
If you can specify the margin, as in Microsoft Word, set the margin at 0 mm. For instructions on specifying
the margin, refer to the software documentation.
•
The extra 3 mm (0.12 in) on each side will not be printed. Create the original so that it fits inside the paper
area to be printed on.
2
Choose
in the application menu.
3
Select the printer in the dialog box, and then display the printer driver dialog box.
er Driver Dialog Box from Applications .")
4
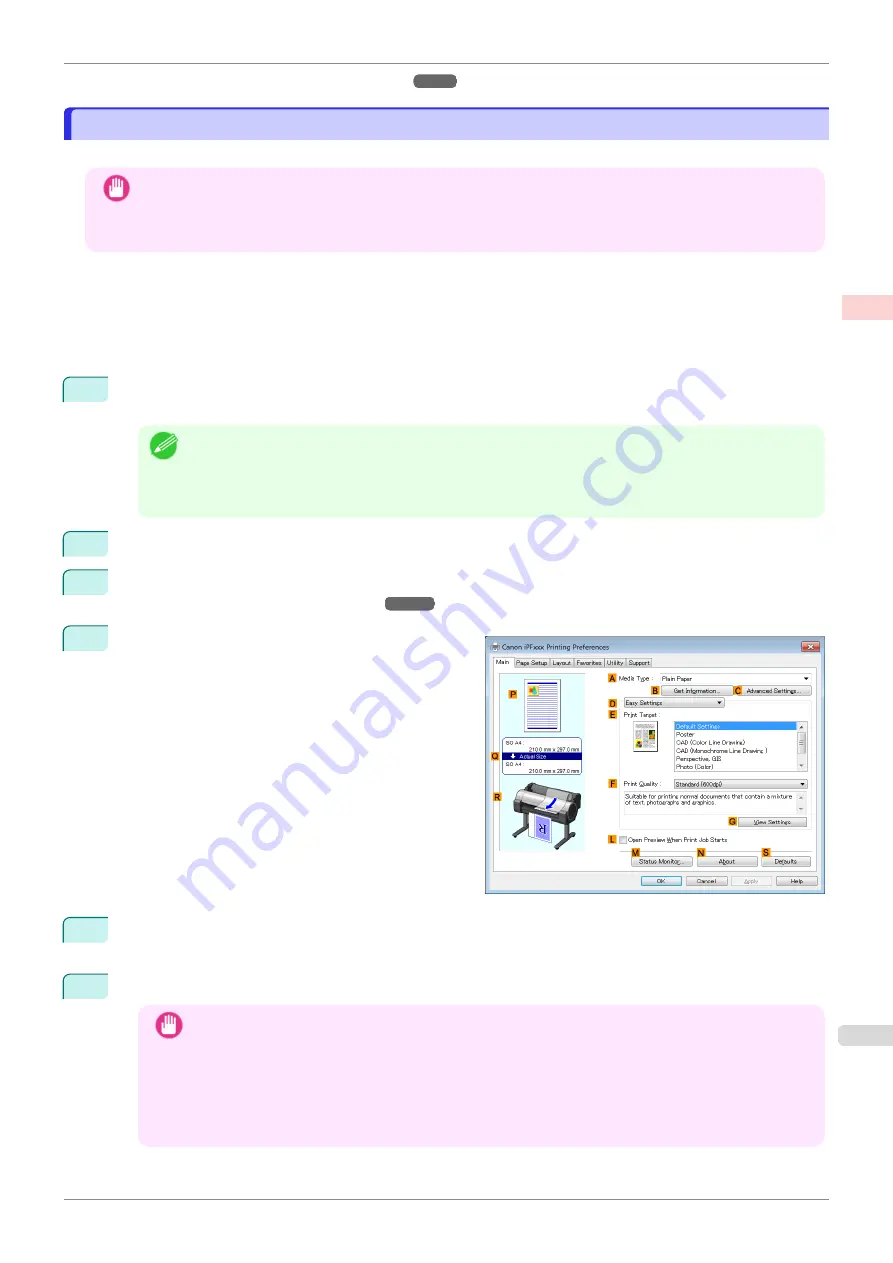
Make sure the
Main
sheet is displayed.
5
In the
A
Media Type
list, select the type of paper that is loaded. In this case, click
Canon Glossy Photo
Paper 170gsm
.
6
Select the print target in the
E
Print Target
list.
Important
•
When you are using paper that takes longer for ink to adhere for borderless printing and the Cutter Unit
touches printing surfaces that are not dry yet, it may damage the paper or the edge of the document that
is cut, depending on frequency of use. In this kind of situation, change the ink drying time using the
following procedure.
•
Click
Advanced Settings
in
Media Type
.
•
Select an ink drying time in the list for the
Between Pages
setting of
Drying Time
.
iPF770
Borderless Printing at Actual Size (Windows)
Enhanced Printing Options
Printing at full size
73
Содержание imagePROGRAF iPF770
Страница 26: ...iPF770 User s Guide 26 ...
Страница 345: ...6 Pull the Release Lever forward iPF770 Removing Sheets User s Guide Handling and Use of Paper Handling sheets 345 ...
Страница 440: ...iPF770 User s Guide 440 ...
Страница 460: ...iPF770 User s Guide 460 ...
Страница 478: ...iPF770 User s Guide 478 ...
Страница 494: ...iPF770 User s Guide 494 ...
Страница 592: ...iPF770 User s Guide 592 ...
Страница 594: ...iPF770 User s Guide ENG CANON INC 2014 ...


