Canon imageclass MF229DW Скачать руководство пользователя страница 225

[Select Purpose]

Select a setting based on your intended use of the scanned image.

[Print (300dpi)]

Select when printing the scanned image.

[Image Display (150dpi)]

Select when displaying the scanned image on a computer.

[OCR (300dpi)]

Select when using the scanned image with OCR (optical character recognition) software.
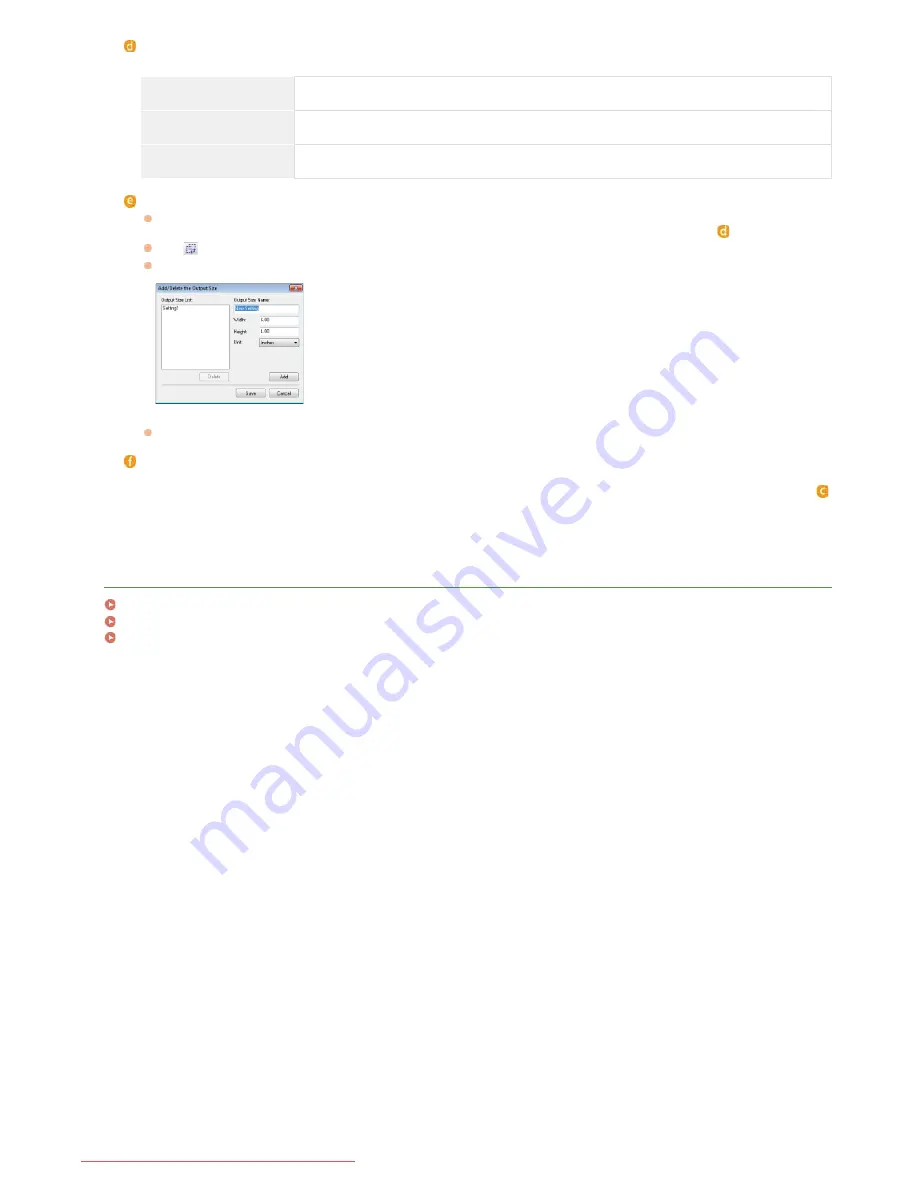
[Output Size]

Select the size of the scanned image when it is printed or displayed on a computer. For example, if you want to output an
image that is appropriate for printing on A4 paper, select [A4], and [Print (300dpi)] for [Select Purpose] (

).

Click

to switch between the portrait and landscape orientation. This button is not available when [Flexible] is selected.

If you select [Add/Delete], you can add new output size settings and delete the added sizes.

Select [Flexible] to change the ratio of width to height. Drag the area you want to scan on the preview image.

[Image Correction]

Select the [Fading Correction] check box to correct faded colors on an old photograph or other images into vivid colors. This
setting is available when a preview image is displayed and you select [Photo (Color)] or [Magazine (Color)] for [Select Source] (
).

LINKS

Configuring Scan Settings in Advanced Mode

Scanning Using MF Toolbox

Scanning Using an Application

㻞㻞㻡㻌㻛㻌㻠㻣㻡

Downloaded from ManualsPrinter.com Manuals

Содержание imageclass MF229DW

Страница 1: ...Downloaded from ManualsPrinter com Manuals...

Страница 2: ...ize 52 Registering in the Address Book 54 Registering Destinations in the Address Book 55 Registering Destinations for One Touch Dial 57 Registering Multiple Destinations for Group Dial 60 Adjusting t...

Страница 3: ...into Memory Memory Reception 124 Forwarding Received Faxes 127 Receiving Fax Information Services 129 Checking Status and Log for Sent and Received Documents 131 Importing Exporting Address Book Data...

Страница 4: ...ork 237 Connecting to a Network 238 Selecting Wired LAN or Wireless LAN MF229dw MF217w 240 Connecting to a Wired LAN 241 Connecting to a Wireless LAN MF229dw MF217w 242 Setting Up Connection Using WPS...

Страница 5: ...the Machine Status 314 Setting Up Menu Options from Remote UI 318 Saving Loading Address Book from Remote UI 320 Registering Address Book from Remote UI 323 Setting Menu List 325 Network Settings 326...

Страница 6: ...tem Management Settings 425 Initializing All Data Settings 426 Appendix 427 Feature Highlights 428 Going Green and Saving Money 429 Improving Efficiency 431 Going Digital 433 So Much More 435 Specific...

Страница 7: ...Contact Us 475 Downloaded from ManualsPrinter com Manuals...

Страница 8: ...ng this machine read this chapter and follow the instructions to properly use this machine Do not perform any operations not described in this manual Canon will not be responsible for any damages resu...

Страница 9: ...amaged resulting in a fire or electrical shock Do not use near any medical equipment Radiowaves emitted from this machine may interfere with medical equipment which may cause a malfunction and result...

Страница 10: ...chine is moved from a cool or dry location to a hot or humid location Using the machine under these conditions may result in paper jams poor print quality or damage to the machine Let the machine adju...

Страница 11: ...fire or electrical shock Do not wrap the power cord or tie it in a knot as this may result in a fire or electrical shock Insert the power plug completely into the AC power outlet Failure to do so may...

Страница 12: ...ing in injury For your safety please unplug the power cord if the machine will not be used for a long period of time Use caution when opening and closing covers to avoid injury to your hands Keep hand...

Страница 13: ...rcibly open and close doors covers and other parts Doing so may result in damage to the machine Do not touch the contacts Doing so may result in damage to the machine Do not turn OFF the machine durin...

Страница 14: ...enzenes paint thinners or other flammable substances Do not use tissue paper or paper towels If these substances come into contact with electrical parts inside the machine they may generate static ele...

Страница 15: ...aution so that toner does not get into your eyes or mouth If toner should get into your eyes or mouth immediately wash with cold water and consult a physician Use caution so that toner does not come i...

Страница 16: ...ons where there are corrosive gases i e aerosol sprays and ammonia Locations subject to high temperature and high humidity Locations subject to dramatic changes in temperature and humidity where conde...

Страница 17: ...how to view the display Parts and Their Functions Using the Display This section describes how to toggle the display and select items Using the Display Entering Text This section describes how to ente...

Страница 18: ...he volume of various machine sounds such as those produced when fax sending is complete or when an error occurs Adjusting the Volume Entering Quiet Mode This section describes how to place the machine...

Страница 19: ...parts of the machine used for such basic operations as placing documents loading paper and replacing the toner cartridges this section also describes the keys on the operation panel and display Read...

Страница 20: ...t for at least 10 seconds and turn it back ON Paper stopper Prevents paper that has been output after printing from falling Manual feed slot Load the paper into the manual feed slot when you want to t...

Страница 21: ...ls Included with the Machine LAN port Connect a LAN cable when connecting the machine to a wired LAN router etc For connection steps see Getting Started Manuals Included with the Machine External tele...

Страница 22: ...place Toner Cartridges Clearing Jams Toner cover Open this cover to replace the toner cartridges or clear paper jams How to Replace Toner Cartridges Clearing Jams Paper exit guide Open this guide to c...

Страница 23: ...to load paper in the manual feed slot Paper guides Adjust the paper guides to exactly the width of the loaded paper to ensure that paper is fed straight into the machine LINKS Loading Paper in the Ma...

Страница 24: ...to load paper in the paper drawer Paper guides Adjust the paper guides to exactly the size of the loaded paper to ensure that paper is fed straight into the machine LINKS Loading Paper in the Paper D...

Страница 25: ...screen Status Monitor key Press to check the status of printing or faxing to view the usage history or to view the network settings such as the IP address of the machine You can also check the status...

Страница 26: ...such as sending or printing are being performed Lights up when there are documents waiting to be processed Start key Press to scan or copy documents key Press to enter symbols such as or key Press to...

Страница 27: ...This button is also used for specifying the size and type of paper loaded in the paper drawer and manual feed slot Specifying Paper Size and Type Home Set Allows you to change the order that Home Scr...

Страница 28: ...evice Status Displays the status of the machine such as the amount of paper or toner remaining Paper Information Displays whether paper is loaded in each paper source Cartridge Level Displays the amou...

Страница 29: ...e Appears When You have notifications or Tap Icon on Right Is Displayed Tap to view the notification When an Error Occurs In some cases when an error occurs instructions on how to respond to the error...

Страница 30: ...t Display Order Tap the button to move Tap Previous or Next to move the button and tap Apply Repeat steps 3 and 4 to move all buttons you want to move Tap End To Insert Blanks in Home Screen Press and...

Страница 31: ...Tap Apply Tap End LINKS Display 4 5 Downloaded from ManualsPrinter com Manuals...

Страница 32: ...t is placed on it Tap Touch the screen lightly and quickly Use for selecting or finalizing items Long Touch Keep finger held on the screen When text cannot be completely displayed on one line appears...

Страница 33: ...lues Tap to enter values If an icon such as below is displayed at the upper left of the screen you can enter values directly using the numeric keys To move the cursor When is displayed tap to move the...

Страница 34: ...text is indicated by the aA or 12 displayed above and to the right of the text input field You can also press to switch the type of text Types of Text That Can Be Entered Enter text with the numeric k...

Страница 35: ...of the text and tap Example of Entering Text and Numbers Example Canon 1 1 Tap aA 12 or press repeatedly until aA is selected 2 Press repeatedly until the letter C is selected 3 Press repeatedly unti...

Страница 36: ...r jams Do not place the following types of documents in the feeder as this may cause paper jams Wrinkled or creased paper Carbon paper or carbon backed paper Curled or rolled paper Coated paper Torn p...

Страница 37: ...document When scanning is complete remove the document from the platen glass Open the document feeder tray Spread the document guides apart Slide the document guides outward until they are slightly f...

Страница 38: ...guides against the edges of the document Slide the document guides inward until they are aligned securely against the edges of the document The machine is ready to scan the document Align the documen...

Страница 39: ...60 to 90 g m Plain 60 90 g m Plain L 60 90 g m Recycled paper 60 to 90 g m Recycled Color paper 60 to 90 g m Color Heavy paper 90 to 120 g m Heavy 1 90 120 g m 120 to 163 g m Heavy 2 120 163 g m Bond...

Страница 40: ...paper output area or water droplets may form on the back side of the operation panel or around the paper output area There is nothing unusual about any of these occurrences which occur when the heat g...

Страница 41: ...nnot be loaded in landscape orientation Make sure to load the paper in portrait orientation Lift the dust cover Slide the paper guides apart Size abbreviations on the paper guides The abbreviations on...

Страница 42: ...n cause misfeeds or paper jams Lower the dust cover When Legal size paper is loaded The paper guides at the rear edge of the paper will be extended Open the dust cover extension then lower the dust co...

Страница 43: ...ed Slot with the side to print face up previously printed side face down Load one sheet at a time per each print You can use only the paper printed with this machine You cannot print on the side that...

Страница 44: ...en the manual feed cover Spread the paper guides apart Slide the paper guides outward Insert the paper into the manual feed slot until the paper stops Load the paper in portrait orientation with the s...

Страница 45: ...against the edges of the paper Paper guides that are too loose or too tight can cause misfeeds or paper jams Pull out the paper stopper to open Continue to Specifying Paper Size and Type 5 Downloaded...

Страница 46: ...er drawer or manual feed slot see Loading Paper in the Paper Drawer or Loading Paper in the Manual Feed Slot Follow the procedure below to prepare the envelopes before loading Only one envelope at a t...

Страница 47: ...first with the non glued side front side face up Load envelopes in the same orientation for both the paper drawer and manual feed slot Load the envelopes so that their flaps are at the left Loaded Or...

Страница 48: ...ading paper in the paper drawer or manual feed slot see Loading Paper in the Paper Drawer or Loading Paper in the Manual Feed Slot Load the paper with the logo side the side to print the document face...

Страница 49: ...you perform 1 sided and 2 sided printing However if Switch Paper Feed Method is set to Print Side Priority the facing that you use for loading preprinted paper for 2 sided printing logo side face dow...

Страница 50: ...rent from the previously loaded paper If the setting does not match the size and type of loaded paper a paper jam or printing error may occur Press and tap Paper Set Tap MP Tray or Drawer 1 Select the...

Страница 51: ...r Set 2 Tap Select Frequently Used Paper Sizes 3 Tap Multi Purpose Tray or Drawer 1 4 Select and checkmark a frequently used paper size Uncheckmarked paper sizes are displayed in the Other Sizes scree...

Страница 52: ...rawer 1 Tap Custom Specify the paper size 1 Specify the length of the X shorter side Tap X Input the length of the X side using with to move the cursor between the digits for inputting whole numbers a...

Страница 53: ...Select the paper type LINKS Loading Paper in the Paper Drawer Loading Paper in the Manual Feed Slot 5 Downloaded from ManualsPrinter com Manuals...

Страница 54: ...displayed by the One Touch buttons in the Home Screen You can register up to 4 destinations for One Touch Dial Registering Destinations for One Touch Dial Group Dial You can select multiple destinatio...

Страница 55: ...ly set to destinations The number can be edited after it has been registered After tapping Details a screen similar to the following is displayed ECM TX If an error occurs in an image that is being se...

Страница 56: ...N enter the correct PIN using the numeric keys and tap Apply Setting a PIN for Address Book Select the item you want to edit perform editing and then tap Apply Tap Apply Deleting a Registered Destinat...

Страница 57: ...y Enter the name using the numeric keys and tap Apply Tap Fax Number Enter the number using the numeric keys and tap Apply Making detailed settings After tapping Details a screen similar to the follow...

Страница 58: ...s prompting you to enter a PIN enter the correct PIN using the numeric keys and tap Apply Setting a PIN for Address Book Tap the item you want to edit perform editing and then tap Apply Tap Apply Dele...

Страница 59: ...Tap Yes 5 Downloaded from ManualsPrinter com Manuals...

Страница 60: ...also be registered in One Touch Dial Select One Touch to register the group as a One Touch Dial number Tap Group Tap Name Registering Name is optional If you register Name the destination can be sear...

Страница 61: ...r a PIN enter the correct PIN using the numeric keys and tap Apply Setting a PIN for Address Book Select the item you want to edit perform editing and then tap Apply Tap Apply Deleting a Group Press a...

Страница 62: ...Scanning Done Tone Sound produced when fax document scanning is complete Entry Tone Confirmation sound each time a key on the operation panel or button on the display is pressed Select On produce a t...

Страница 63: ...Tap and move the cursor all the way to the left to mute the sound End sound only for error Tap When Error On Apply Downloaded from ManualsPrinter com Manuals...

Страница 64: ...one Tone is not lower To adjust volume or mute sounds see Adjusting the Volume When the machine cannot enter quiet mode The machine is in Special Mode A particular paper size or paper type is specifie...

Страница 65: ...Exiting Quiet Mode Press to exit quiet mode Downloaded from ManualsPrinter com Manuals...

Страница 66: ...n external telephone is off the hook When the menu screen is displayed When an error message is displayed on the screen There are some exceptions The machine sometimes enters sleep mode when error mes...

Страница 67: ...the hook Downloaded from ManualsPrinter com Manuals...

Страница 68: ...opies Using Copy Settings to Suit Your Needs Enlarging or Reducing Collating Copies by Page Selecting Document Type Adjusting Density Adjusting Sharpness 2 Sided Copying MF229dw MF226dn Copying Multip...

Страница 69: ...s Copy Settings Press Copying starts If you want to cancel copying tap Cancel Yes Canceling Copies When placing documents in the feeder in step 1 The document is automatically scanned When placing doc...

Страница 70: ...edges of the document might not be copied For more information about the scan margins see Scan Area If you always want to make copies with the same settings Changing Default Settings 2 Place the next...

Страница 71: ...Press to Cancel If the Screen Displays a List of Documents When is Pressed Documents have been scanned and are waiting to be printed Select the copy document to cancel Use to Cancel Copy Job Status C...

Страница 72: ...LINKS Basic Copy Operations Downloaded from ManualsPrinter com Manuals...

Страница 73: ...cuments easier to read Enlarging or Reducing Selecting Document Type Adjusting Density Adjusting Sharpness 2 Sided Copying MF229dw MF226dn Copying Multiple Documents onto One Sheet 2 on 1 4 on 1 Using...

Страница 74: ...a custom copy ratio in increments of 1 Copy Copy Ratio Select the copy ratio Custom Ratio Use or the numeric keys to enter the copy ratio and press Apply You can set any copy ratio from 25 to 400 in 1...

Страница 75: ...Text Photo High Speed Suitable when copying documents that contain both text and photos Priority is given to speed over image quality Text Photo Suitable when copying documents that contain both text...

Страница 76: ...optimal density for a document Copy Density Adjust the density Apply Decreases the density Increases the density Auto Density An optimal density for the document is automatically set Original Type is...

Страница 77: ...appearance of magazine photos Copy Sharpness Adjust the sharpness Apply Decreases the sharpness resulting in a softer image Example If you want to improve the appearance of magazine photos Increases t...

Страница 78: ...the type of 2 sided copying Types of 2 sided copying The illustration below shows the types of 2 sided copying 1 Sided 2 Sided 2 Sided 2 Sided 2 Sided 1 Sided Original Finishing Type Specify if you wa...

Страница 79: ...riginal binding type Select the binding type for the finished copy which is different from that of the original document This setting enables you to align the direction of the output paper When a 2 si...

Страница 80: ...e when using Paper Save or ID Card Copy When you copy multiple documents onto one page margins may be created in the copied image Using the Paper Save enables you to combine 2 sided copying and 2 on 1...

Страница 81: ...e or further reduce the copy ratio before pressing but the edges of the document might not be copied if you increase it Paper Save is not available when using 2 Sided 2 on 1 4 on 1 or ID Card Copy Whe...

Страница 82: ...useful when copying a driver s license or ID card ID Card Copy is available with A4 Letter size paper or larger Copy Ratio is automatically set to 100 ID Card Copy is not available when using Paper S...

Страница 83: ...page and not collated For example if you are making three copies of a five page document the printouts will be arranged in the following page order 1 1 1 2 2 2 3 3 3 4 4 4 5 5 5 On The copies are grou...

Страница 84: ...t you perform frequently you can eliminate the need to configure the same settings every time you make copies Menu Copy Settings Change Default Settings Select the setting Change the default value of...

Страница 85: ...the Address Book before using this feature Registering in the Address Book Specifying Fax Settings Configuring Initial Settings for Fax Functions Using Basic Operations Sending Faxes Canceling Sendin...

Страница 86: ...nual Sending Sending Faxes to Multiple Destinations Simultaneously Sequential Broadcast Storing Received Faxes into Memory Memory Reception Forwarding Received Faxes Receiving Fax Information Services...

Страница 87: ...d use and then follow the on screen instructions to configure the settings For more information about a particular step click on the link to go to the corresponding section Step 1 Deciding Which Fax R...

Страница 88: ...both fax and telephone Use answering machine Answering Machine Connect your answering machine Callers can record a message if they call while you are away from the telephone The machine automatically...

Страница 89: ...printed at the top of each page sent from the machine Press and tap Menu Tap Fax Settings Fax Setup Guide Tap Set Up Now If you select Set Up Later the receive mode is set to Auto Tap Next Enter the f...

Страница 90: ...er name or company name Entering Text and tap Apply Enter up to 24 alphanumeric characters Tapping aA 12 toggles the input modes Continue to Selecting the Receive Mode LINKS Sending Faxes 7 Downloaded...

Страница 91: ...nit name has been registered Registering the Fax Number and Unit Name Select the receive mode that suits your intended use Select the receive mode with tapping Yes or No You may be able to manually se...

Страница 92: ...LINKS Receiving Faxes Downloaded from ManualsPrinter com Manuals...

Страница 93: ...lephone jack Notice for Connecting the Telephone Line This product includes the Telephone Line Cord and Adapter to connect the telephone line Depending on your country or region you may need to use th...

Страница 94: ...omatically set If the machine does not automatically set the type of telephone line Follow the procedure below to set the type of telephone line If you are not sure of the type of phone line you are u...

Страница 95: ...ation using the numeric keys and tap Apply If your machine is connected to a PBX Private Branch Exchange tap R before entering the destination If R is not available you need to register the R key sett...

Страница 96: ...e dialed Inputting pauses is optional however consecutive numbers that are input without pauses may not be recognized correctly Pauses can be inserted continuously One pause inserts 4 seconds of waiti...

Страница 97: ...inations for one touch dialing are displayed A Z 0 9 ABC to YZ Displays destinations with recipient names whose first characters correspond to the characters of the selected tab Displays destinations...

Страница 98: ...es are sent When placing documents on the platen glass in step 1 1 Tap Destination 2 Tap Specify from One Touch 3 Select a destination Follow the procedures below 1 Select the document size When there...

Страница 99: ...k Off Hook Alarm LINKS Canceling Sending Faxes Sending and Receiving Faxes According to Your Purposes Checking Status and Log for Sent and Received Documents Specifying from Address Book Selecting Des...

Страница 100: ...Specifying from Address Book Selecting Destinations Directly by Entering Coded Dial Numbers Specifying Destinations with the One Touch Buttons Specifying Previously Used Destinations TIPS for Enhanci...

Страница 101: ...splayed A Z 0 9 ABC to YZ Displays destinations with recipient names whose first characters correspond to the characters of the selected tab Displays destinations for faxes Displays a list of destinat...

Страница 102: ...Confirm Edit 2 Select a destination you want to delete 3 Tap Remove Yes If you specified Group Dial in step 2 XX destination s is displayed Tapping Number of Destinations displays destinations regist...

Страница 103: ...ouch Coded Dial TX Confirmation is set to On a screen is displayed that shows the destination and the name for the number For Group Dial the destination name and the number of destinations are shown C...

Страница 104: ...Confirm Edit 2 Select a destination you want to delete 3 Tap Remove Yes If you specified Group Dial in step 2 XX destination s is displayed Tapping Number of Destinations displays destinations regist...

Страница 105: ...oup Dial the group name and number of destinations appears Confirm the destinations are correct and tap OK If destinations are incorrect tap Cancel and tap the one touch buttons again Checking Destina...

Страница 106: ...2 XX destination s is displayed Tapping Number of Destinations displays destinations registered in the group If you want to easily and quickly delete destinations without displaying a list of destinat...

Страница 107: ...Destinations from a fax for which several destinations were specified as well as the destinations in Manual Sending are not available for this feature Sending Faxes to Multiple Destinations Simultane...

Страница 108: ...ou want to delete 3 Remove Tap Yes If you specified Group Dial in step 2 XX destination s is displayed Tapping Number of Destinations displays destinations registered in the group If you want to easil...

Страница 109: ...s are available to suit your needs for example when you want to adjust density or enhance the clarity of an image Adjusting Resolution Adjusting Density Adjusting Sharpness Scanning 2 Sided Documents...

Страница 110: ...to send Fax Resolution Select the resolution 200 x 100 dpi Normal Suitable for documents that contain text only 200 x 200 dpi Fine Suitable for documents that contain fine text 200 x 200 dpi Photo Sui...

Страница 111: ...he density of the fax if the text or images in a document are too light or dark Fax Density Adjust the density Apply Decreases the density Increases the density LINKS Sending Faxes Adjusting Sharpness...

Страница 112: ...rove the appearance of magazine photos Fax Sharpness Adjust the sharpness Apply Decreases the sharpness resulting in a softer image Example If you want to improve the appearance of magazine photos Inc...

Страница 113: ...placed on the platen glass or when the machine is set to Manual Sending Fax 2 Sided Original Select Book Type or Calendar Type Book Type Select for documents whose images on the front and back sides...

Страница 114: ...at you perform frequently you can eliminate the need to configure the same settings every time you send faxes Menu Fax Settings TX Function Settings Change Default Set Select the setting Change the de...

Страница 115: ...a list of documents when is pressed Documents have been scanned and are waiting to be processed Select the document to cancel Use to cancel Fax TX Job Status Log Job Status Select the document Cancel...

Страница 116: ...Sending Faxes Checking Status and Log for Sent and Received Documents Downloaded from ManualsPrinter com Manuals...

Страница 117: ...es enabling the caller to leave a message If you pick up the handset before the answering machine starts recording a message you can talk with the caller You need to connect your answering machine to...

Страница 118: ...mber default setting 25 with the telephone and you can start receiving the fax Specify the following three settings as necessary When the setting is complete tap Apply Ring Start Time Enables you to s...

Страница 119: ...te Reception with the telephone The ID number is set to 25 by default You can change this number as necessary Remote RX Hang up the handset LINKS Sending and Receiving Faxes According to Your Purposes...

Страница 120: ...es Making a Call before Sending Faxes Manual Sending Sending Faxes to Multiple Destinations Simultaneously Sequential Broadcast Storing Received Faxes into Memory Memory Reception Forwarding Received...

Страница 121: ...d Place the document s Placing Documents The machine cannot automatically scan both sides of the documents in Manual Sending Press and tap Fax Specify the scanning settings as necessary Various Fax Se...

Страница 122: ...ook or one touch buttons before using this feature Registering in the Address Book Specifying Destinations with the One Touch Buttons Place the document s Placing Documents Press and tap Fax Specify t...

Страница 123: ...LINKS Sending Faxes Canceling Sending Faxes Checking Status and Log for Sent and Received Documents Downloaded from ManualsPrinter com Manuals...

Страница 124: ...Lock PIN Enables you to register a password of up to seven digits To register a password use the numeric keys to enter a password and tap Apply Enter the same numbers again for confirmation and tap A...

Страница 125: ...ou can check detailed information about the documents stored in memory including sender fax numbers and number of pages sent and then delete unnecessary documents Press Tap Fax RX Job Status Log Tap J...

Страница 126: ...LINKS Receiving Faxes Checking Status and Log for Sent and Received Documents Downloaded from ManualsPrinter com Manuals...

Страница 127: ...tions are registered register destinations in the Address Book before using this feature Registering in the Address Book While the Memory Reception feature is activated documents remain in memory even...

Страница 128: ...The document is forwarded to the specified destination Downloaded from ManualsPrinter com Manuals...

Страница 129: ...ng Press and tap Fax Tap Hook If an external telephone or the optional handset is connected to the machine you can pick up the handset instead of tapping Hook When you hear a dial tone dial the inform...

Страница 130: ...Tap Start Receiving If you have picked up the handset hang it up LINKS Receiving Faxes 6 Downloaded from ManualsPrinter com Manuals...

Страница 131: ...s and communication logs for sent and received documents To check the statuses for sent and received documents 1 Tap Job Status 2 Select the document whose status you want to check Fax TX Job Status F...

Страница 132: ...r is displayed when a document failed to be sent or received because it was canceled or there was some error Details Displays detailed information about the document selected from the list If the Resu...

Страница 133: ...e Press and tap Menu Tap System Management Settings If a screen for entering a PIN is displayed enter the PIN with the numeric keys and tap Apply Setting the System Manager PIN Tap Import Export Addre...

Страница 134: ...Downloaded from ManualsPrinter com Manuals...

Страница 135: ...his feature About the Fax Driver Help Clicking Help on the fax driver screen displays the Help screen On this screen you can see information that is not in the e Manual including information about dri...

Страница 136: ...vices the fax you are using Print When you print in this way you can only specify settings for some of the print functions Windows 8 1 Server 2012 R2 Display the charms at the right of the screen and...

Страница 137: ...ke it easier to specify destinations using the Address Book see Using Registered Destinations Selecting Store Sent Fax Information and Image enables you to store the logs for sending documents and che...

Страница 138: ...manual for the application you are using Select your fax driver and click Print Click the Cover Sheet button and specify each setting Cover Sheet Attachment Select Different Sheet to Each Destination...

Страница 139: ...out logos or signatures Select Print with Logo or Print with Signature if you want to include logos or signatures on the cover sheet Have the bitmap files for logos or signatures ready beforehand Loca...

Страница 140: ...ect click OK To modify the contents perform the steps from 3 again The specified cover sheet is attached to the fax when the fax is sent Include Number of Sheets to Send Select this check box if you w...

Страница 141: ...Microsoft Excel can be imported into the machine or the Address Book data can be exported to a file for use on other fax machines or applications You cannot use the Address Book if you do not have per...

Страница 142: ...ations and 3 000 for group destinations You can select and combine registered group destinations and register them as separate group destinations You cannot use the Address Book if you do not have per...

Страница 143: ...ecessary Fax Number Enter the fax number s Hyphens can be inserted between numbers as necessary If you want to add explanations of the uses for the fax numbers such as Home or Office enter them in Des...

Страница 144: ...d click OK Group Name Enter a group name such as Sales Department 1 Show Select the type of the destinations to display in Available Destinations from which you can select the destinations to register...

Страница 145: ...ations are displayed in Current Group Members To select multiple destinations click the destinations while holding down SHIFT key or CTRL key To delete a destination from Current Group Members select...

Страница 146: ...nge the save location of the Address Book Changing Location to Save Address Book Data Open a document in an application and display the print dialog box How to display the print dialog box differs for...

Страница 147: ...fy multiple destinations repeat step 4 You can search for destinations with Address List Clicking Edit Address Book allows you to edit the Address Book Click Send 5 Downloaded from ManualsPrinter com...

Страница 148: ...Exporting Address Book Data Changing Location to Save Address Book Data You cannot use the Address Book if you do not have permission to access the folder where the Address Book is saved Log on as a u...

Страница 149: ...s used in the file The destinations imported from the file are displayed in Address Book Open the printer folder Displaying the Printer Folder Right click your fax icon and click Printing preferences...

Страница 150: ...ssword when Exporting Address List in the dialog box that is displayed when Security Settings of the Special tab is clicked a dialog box for entering a password is displayed when you click Export For...

Страница 151: ...ed in the file The Address Book data is exported to the specified location Open the printer folder Displaying the Printer Folder Right click your fax icon and click Printing preferences Click the Sele...

Страница 152: ...Book click New or if you want to copy the existing Address Book to the specified folder click Copy The Address Book is created or copied If an Address Book already exists in the folder selected in ste...

Страница 153: ...or tablet from an iPhone iPad or Android terminal Using AirPrint You can print without using a printer driver by sending print data wirelessly from Apple devices Using AirPrint Printing with the Cano...

Страница 154: ...For more information see MF Driver Installation Guide About the Printer Driver Help Clicking Help on the printer driver screen displays the Help screen On this screen you can see the detailed descript...

Страница 155: ...Click each tab to display the print setting screens and specify the print settings as necessary Various Print Settings For the MF229dw MF226dn the default setting is for 2 sided printing Change the se...

Страница 156: ...Windows 8 8 1 Server 2012 Server 2012 R2 Follow the procedure below Windows 8 Server 2012 Display the charms at the right of the screen and tap or click Devices the printer you are using Print When yo...

Страница 157: ...d click See what s printing or double click the icon of the printer driver for the machine Select the document you want to cancel and click Document Cancel Click Yes Printing of the selected document...

Страница 158: ...d Tap the document to cancel Use to Cancel Print Job Status Select the document on the Print Job Status screen Cancel Yes Several pages may be output after you cancel printing LINKS Printing a Documen...

Страница 159: ...cannot find your printouts that you thought had been printed you may want to see whether an error has occurred Press Tap Print Job Status Select the document to check Print Job Status Displays a list...

Страница 160: ...ing 1 Sided and 2 Sided Printing MF229dw MF226dn Collating Printouts by Page Printing Multiple Pages onto One Sheet Printing Posters Printing Booklet MF229dw MF226dn Printing Borders Printing Dates an...

Страница 161: ...s tab Select the document size in Page Size Select the paper size in Output Size OK Specifying Print Ratio in Increments of 1 Basic Settings tab Select the Manual Scaling check box Enter the print rat...

Страница 162: ...LINKS Printing a Document Downloaded from ManualsPrinter com Manuals...

Страница 163: ...sided Booklet Printing Select 1 sided Printing or 2 sided Printing For Booklet Printing see Printing Booklet MF229dw MF226dn Binding Location Specify the position to bind the printouts with a binding...

Страница 164: ...LINKS Printing a Document Printing Multiple Pages onto One Sheet Printing Booklet MF229dw MF226dn Downloaded from ManualsPrinter com Manuals...

Страница 165: ...touts are grouped into complete sets in sequential page order For example if you are printing three copies of a five page document the printouts will be arranged in the following page order 1 2 3 4 5...

Страница 166: ...e Order select the page distribution layout OK Page Layout Select the number of pages to print onto a single sheet from 1 on 1 to 16 on 1 For example to print 16 pages onto a single sheet select 16 on...

Страница 167: ...xample Poster 2 x 2 OK There are four size settings Poster 1 x 2 Poster 2 x 2 Poster 3 x 3 and Poster 4 x 4 Poster size settings cannot be selected when 2 sided printing is enabled Select 1 sided Prin...

Страница 168: ...ching 1 Sided and 2 Sided Printing MF229dw MF226dn Booklet The screen below is displayed Booklet Printing Method All Pages at Once Prints all of the pages at once as a single bundle so that you can ma...

Страница 169: ...LINKS Printing a Document Downloaded from ManualsPrinter com Manuals...

Страница 170: ...gins of printouts Page Setup tab Click Page Options Select the border type in Edging OK OK Edging Select the border type Preview Displays a preview with the selected border LINKS Printing a Document P...

Страница 171: ...the print date Print User Name Specify the position to print the user name logon name for the computer used to print the document Print Page Number Specify the position to print the page number Chang...

Страница 172: ...ox to display the list of the watermarks in the Watermark Name drop down list Select a watermark from the menu Edit Watermark Displays the screen to create or edit watermarks LINKS Add Click to create...

Страница 173: ...Printing a Document Printing Borders Printing Dates and Page Numbers Downloaded from ManualsPrinter com Manuals...

Страница 174: ...mal print quality General A versatile option that is suitable when printing most documents Publications Suitable when printing documents that have a mix of photo images charts and graphs Graphics Suit...

Страница 175: ...lect the document type for which you want to enable the toner save setting Advanced Settings A screen with settings is displayed Click Toner Save and select On from the drop down list on the bottom of...

Страница 176: ...ent in an application and display the print dialog box How to display the print dialog box differs for each application For more information see the instruction manual for the application you are usin...

Страница 177: ...rint Preview Displays a preview of the document to be printed Document List Print Settings Click the Document List tab to display the documents added in steps 1 to 4 You can remove documents by select...

Страница 178: ...lable than when using the ordinary printing method On the Document Name list select the combined document print job you want to print and click Printing starts For instructions on how to cancel printi...

Страница 179: ...in the printer driver screen and you can skip the operations to specify them and proceed to printing immediately Set TOP SECRET as a watermark and register it in profiles You can then select this wat...

Страница 180: ...u want to register as a profile and click Add Make print settings as required on the Basic Settings Page Setup Finishing and Quality tabs Various Print Settings Enter a profile name in Name select an...

Страница 181: ...lected profile You can change the settings of the currently selected profile In addition the changed settings can be registered as another profile LINKS Printing a Document Changing Default Settings D...

Страница 182: ...ng will always be 2 on 1 eliminating the need to change this setting every time you make prints To perform the following procedure log on to your computer with an administrator account Open the printe...

Страница 183: ...e LAN To install security functionality in AirPrint set a key pair and a digital certificate before using TLS Encrypting Communication of Print Data for Apple Devices with TLS Configuring Settings for...

Страница 184: ...eferences Print Scan Make sure that the machine is turned ON and is connected to the LAN For information on how to make sure see Getting Started Manuals Included with the Machine Open a document in an...

Страница 185: ...ation that is used for identifying the machine You can also disable the AirPrint function of the machine Use the Remote UI to change these settings Start the Remote UI and log on in System Manager Mod...

Страница 186: ...Printer Name and Location are reflected in the following settings respectively Printer Name can also be set in mDNS Name IPv4 Settings Location can also be set in Location Device Information Settings...

Страница 187: ...g on to the Remote UI in System Manager Mode To check the machine status or supplies you can also log on in End User Mode Trademarks Apple Bonjour iPad iPhone iPod touch Macintosh Mac OS and OS X are...

Страница 188: ...ice with Transport Layer Security TLS TLS allows data to be encrypted and sent or received over the network To use TLS you need to specify a key pair and enable the TLS function Generate or install th...

Страница 189: ...twork Settings AirPrint Security Settings 2 Click Edit 3 Select the Use TLS check box set required items and then click OK Use Authentication When using AirPrint you can use authentication To use auth...

Страница 190: ...LINKS Using AirPrint Generating Key Pairs Using CA issued Key Pairs and Digital Certificates Downloaded from ManualsPrinter com Manuals...

Страница 191: ...tal signature which enables the machine to detect any spoofing or tampering of data It is extremely difficult for third parties to abuse digital certificates A digital certificate that contains a publ...

Страница 192: ...equest CSR Start the Remote UI and log on in System Manager Mode Starting Remote UI Click Settings Registration Click Security Settings Key and Certificate Settings Click Generate Key Deleting a regis...

Страница 193: ...D Enter the date to which the certificate is valid between 01 01 2000 and 12 31 2099 A date earlier than Validity Start Date YYYY MM DD cannot be set Country Region Click the Select Country Region rad...

Страница 194: ...r Click Delete on the right of the key pair you want to delete click OK TLS is displayed for a currently used key pair and the key pair cannot be deleted In this case disable the function or replace t...

Страница 195: ...ettings Country Region Click the Select Country Region radio button and select the country region from the drop down list You can also click the Enter Internet Country Code radio button and enter a co...

Страница 196: ...the certificate signing request and click Register LINKS Using CA issued Key Pairs and Digital Certificates Verifying Key Pairs and Digital Certificates Encrypting Communication of Print Data for Appl...

Страница 197: ...Certificate Settings for key pairs or CA Certificate Settings for CA certificates Click Register Key and Certificate or Register CA Certificate Deleting a registered key pair or CA certificate Click...

Страница 198: ...ring a key pair 1 Click Register on the right of the key pair you want to register 2 Enter the name of the key pair and password and then click OK Key Name Enter up to 24 alphanumeric characters for t...

Страница 199: ...LINKS Generating Key Pairs Verifying Key Pairs and Digital Certificates Encrypting Communication of Print Data for Apple Devices with TLS Downloaded from ManualsPrinter com Manuals...

Страница 200: ...UI and log on in System Manager Mode Starting Remote UI Click Settings Registration Click Security Settings Key and Certificate Settings for key pairs or CA Certificate Settings for CA certificates C...

Страница 201: ...The result from verifying the certificate is displayed as shown below LINKS Generating Key Pairs Using CA issued Key Pairs and Digital Certificates Downloaded from ManualsPrinter com Manuals...

Страница 202: ...functions For Mac OS Users Depending on the operating system and the version of the scanner driver or applications you are using the screens in this manual may differ from your screens Scanning from...

Страница 203: ...Network Scan Utility Register by following the procedure below This procedure is not required if the machine and your computer are connected via USB The scan function is not available if the machine a...

Страница 204: ...documents as PDFs or JPEGs and other settings Place the document s Placing Documents Press and tap Scan Tap Computer Select the destination computer This screen is not displayed if only a computer is...

Страница 205: ...e destination folder is displayed on the computer When placing documents on the platen glass in step 1 About the save destination folder By default the scanned data is saved to the Pictures or My Pict...

Страница 206: ...uments will be saved specifying these settings each time you scan can be troublesome Register these settings in a Scan PC button so that you can scan with one press of a button There are two Scan PC b...

Страница 207: ...the Scan PC Button Using the Scan PC Button Register the save destination computer and type of scan in Scan PC1 or Scan PC2 button Press and tap Menu Tap Scan Settings Select Shortcut Key Settings Re...

Страница 208: ...the document are scanned as text data and the text can be searched using a computer Documents are scanned in black and white only with no intermediate shades of gray To change settings You can change...

Страница 209: ...destination folder By default the scanned data is saved to the Pictures or My Pictures folder A subfolder named with the scanning date is created and the data is saved to that folder To change the sa...

Страница 210: ...LINKS Scanning from the Machine Downloaded from ManualsPrinter com Manuals...

Страница 211: ...h the machine that enables you to scan documents or images to a computer You can forward the scanned data to a specified application or attach it to an e mail message Scanning Using an Application You...

Страница 212: ...lect the scan type Click the icon for the type of scan you want to perform Mail The scanned document is sent as an e mail attachment You can also save it to the computer and manually attach it to an e...

Страница 213: ...ent from that in the original you can configure advanced scan settings with ScanGear MF Place the document again select the Display the Scanner Driver check box on the screen in step 6 and click Start...

Страница 214: ...ox If you selected PDF in step 1 select the Confirm the Scanned Image check box Click Start Scanning starts To cancel click Cancel The scanned images are displayed as thumbnails on the Scanned Image s...

Страница 215: ...isting PDF file to which you want to add the newly scanned document data The data is added to the existing file as additional pages Click Save or Forward The scanned data is saved to a folder on a com...

Страница 216: ...using the operation panel of the machine MF Toolbox starts You can specify whether you want to automatically close the MF Toolbox screen when you finish scanning LINKS Configuring Scan Settings in MF...

Страница 217: ...gs For Macintosh users available functions vary For Mac OS Users Configuring Scan Settings Configuring Storing Settings Specifying External Applications to Forward Scanned Data Configure the scan sett...

Страница 218: ...nned as a color image Color Magazine The document is scanned as a color image The color unevenness and moire that occurs when scanning print material is reduced It takes more time to scan when using t...

Страница 219: ...verted into a TIFF image PDF A PDF file is created If you scan a multi page document these pages are merged into one PDF file PDF Single Page A one page PDF file is created for each page of the scanne...

Страница 220: ...f you select PDF Add Page for Save as Type Save Scanned Image to is switched to Create PDF File Based On In this case specify an existing PDF file to which you want to add the newly scanned document d...

Страница 221: ...application Alternatively you can specify an application by dragging its icon here if it is not an e mail application Supported e mail applications Microsoft Outlook Express Microsoft Outlook Microsof...

Страница 222: ...sequent documents may not be scanned or an error message may be displayed depending on the application In such a case place and scan one document at a time From the application select the start scan c...

Страница 223: ...F Scanning Using MF Toolbox Starting from an application You can use ScanGear MF to load the scanned image into Adobe Photoshop Microsoft Office Word or other image processing and word processing appl...

Страница 224: ...ten areas Click Scan to scan the areas in the cropping frames as separate images Clear Crop Frame Clears the selected cropping frame Left Rotate Right Rotate Rotates the preview image 90 degrees to t...

Страница 225: ...urpose Click to switch between the portrait and landscape orientation This button is not available when Flexible is selected If you select Add Delete you can add new output size settings and delete th...

Страница 226: ...djustments on the preview image Operating Preview Images Clear Clears the preview image Crop Specifies the cropping area with the cropping frame Click and drag the area you want to crop The cropping a...

Страница 227: ...ecifying Settings for Documents and Color Mode Original Input Method Select a setting based on whether you place your documents on the platen glass or in the feeder Platen Glass Select when placing do...

Страница 228: ...tion and Image Size Output Resolution Select the resolution of the scanned image that suits your intended use If documents are placed in the feeder the maximum resolution is 300 dpi About the output r...

Страница 229: ...e image when it is scanned with the set Output Resolution and Output Size Adjusting Image Quality Auto Tone Automatically adjusts the color tone of the image Reduce Dust and Scratches Makes dust or sc...

Страница 230: ...t the balance with the brightness of the medium tone being the average Channel If you select Color for Color Mode you can adjust the Red Green and Blue color channels separately To adjust all three co...

Страница 231: ...s of all adjustments made to the brightness contrast histogram and tone curve settings are displayed in a tone curve and as numerical values Perform a final check of the color settings Threshold Adjus...

Страница 232: ...y the Last Frame on Previewed Images Auto Crop is not performed and the most recently set cropping frame is displayed None Auto Crop is not performed and no cropping frame is displayed Scan Tab Config...

Страница 233: ...bled Always Execute the Auto Tone Color tone is automatically adjusted The setting is available if you select Color or Grayscale for Color Mode Monitor Gamma You can display the document at the proper...

Страница 234: ...atio of width to height in Input Settings The magnification percentage in Output Settings Registering Frequently Used Settings Place the document s and click Preview Change the scan settings Select se...

Страница 235: ...ghtness or color Adjusting Brightness and Color Select settings to register as necessary Select Add Delete in the drop down list The Add Delete Tone Curve Settings or Add Delete Threshold Settings scr...

Страница 236: ...LINKS Configuring Scan Settings in Simple Mode Scanning Using MF Toolbox Scanning Using an Application Downloaded from ManualsPrinter com Manuals...

Страница 237: ...enience and ease of use Relax and proceed with the network setup one step at a time Connecting to a Computer Viewing the Machine s Network Settings Connecting to a Network Viewing Network Settings Con...

Страница 238: ...ect the machine to a network Check your computer settings Make sure that the computer is correctly connected to the network For more information see the instruction manuals for the devices you are usi...

Страница 239: ...ecessary This step is required when you want to assign a specific IP address to the machine or change the dynamic IP addressing protocol from the default DHCP Setting IP Addresses Downloaded from Manu...

Страница 240: ...from Wired LAN to Wireless LAN or vice versa you will need to uninstall MF Drivers installed on your computer and then reinstall them MF Driver Installation Guide Tap Menu in the Home Screen Tap Netwo...

Страница 241: ...Connect a LAN cable Connect the machine to a router by using a LAN cable Push the connector in until it clicks into place Wait approximately 2 minutes While you wait the IP address is set automaticall...

Страница 242: ...ess security compatibility of your wireless router see the instruction manuals for your networking devices or contact your manufacturer 128 104 64 40 bit WEP WPA PSK TKIP AES CCMP WPA2 PSK TKIP AES CC...

Страница 243: ...eless Router Select this setup option if you need to manually set up the connection but want to complete the setup as easily as possible Setting Up Connection by Selecting a Wireless Router Manually E...

Страница 244: ...you want to enable the wireless LAN message is displayed tap Yes Read the message that is displayed and tap OK Tap WPS Push Button Mode Tap Yes Press and hold the WPS button on the wireless router The...

Страница 245: ...l Signal strength is measured using RSSI Received Signal Strength Indication Reducing power consumption You can set the machine to enter Power Save Mode based on signals emitted from the wireless rout...

Страница 246: ...the Home Screen Tap Network Settings If a screen for entering a PIN is displayed enter the PIN with the numeric keys and tap Apply Setting the System Manager PIN Tap Wireless LAN Settings If the Do y...

Страница 247: ...ion the machine connects to the device with the strongest signal Signal strength is measured using RSSI Received Signal Strength Indication Reducing power consumption You can set the machine to enter...

Страница 248: ...al entry method Setting Up Connection by Specifying Detailed Settings Tap Menu in the Home Screen Tap Network Settings If a screen for entering a PIN is displayed enter the PIN with the numeric keys a...

Страница 249: ...ings of the machine are completed Signal strength When more than one wireless router is available for connection the machine connects to the device with the strongest signal Signal strength is measure...

Страница 250: ...ss LAN message is displayed tap Yes Read the message that is displayed and tap OK Select SSID Settings Enter Manually Enter the SSID that you have written down Enter the SSID using the numeric keys an...

Страница 251: ...y Entering Text 6 Tap Select WEP Key 7 Tap the WEP key you have edited 1 Tap WPA WPA2 PSK 2 Select an encryption method Auto Sets the machine to automatically select AES CCMP or TKIP to match the sett...

Страница 252: ...gth When more than one wireless router is available for connection the machine connects to the device with the strongest signal Signal strength is measured using RSSI Received Signal Strength Indicati...

Страница 253: ...n Encryption When manually setting up a wireless connection by specifying detailed settings you need to specify security settings Check the following information Security types WEP WPA PSK WPA2 PSK Au...

Страница 254: ...wn all the information that is displayed If wireless routers are not found Click Refresh If nothing happens check that the settings are correctly configured on the computer and the wireless router LIN...

Страница 255: ...es a unique network IP address Two versions of IP addresses are available IPv4 and IPv6 Configure these settings depending on the network environment To use IPv6 addresses you need to properly configu...

Страница 256: ...o Acquire Select to automatically assign an IP address via a protocol such as DHCP When Auto Acquire On is displayed automatic addressing is enabled Manually Acquire Select to configure the IP address...

Страница 257: ...ect Make sure that the Remote UI screen can be displayed with your computer Starting Remote UI If a computer is not available you can check the connection by using the operation panel Testing the Netw...

Страница 258: ...with devices beyond a router A link local address is automatically set when the IPv6 function of the machine is enabled Manual address 1 An address that is entered manually When using this address sp...

Страница 259: ...ngth and default router address in the corresponding text boxes IP Address Enter an IPv6 address Addresses that start with ff or multicast address cannot be entered Prefix Length Enter a number that i...

Страница 260: ...mputer by using the IPv6 address of the machine Starting Remote UI Using the operation panel IPv6 settings can also be accessed from Menu in the Home Screen IPv6 Settings LINKS Setting IPv4 Address Vi...

Страница 261: ...certain interval before the machine starts communicating Setting a Wait Time for Connecting to a Network You can print a list of the current network settings User Data List Network Information IPv4 Se...

Страница 262: ...EP and WPA WPA2 PSK information 1 Tap Security Settings 2 Confirm and tap the current security setting If the security settings are not configured None is displayed 3 Select the setting to view WEP WP...

Страница 263: ...uter perform the basic setup procedures including the printer driver installation MF Driver Installation Guide Printing protocols are rules for delivering document data created on a computer to the ma...

Страница 264: ...rvices on Devices To change protocols port numbers see Changing Port Numbers Start the Remote UI and log on in System Manager Mode Starting Remote UI Click Settings Registration Click Network Settings...

Страница 265: ...able for Windows Vista 7 8 8 1 WSD scanning enables you to scan documents to a computer without installing the scanner driver Select the check box to scan documents via WSD When not using WSD scanning...

Страница 266: ...Setting up WSD network devices on Windows Vista 7 8 8 1 The WSD printer and scanner can be added from the printer folder Open the printer folder Displaying the Printer Folder click Add a device or Ad...

Страница 267: ...port settings on the computer To perform the following procedure log on to your computer with an administrator account Open the printer folder Displaying the Printer Folder Right click your printer ic...

Страница 268: ...ose 3 Click Auto Detect select the machine when it is detected and click Next If the machine is not detected Click Refresh If the problem persists click IP address or MAC address enter the IP address...

Страница 269: ...LINKS Setting Up Print Server Downloaded from ManualsPrinter com Manuals...

Страница 270: ...ystem and the bit architecture 32 bit or 64 bit of the print server and client computers When implementing a print server in a domain environment consult your Network Administrator To obtain device in...

Страница 271: ...Version Windows Vista 7 8 8 1 Server 2008 Server 2008 R2 Server 2012 Server 2012 R2 x86 under Processor If you do not know whether your Windows Vista 7 8 8 1 Server 2008 Server 2008 R2 Server 2012 Se...

Страница 272: ...LINKS Printing from a Computer Double click the shared printer Follow the on screen instructions to install the drivers 2 3 Downloaded from ManualsPrinter com Manuals...

Страница 273: ...e Machine for Your Network Environment The configuration of a network varies depending on the purpose of the network Specify the settings necessary to suit your network environment Downloaded from Man...

Страница 274: ...gure Ethernet settings automatically or manually Configuring Ethernet settings automatically Tap On The machine detects and automatically sets the communication mode and the Ethernet type that can be...

Страница 275: ...each network Change the settings of the machine as necessary For more information contact your Network Administrator Tap Menu in the Home Screen Tap Network Settings If a screen for entering a PIN is...

Страница 276: ...e the way that network devices are connected or if you add a new device If this type of problem occurs set a wait time for connecting to the network Tap Menu in the Home Screen Tap Network Settings If...

Страница 277: ...gs as necessary Note that the procedures for configuring DNS are different for IPv4 and IPv6 Start the Remote UI and log on in System Manager Mode Starting Remote UI Click Settings Registration Click...

Страница 278: ...address is changed When specifying the interval between updates enter the time in hours in the DNS Dynamic Update Interval text box mDNS Settings Use mDNS Adopted by Bonjour mDNS multicast DNS is a p...

Страница 279: ...h as example com DNS Dynamic Update Select the check box to dynamically update the DNS records whenever the machine s IP address is changed To specify the type s of addresses you want to register to t...

Страница 280: ...LINKS Setting IPv4 Address Setting IPv6 Addresses Viewing Network Settings Downloaded from ManualsPrinter com Manuals...

Страница 281: ...machine does not support the trap notification feature of SNMP To change the port number of SNMP see Changing Port Numbers SNMP management software when installed on a computer on the network enables...

Страница 282: ...of MIB objects Read Only Permits only viewing the values of MIB objects Use Dedicated Community Dedicated Community is a preset community intended exclusively for Administrators using Canon software...

Страница 283: ...t the check box to enable monitoring of the printer management information of the machine via SNMP To disable monitoring of the printer management information clear the check box Click OK Disabling SN...

Страница 284: ...of negligence or improper use Either way you may incur unanticipated losses when your confidential information is leaked To counter these risks the machine is equipped with a variety of security func...

Страница 285: ...rom Unauthorized Access Prevent unauthorized third parties from accessing and using the machine You can implement multiple security measures such as using firewalls and changing port numbers Downloade...

Страница 286: ...ings via the Remote UI Start the Remote UI and log on in System Manager Mode Click Settings Registration System Management Edit and specify the necessary settings on the displayed screen By using the...

Страница 287: ...Downloaded from ManualsPrinter com Manuals...

Страница 288: ...ies can access computers and other communication devices that are connected to a network To prevent this unauthorized access specify the settings for packet filter a feature that restricts communicati...

Страница 289: ...addresses can be specified for both IPv4 and IPv6 The packet filters described in this section control communications over TCP UDP and ICMP Start the Remote UI and log on in System Manager Mode Starti...

Страница 290: ...sses Allowed Addresses Allows communication received only with devices having their IP addresses entered for Address to Register and restricts communication with devices with any other IP addresses Re...

Страница 291: ...ating the prefix length fe80 1234 64 Deleting an IP address from exceptions Select an IP address and click Delete 3 Click OK You can enable or disable the IP Address Filter settings from Menu in the H...

Страница 292: ...fied This function is unavailable when the machine is connected to a wireless LAN Start the Remote UI and log on in System Manager Mode Starting Remote UI Click Settings Registration Click Security Se...

Страница 293: ...C addresses You do not need to delimit the address with hyphens or colons Check for entry errors If MAC addresses are incorrectly entered you may become unable to access the machine from the Remote UI...

Страница 294: ...r settings depending on the network environment To change the port number for proxy server Setting a Proxy Tap Menu in the Home Screen Tap Network Settings If a screen for entering a PIN is displayed...

Страница 295: ...management of traffic between in house and outside networks but also blocks unauthorized access and consolidates anti virus protection for enhanced security When setting a proxy make sure that you ha...

Страница 296: ...to use a proxy server specified in the same domain Use Proxy Authentication To enable authentication by the proxy server select the check box and enter up to 24 alphanumeric characters for the user n...

Страница 297: ...the machine can be set to limit its capabilities by partially or completely disabling these functions Restricting Access to Address Book and Sending Functions Restricting Access to Address Book and Se...

Страница 298: ...mail destinations to those registered in the Address Book or by setting a PIN for the Address Book so that unauthorized users cannot add or edit Address Book entries You can also avoid sending docume...

Страница 299: ...ct Restrict TX Function Address Book PIN Set the PIN for editing the Address Book Enter a number of up to seven digits using numeric keys and tap Apply When PIN Confirm is displayed enter the PIN once...

Страница 300: ...e Screen Tap System Management Settings If a screen for entering a PIN is displayed enter the PIN with the numeric keys and tap Apply Setting the System Manager PIN Select Restrict TX Function Restric...

Страница 301: ...ngs Allow Fax Driver TX If a screen for entering a PIN is displayed enter the PIN with the numeric keys and tap Apply Setting the System Manager PIN Tap Off Off Disables PC faxing On Enables PC faxing...

Страница 302: ...or entering a PIN is displayed enter the PIN with the numeric keys and tap Apply Setting the System Manager PIN Select Restrict TX Function Restrict Resending from Log Tap On Off Enables use of previo...

Страница 303: ...onfirming the fax number On Displays the screen for confirming the fax number When using One Touch buttons or coded dial numbers to specify destinations you need to remember whose destination or what...

Страница 304: ...Touch button or coded dial number On Displays the details of the selected entered One Touch button or coded dial number LINKS Registering Destinations Specifying from Address Book Registering Address...

Страница 305: ...anager PIN Select Restrict TX Function Restrict Sequential Broadcast Select Confirm Sequential Broadcast or Reject Sequential Broadcast Off Enables sequential broadcasting Confirm Sequential Broadcast...

Страница 306: ...g HTTP disables some of the network capabilities such as the Remote UI WSD printing Tap Menu in the Home Screen Tap Network Settings If a screen for entering a PIN is displayed enter the PIN with the...

Страница 307: ...e UI to reduce the risk of having your machine controlled remotely over the network by malicious third parties Tap Menu in the Home Screen Tap System Management Settings If a screen for entering a PIN...

Страница 308: ...nd Checking the Machine Status Setting Up Menu Options from Remote UI Saving Loading Address Book from Remote UI Registering Address Book from Remote UI Basics of the Remote UI Starting Remote UI Remo...

Страница 309: ...ngs or TLS settings have no errors continue browsing the Web site Log on to the Remote UI When a System Manager PIN is not set Select System Manager Mode or End User Mode System Manager Mode You can p...

Страница 310: ...Downloaded from ManualsPrinter com Manuals...

Страница 311: ...nt of toner Click Check Consumables Details to display the screen for checking consumables Checking Consumables Support Link Displays the support link specified in Device Information under System Mana...

Страница 312: ...Click an item the content is displayed in the right page Setting Up Menu Options from Remote UI Breadcrumb Trail Indicates the series of pages you opened to display the currently displayed page You c...

Страница 313: ...es you opened to display the currently displayed page You can check what page is currently displayed List Number Specifies the range of coded dial numbers displayed on the page Top Icon Moves the scro...

Страница 314: ...ancel Job Status You can delete a document job by clicking Cancel If you logged on in System Manager Mode all the print documents currently printing and waiting to be printed will be listed If you ent...

Страница 315: ...and other information is displayed Log on to the Remote UI Starting Remote UI Status Monitor Cancel Consumables You can also click Check Consumables Details in Portal Page main page to display the scr...

Страница 316: ...Registration page System Management Settings Log on to the Remote UI Starting Remote UI Status Monitor Cancel Device Information The total number of pages that have been printed by the copy print and...

Страница 317: ...LINKS Remote UI Screens Downloaded from ManualsPrinter com Manuals...

Страница 318: ...UI Click Settings Registration Click the menu item you want to set For more information about the settings menu see each item below Menu items Referents Preferences Paper Settings Specifying Paper Si...

Страница 319: ...t System Management Settings Network Settings Network Security Settings Security Import Export Saving Loading Address Book from Remote UI Initialize Setting Information Initialize Menu LINKS Remote UI...

Страница 320: ...the machine until the import or export process is complete It may take a few minutes to complete the process If the machine is turned OFF during the process it may result in damage to data or the mach...

Страница 321: ...ss Do not operate the Remote UI until the message The file name download has completed is displayed at the bottom of the screen The Address Book data currently registered is overwritten when you load...

Страница 322: ...o specify the file to be imported click Browse and select the file or enter the path to the file in File Path the file name with the location where the file is saved Click OK The specified Address Boo...

Страница 323: ...ess Book is protected by a PIN Enter the PIN and click OK Click Coded Dial You can also register destinations in One Touch In this case click One Touch instead of Coded Dial Registering in the Address...

Страница 324: ...tination Type to Register and click OK Specify required settings and click OK LINKS Remote UI Screens Saving Loading Address Book from Remote UI Address Book List 5 6 Downloaded from ManualsPrinter co...

Страница 325: ...s in this machine You can adjust each of the settings in detail Access these settings by tapping Menu in the Home Screen You can print the setting menu in list form to check the current settings User...

Страница 326: ...cting Wired LAN or Wireless LAN MF229dw MF217w Wired LAN Wireless LAN Specify settings for connecting the machine to a wireless LAN You can also view the current settings or specify the setting for sa...

Страница 327: ...ess router Off On Wireless LAN Information Select to view the current wireless LAN settings Viewing Network Settings MAC Address Wireless LAN Status Latest Error Information Channel SSID Settings Secu...

Страница 328: ...mDNS Settings Specify settings for using DNS functions without DNS servers Configuring DNS Off On mDNS Name DHCP Option Settings Select whether to acquire the host name and whether to use the dynamic...

Страница 329: ...Name On LPD Print Settings Enable or disable LPD a printing protocol that can be used on any hardware platform or operating system Configuring Printing Protocols and WSD Functions Off On RAW Print Set...

Страница 330: ...of packets the machine sends or receives Changing the Maximum Transmission Unit 1300 1400 1500 Specify the settings for monitoring and controlling the machine from a computer running SNMP compatible...

Страница 331: ...g to a Network 0 to 300 sec Select the communication mode of Ethernet half duplex full duplex and the Ethernet type 10BASE T 100BASE TX You can also view the MAC address of the machine Auto Detect Sel...

Страница 332: ...which is a number unique to each communication device Viewing the MAC Address Select to return the Network Settings to the factory defaults Initialize System Management Settings Initialize Network Set...

Страница 333: ...a key is pressed on the operation panel or when a paper jam occurs Adjusting the Volume Fax Tone Select whether to make a dial tone while a fax is being sent You can also adjust the volume 0 to 1 to 5...

Страница 334: ...an operation mistake occurs Off On Job Done Tone Select whether the machine beeps when copying or scanning is complete Off On Energy Saver Alert Select whether the machine beeps when the machine ente...

Страница 335: ...justed in Contrast Off On Millimeter Inch Entry Switch Select the unit of measurement Millimeter Inch Menu Preferences Display Settings Default Screen after Startup Restoration Select a function to di...

Страница 336: ...r moves after a character is entered on the screen Select Auto to automatically move the cursor to the right of the entered character Select Manual to manually move the cursor to the right of the ente...

Страница 337: ...anish Swedish Turkish Remote UI Language Select the display language used for the Remote UI screens Czech Danish Dutch English Finnish French German Hungarian Italian Norwegian Polish Portuguese Russi...

Страница 338: ...o enter quiet mode automatically You can also set the machine to always run in quiet mode Entering Quiet Mode Start Time Off On Start time setting to enter quiet mode End Time Off On Stop time setting...

Страница 339: ...eek Day If the machine has not been operated or has had no data to process for a specified period of time the machine enters sleep mode to save energy consumption Auto Sleep Specify the period of time...

Страница 340: ...o return the display to the default screen after the Auto Reset is performed If Default Function is selected the main screen of the function selected in Default Screen after Startup Restoration is dis...

Страница 341: ...1 to 5 to 60 min Menu Timer Settings Auto Offline Time Set the time period Apply Downloaded from ManualsPrinter com Manuals...

Страница 342: ...ethod Select the paper source Select Speed Priority or Print Side Priority Paper Sources Select the paper source that you want to change the setting for Speed Priority When using paper that has been p...

Страница 343: ...default settings about copy The selected settings are used as the default settings of the copy function Changing Default Settings Number of Copies 1 to 99 Density 4 to 0 to 4 Auto Density Original Ty...

Страница 344: ...tial copy density You can also change the copy density temporarily Adjusting Density 4 to 0 to 4 Correct Density Menu Copy Settings Correct Density Adjust the density Apply Downloaded from ManualsPrin...

Страница 345: ...nction Settings RX Function Settings RX Print Settings Fax Setup Guide Specify the basic settings for using the machine as a fax device Register Unit Telephone Number Register the fax number for the m...

Страница 346: ...ing order from 33600 bps This adjustment should be made when it takes a long time to start receiving a fax due to a poor telephone line connection 33600 bps 14400 bps 9600 bps 7200 bps 4800 bps 2400 b...

Страница 347: ...e is sent as sender information to the destination TX Terminal ID ECM TX Enable or disable error correction mode ECM ECM checks for fax data errors and corrects them To reduce errors on received faxes...

Страница 348: ...nternational access code or the fax number If the code or the number is still not recognized correctly change the duration of the pause For instructions on how to enter a pause see step 3 on Sending F...

Страница 349: ...r for the interval and tap Apply Redial When Err Occurs Specifies whether to redial when a transmission error occurs Select Off or On Menu Fax Settings TX Function Settings TX Terminal ID On Specify t...

Страница 350: ...ual to process data when ECM is enabled because the error check and corrections are performed while the data is transmitted Incoming Ring Specify settings for sounding a ring to notify you of incoming...

Страница 351: ...elected for the receive mode By using this feature faxes can be received even when no one is available to pick up the handset Off On 1 to 15 to 99 sec Memory Lock Settings Select whether to store rece...

Страница 352: ...al Vertical Only RX Page Footer Select whether to print information including date and time of reception and page numbers on the bottom of received faxes Off On 3 Menu Fax Settings RX Print Settings P...

Страница 353: ...lur Because received documents are not stored in memory you need to ask the sender to resend the document Select to display on screen instructions for specifying settings including the fax number and...

Страница 354: ...settings enables you to scan documents into a specified computer just by pressing a button You can view the registered settings by selecting Confirm Destination Scanning Using the Scan PC Button Regis...

Страница 355: ...om a mobile device with AirPrint Mopria etc Select Gradation for photos and illustrations and Error Diffusion for mostly text documents for more attractive printouts Gradation Error Diffusion Select w...

Страница 356: ...Fine lines and portions with lighter print density may become blurred If the print results on special types of paper are not satisfactory the following settings may improve the quality of the printout...

Страница 357: ...er size is set to B5 A5 STMT or EXEC Paper Type is set to Plain Plain L Recycled Color or Envelope After the setting is enabled Print speed is slower Special Mode Z Adjust this setting if streaks adhe...

Страница 358: ...rtridge or after not printing for a long period of time Off Mode 1 Mode 2 Mode 3 After the setting is enabled Print speed is slower Special Mode C Adjust this setting if streaks adhere to the print pa...

Страница 359: ...r jams frequently when performing 2 sided printing on lightweight paper or on curled paper Off On When set to On White patches may appear in images printed on paper other than lightweight paper Specia...

Страница 360: ...K If toner does not adhere adequately and printouts are faded select On Off On When set to On Print speed is slower Clean the fixing assembly after a toner cartridge is replaced or if black streaks ap...

Страница 361: ...Device Enable Product Extended Survey Program Displ Consmbls Info RUI Toner Status Import Export Address Book PDL Selection Plug and Play Update Firmware Initialize Address Book Initialize System Man...

Страница 362: ...evices with specified IPv6 addresses Specifying IP Addresses for Firewall Rules Off On MAC Address Filter Enable or disable settings for filtering packets received from devices with specified MAC addr...

Страница 363: ...at Britain GB Other Select whether to use the Remote UI a feature that enables you to specify the machine settings by using a Web browser Disabling Remote UI Use Remote UI Off On Select whether to use...

Страница 364: ...ogs Disabling Use of Previously Used Destinations Off On One Touch Coded Dial TX Confirmation Select whether to display the details of an entered coded dial number when it is selected as a destination...

Страница 365: ...ttings Off On Displ Purchase Button Off On Use as USB Device Menu System Management Settings Use as USB Device Select Off or On Restart the machine Enable Product Extended Survey Program Menu System M...

Страница 366: ...S For USB this setting is enabled the next time the main power is turned ON Select how to install the firmware update according to the environment of the machine Via PC Select to manually install the...

Страница 367: ...l the System Management Settings at once Initializing System Management Settings Network Settings System Manager Information Settings Device Information Settings Security Settings Remote UI Settings A...

Страница 368: ...lizing Menu If a screen for entering a PIN is displayed Enter the PIN with the numeric keys and tap Apply Setting the System Manager PIN Asterisks Settings marked with an asterisk are only available f...

Страница 369: ...Appears When an Error Code Appears Common Problems If you suspect that the machine is malfunctioning see the following sections before contacting Canon Common Problems Installation Settings Problems...

Страница 370: ...receiving fax documents If paper tears Remove all the paper fragments to prevent them from becoming jammed If paper jams repeatedly Make sure that the paper and the packing material are completely re...

Страница 371: ...2 Move the lever to unlock 3 Gently pull out the document Remove the jammed document from the inner cover inside the feeder 1 Hold the green knob and open the inner cover 2 Gently pull out the documen...

Страница 372: ...ve them first Then follow the procedure below Open the feeder cover Gently pull out the document Close the feeder cover Remove the toner cartridge 1 Lift the operation panel Document Jams in the Feede...

Страница 373: ...ont right of the toner cover 3 Remove the toner cartridge Gently pull out the document Check whether paper is jammed inside the output guide 1 Pull out toward you while pressing the button to open the...

Страница 374: ...er is jammed in the manual feed slot or paper drawer 1 Slowly pull out any paper in the manual feed slot 2 Open the paper cover and remove any loaded paper 3 Gently pull out the document 4 Load paper...

Страница 375: ...t projections with the toner cartridge guides and push securely all the way in Close the toner cover and lower the operation panel If you cannot close the toner cover Make sure that the toner cartridg...

Страница 376: ...r Importing Exporting Address Book Data with the Supplied Software You cannot access or edit the address book if you do not have access permission to the destination folder of the address book If you...

Страница 377: ...respond within 35 seconds Ask the sender to send the fax again If you hear a beep tap Start Receiving to receive the fax Receiving Faxes Cannot send because more than one destination is specified Sen...

Страница 378: ...AN connection Restart the machine and set again If the problem persists even after restarting the machine check whether the machine is properly installed and ready to connect to the network Installati...

Страница 379: ...ting may resume automatically Clearing Jams Prepare a cartridge The toner cartridge needs to be replaced soon Shake the toner cartridge to evenly distribute the toner inside the toner cartridge It is...

Страница 380: ...nation with the operation panel or add or edit it in the Address Book you need to set Restrict New Destinations to Off For more information contact your Administrator Limiting Available Destinations T...

Страница 381: ...nd set it to the machine again For more information about how to check the network key see the instruction manuals for your networking devices or contact your manufacturer Checking the SSID and Networ...

Страница 382: ...be sent or received due to its large data size When sending a fax Reduce the resolution and scan the document Adjusting Resolution When receiving a fax Ask the sender to divide the document into multi...

Страница 383: ...er the forwarding destination again If the documents that failed to be forwarded remain in memory you can forward it again Registering in the Address Book 037 Memory is full If a sending or printing j...

Страница 384: ...ted correctly Check whether these cables are connected correctly Use care not to mistake the phone cord s port for the other cables ports Connecting the Telephone Line Parts and Their Functions Is sle...

Страница 385: ...connect to the wireless LAN MF229dw MF217w You are unsure of the set IP address Viewing Network Settings The connection method cannot be switched between a wired LAN and a wireless LAN Did you select...

Страница 386: ...o connect to the network Check whether the machine is turned ON If the machine is turned ON turn it OFF and then turn it back ON Check the installation site of the machine and the wireless router Is t...

Страница 387: ...AC address packet filtering is set When only IEEE 802 11n is used for the wireless communication WEP is selected or the WPA WPA2 encryption method is set to TKIP Downloaded from ManualsPrinter com Man...

Страница 388: ...0KCY 0C2 Copying Problems See Common Problems also Printing results are not satisfactory Paper creases or curls When You Cannot Print Properly Downloaded from ManualsPrinter com Manuals...

Страница 389: ...r installed to your computer correctly MF Driver Installation Guide Printing seems to be slow Print or delete data in memory Printing Documents in Memory Checking Deleting Documents in Memory When the...

Страница 390: ...ot satisfactory Clean the platen glass or feeder If cleaning does not improve the results the recipient s fax machine may be a cause Platen Glass Feeder The results of received fax are not satisfactor...

Страница 391: ...ntouts Streaks Appear on Printouts White Streaks Appear Toner Smudges and Splatters Appear Printouts Are Faded Printed Pages Have White Specks A Portion of the Page Is Not Printed Print Density Is Une...

Страница 392: ...e you using appropriate paper Check usable paper and replace with appropriate paper Paper Loading Paper If using the appropriate paper still does not solve the problem change one of the Special Mode Z...

Страница 393: ...tridges Printouts Are Faded Is toner running low Check how much toner is left and replace the toner cartridges as necessary Replacing Toner Cartridges Are you using appropriate paper Check usable pape...

Страница 394: ...e Is Not Printed Do you print data without margins This symptom occurs if a margin is set to none in the printer driver A margin of 5 mm or less around the edge of paper or 10 mm or less around the ed...

Страница 395: ...on for two to three hours then try printing again This may solve the problem If the problem persists replace the toner cartridge Replacing Toner Cartridges Cannot Scan a Printed Barcode Are you trying...

Страница 396: ...sing appropriate paper change the setting for Special Mode V Special Processing Paper Curls Are you using appropriate paper Check usable paper and replace with appropriate paper Also specify the paper...

Страница 397: ...or More Sheets Are Fed Together Is paper loaded correctly Fan the paper stack thoroughly so that paper is not stuck together Check whether paper is loaded correctly Loading Paper Check whether the nu...

Страница 398: ...he machine yourself it may not be covered by warranty When Contacting Canon When contacting us have the following information ready Product name MF229dw MF226dn MF217w MF216n Dealer where you purchase...

Страница 399: ...he remaining toner level Replacing Toner Cartridges How to replace toner cartridges How to Replace Toner Cartridges Relocating the Machine Relocating the machine for maintenance or an office move Relo...

Страница 400: ...ead the safety instructions before you start cleaning Maintenance and Inspections Where to Clean Exterior of the machine and ventilation slots Exterior Rollers inside the feeder Feeder Interior of the...

Страница 401: ...documents that were received by using the Memory Reception function faxes that are waiting to be sent and reports that are automatically printed after sending and receiving faxes are not deleted Clea...

Страница 402: ...iting to be sent and reports that are automatically printed after sending and receiving faxes are not deleted Open the feeder Clean the platen glass and the underside of the feeder Clean the areas wit...

Страница 403: ...ents that were received by using the Memory Reception function faxes that are waiting to be sent and reports that are automatically printed after sending and receiving faxes are not deleted Open the f...

Страница 404: ...in the paper drawer or manual feed slot before performing the following procedure Cleaning requires toner Make sure that there is sufficient toner remaining beforehand It takes approximately 90 secon...

Страница 405: ...deleted Lift the operation panel If you cannot lift the operation panel Make sure the feeder or platen glass cover is completely closed If a thick original such as a book is placed on the platen glass...

Страница 406: ...peration panel If you cannot close the toner cover Make sure that the toner cartridge is inserted properly Forcing it closed may cause damage Reconnect the power cord and turn ON the machine 7 8 Downl...

Страница 407: ...ch the end of its lifetime Shake the toner cartridge to evenly distribute the toner inside the cartridge If this does not improve the print quality replace the toner cartridge If this message is displ...

Страница 408: ...nt to It is recommended that you check the level before you start to print a large job Device Status Cartridge Level Check the toner level Toner Level Displays the amount of remaining toner Depending...

Страница 409: ...glass cover is completely closed If a thick original such as a book is placed on the platen glass remove the original Forcing the operation panel up may cause damage Open the toner cover by the grip...

Страница 410: ...wer the operation panel If you cannot close the toner cover Make sure that the toner cartridge is inserted properly Forcing it closed may cause damage LINKS Replacing Toner Cartridges 6 Downloaded fro...

Страница 411: ...inal such as a book is placed on the platen glass remove the original Forcing the operation panel up may cause damage Open the toner cover by the grip at the front right of the toner cover Pull the to...

Страница 412: ...tape at an angle or sideways If the tape breaks you may not be able to pull it out completely If the sealing tape becomes stuck when pulling it out keep pulling until it is completely removed Install...

Страница 413: ...tion below Whether the cables with are connected depends on your environment Power plug Power cord USB cable LAN cable Optional handset or external telephone cable Telephone cable When transporting th...

Страница 414: ...of sent and received documents Communication Management Report RX Result Report You can check the logs of received fax documents RX Result Report Address Book List You can check the list of destinati...

Страница 415: ...to print a TX Result Report every time you send a document Only When Error Occurs Select to print a TX Result Report only when a sending error occurs Example Result OK indicates that the transmission...

Страница 416: ...Downloaded from ManualsPrinter com Manuals...

Страница 417: ...fter every 40 transmissions or Off if you do not want to print the report automatically Separate TX RX Tap On to print sent and received reports separately or Off to print both reports on one sheet Pr...

Страница 418: ...ct the print setting Off Select if you do not want to print RX Result Reports On Select to print an RX Result Report every time you receive a document Only When Error Occurs Select to print an RX Resu...

Страница 419: ...Book List Menu Output Rprt Print List Address Book List Select the setting you want to print out Check that the size of paper displayed on the screen is loaded in the machine OK Yes Example Coded Dial...

Страница 420: ...er size and type registered in the machine the print settings of TX Result Report Communication Management Report and RX Result Report Menu Output Rprt Print List User Data List Check that the size of...

Страница 421: ...ou can check total for the number of pages used for printouts This total includes faxes reports and lists in addition to copies and printouts of data from computers Device Status Check Counter Downloa...

Страница 422: ...alizing Settings You can restore the following settings Initializing Menu Initializing Address Book Initializing System Management Settings Initializing All Data Settings Downloaded from ManualsPrinte...

Страница 423: ...alizing System Management Settings If a screen for entering a PIN is displayed enter the PIN with the numeric keys and tap Apply Setting the System Manager PIN Menu Initialize Menu Select the item you...

Страница 424: ...k will be deleted after initializing If a screen for entering a PIN is displayed enter the PIN with the numeric keys and tap Apply Setting the System Manager PIN Menu System Management Settings Initia...

Страница 425: ...p Apply Setting the System Manager PIN Menu System Management Settings Initialize System Management Settings Select the item that you want to initialize Yes Restart the machine if necessary Items for...

Страница 426: ...and initialize all settings Setting Menu List together at the same time You are required to restart the machine after initializing all data settings If a screen for entering a PIN is displayed enter...

Страница 427: ...chapter contains technical specifications of this machine instructions on how to use the e Manual disclaimers copyright information and other important information for customers Downloaded from Manua...

Страница 428: ...ts Give the features that are described in this section The features are grouped under four headings Going Green and Saving Money Improving Efficiency Going Digital and So Much More Downloaded from Ma...

Страница 429: ...g paper shrink multiple pages onto a single sheet 2 or 4 pages for copies and up to 16 pages for print jobs sent from your computer If you are using a machine capable of 2 sided printing the Paper Sav...

Страница 430: ...directly from your computer Why bother printing and then faxing It just wastes paper and costs you money You can save yourself this trouble and cut costs with paperless faxing For more information abo...

Страница 431: ...resses on your computer or export Address Book addresses from your computer to the machine using the supplied software Importing Exporting Address Book Data with the Supplied Software Take advantage o...

Страница 432: ...e page layout as well as binding position switching between 1 sided and 2 sided printing etc intuitively on the preview image in the printer driver The simple click operation allows you to convenientl...

Страница 433: ...liability If you are uncertain about the legality of using your product to scan print or otherwise reproduce any particular document and or of the use of the images scanned printed or otherwise reprod...

Страница 434: ...n edit with a text editor For more information about this function see Scanning Using MF Toolbox Some applications work with the machine to let you easily import scanned images directly into documents...

Страница 435: ...opria including certified terminals visit http www mopria org For more information Using the Machine as a Printer For more information Using the Machine as a Scanner TM TM No cables easy installation...

Страница 436: ...presentation than a staple in the upper left corner Making booklets is easy The print driver will take care of the page positioning for you All you have to do is fold the pages and staple them along...

Страница 437: ...hout prior notice due to improvements of the machine Machine Specifications Wireless LAN Specifications MF229dw MF217w Document Type Scan Area Paper Copy Specifications Fax Specifications Scanner Spec...

Страница 438: ...nections Approx 2 0 W by Wireless Connections MF216n Approx 1 6 W When the power switch is turned OFF 0 5 W or less Warm up Time 13 5 seconds or less Weight MF229dw Approx 13 7 kg MF226dn Approx 12 8...

Страница 439: ...interval between when the machine is turned ON and when the main screen appears on the display Warm up time may vary depending on the use conditions and environment of the machine The value indicates...

Страница 440: ...0 MHz 6 5 13 19 5 26 39 52 58 5 65 Mbps SGI Validated 20 MHz 7 2 14 4 21 7 28 9 43 3 57 8 72 2 Mbps SGI Invalidated 40 MHz 13 5 27 40 5 81 108 121 5 135 Mbps SGI Validated 40 MHz 15 30 45 60 90 120 15...

Страница 441: ...e document Multi page documents of the same size thickness and weight Size W x L Up to 216 x 297 mm MF229dw Maximum size 216 x 356 mm Minimum size 140 x 127 mm MF226dn MF217w MF216n Maximum size 216 x...

Страница 442: ...haded area The scan area varies depending on the function used and where documents are placed in the feeder or on the platen glass Platen Glass Feeder Copy The scan area for copying may differ from th...

Страница 443: ...d printing is available without replacing paper The machine can print received fax documents You can load Envelope Monarch and Index Card only in the manual feed slot Custom paper size of 76 2 to 216...

Страница 444: ...heet Only in MF229dw MF226dn automatic 2 sided printing is available without replacing paper 2 Only in MF229dw MF226dn automatic 2 sided printing is available for heavy paper 1 90 to 120 g m Only in M...

Страница 445: ...laten glass 9 seconds or less Feeder 14 seconds or less The copy speed on A4 size plain paper on one side printing is measured during continuous copying Copy speeds vary depending on the output resolu...

Страница 446: ...dpi Superfine 200 x 400 dpi Dialing One touch keys 4 destinations Coded dialing 100 destinations Group dialing 103 groups Address Book dialing Regular dialing with numeric keys Automatic redialing Ma...

Страница 447: ...0 x 300 dpi Software interpolation resolution 9 600 x 9 600 dpi Scan Speed A4 300 x 300 dpi MF229dw Color 15 sheets minute Black and White 22 sheets minute MF226dn MF217w MF216n Color 15 sheets minute...

Страница 448: ...ion environment and paper type used The print speed on A4 size plain paper on one side printing is measured during continuous printing Print speeds vary depending on the output resolution the paper ty...

Страница 449: ...age yield of the toner cartridge that comes with the machine is 1 700 sheets The average yield is based on ISO IEC 19752 the global standard related to Method for the determination of toner cartridge...

Страница 450: ...the machine e Manual This Manual This manual describes all the functions of the machine in a manual that is viewed using a Web browser You can browse information by category or enter a keyword to sear...

Страница 451: ...re displayed You can find the page you are looking for from those results You can also enter phrases such as connecting to a network The keyword search also supports the AND Boolean to search for mult...

Страница 452: ...on the computer Select a language and click OK if you are prompted to do so If the Software Programs Manuals Setup screen does not appear remove the DVD ROM from the drive and insert it again or see...

Страница 453: ...Read the License Agreement and click Yes to agree The installation begins Wait a moment This process may take some time Click Exit Click Next Exit 5 6 7 Downloaded from ManualsPrinter com Manuals...

Страница 454: ...wser 1 Insert the User Software and Manuals DVD ROM into the drive on the computer Select a language and click OK if you are prompted to do so If the Software Programs Manuals Setup screen does not ap...

Страница 455: ...Downloaded from ManualsPrinter com Manuals...

Страница 456: ...VD ROM into the drive on the computer Select a language and click OK if you are prompted to do so Click Start Software Programs If the above screen is not displayed see Displaying the Software Program...

Страница 457: ...Click Back Exit 6 Downloaded from ManualsPrinter com Manuals...

Страница 458: ...ts tab Search tab Click to toggle the display between the table of contents and search Contents The titles of chapters are displayed Place the mouse pointer over one of the titles and topics of the ch...

Страница 459: ...k Help Troubleshooting Maintenance Click to view how to solve problems or maintain the machine For Mac OS Users Click to view precautions when using Mac OS Notice Click to view important information y...

Страница 460: ...e subsections of that topic Click to close the expanded topic Print all All pages of the selected chapter are opened in a separate window The chapter can be printed if necessary Navigation See what ch...

Страница 461: ...he general location of the topic that you are looking for Search options selector Select the check box to make your search case sensitive Search with these conditions Click to display the search resul...

Страница 462: ...Title Topic Displays titles and topics Click a title or topic to jump to the page Click to return to the page top Click to go to the previous or next chapter Downloaded from ManualsPrinter com Manuals...

Страница 463: ...an operation or contains additional explanations for a procedure Indicates useful functions or tips for using the machine Keys and Buttons Used in this Manual Keys on the operation panel and buttons...

Страница 464: ...0KCY 0FW Others This section describes basic Windows operations and includes disclaimers copyright information and other information Downloaded from ManualsPrinter com Manuals...

Страница 465: ...ows Server 2008 Start select Control Panel double click Printers Windows 8 Server 2012 Right click the lower left corner of the screen select Control Panel View devices and printers Windows 8 1 Server...

Страница 466: ...ams and files or Start Search under the Start menu 2 Press the ENTER key Windows 8 Server 2012 1 Right click the lower left corner of the screen select Run 2 Enter D Minst exe and then click OK Window...

Страница 467: ...08 R2 Start select Control Panel Windows 8 Server 2012 Right click the lower left corner of the screen select Control Panel Windows 8 1 Server 2012 R2 Right click Start select Control Panel Display Sy...

Страница 468: ...2 1 Display Control Panel Windows Vista 7 Server 2008 Server 2008 R2 Start select Control Panel Windows 8 Server 2012 Right click the lower left corner of the screen select Control Panel Windows 8 1 S...

Страница 469: ...lder Right click your printer icon and click Printer properties or Properties in the pop up menu Check the port settings Click the Ports tab Make sure that the correct port is selected for the printer...

Страница 470: ...er Installation Guide Canon MF Printer Driver Guide Using each feature Driver s Help Canon MF Printer Driver Guide Fax function Installing the Driver Getting Started MF Driver Installation Guide Canon...

Страница 471: ...ion could be hazardous to the human body For this reason laser radiation emitted inside this equipment is hermetically sealed within the protective housing and external cover No radiation can leak fro...

Страница 472: ...service or visit www canon europe com weee or www canon europe com battery International ENERGY STAR Program As an ENERGY STAR Partner Canon Inc has determined that this product meets the ENERGY STAR...

Страница 473: ...quisiti essenziali ed alle altre disposizioni pertinenti stabilite dalla direttiva 1999 5 CE Latviski Latvian Lithuanian reikalavimus ir kitas josnuostatas Nederlands Dutch Hierbij verklaart CANON INC...

Страница 474: ...ht Copyright CANON INC 2014 No part of this publication may be reproduced transmitted transcribed stored in a retrieval system or translated into any language or computer language in any form or by an...

Страница 475: ...V Bovenkerkerweg 59 1185 XB Amstelveen The Netherlands CANON CHINA CO LTD 15F Jinbao Building No 89 Jinbao Street Dongcheng District Beijing 100005 PRC CANON SINGAPORE PTE LTD 1 HarbourFront Avenue 04...

Страница 476: ...Downloaded from ManualsPrinter com Manuals...

Страница 477: ...lied CD ROM DVD ROM 9 Installing after Downloading from the Canon Website 20 Installing to Use WSD 27 Uninstalling 32 Troubleshooting 36 Appendix 37 Using the Installation Guide 38 Screen Configuratio...

Страница 478: ...and MF Toolbox so the machine is ready to print from a computer Installing Uninstalling This section explains how to uninstall the MF Drivers or MF Toolbox Uninstalling Troubleshooting This section e...

Страница 479: ...ent file store it on the hard disk etc Toner Status This application informs you with the amount of cartridge consumption on the computer it is installed on pop up display You can also access a site f...

Страница 480: ...XPS Fax driver Scanner driver Network Scan Utility MF Toolbox Toner Status Address Book Import Export Tool Canon MF LBP Wireless Setup Assistant Presto PageManager 1 Supported only over network connec...

Страница 481: ...Play Tap Network or USB Select the driver you are using Selectable page description language Network Fax UFRII LT UFRII LT XPS USB UFRII LT UFRII LT XPS Restart the machine If you selected USB in step...

Страница 482: ...d press Selectable page description language Network UFRII LT UFRII LT XPS USB UFRII LT UFRII LT XPS Restart the machine If you selected USB in step 4 turn OFF the machine and wait for at least 10 sec...

Страница 483: ...the Supplied CD ROM DVD ROM Installing after Downloading from the Canon Website The latest MF Driver and MF Toolbox versions are available for downloading from the Canon website Download the MF Drive...

Страница 484: ...puter via a USB cable install the software before connecting the USB cable A USB cable is not included with the machine Prepare one separately The options to be displayed differ depending on your coun...

Страница 485: ...nd click Next In Server 2003 Server 2008 Server 2008 R2 Server 2012 Server 2012 R2 this screen is not displayed Proceed to the following procedure Click Install Read the License Agreement and click Ye...

Страница 486: ...8 To connect the machine and a computer via USB cable proceed to step 10 Installation of the drivers starts When the following screen appears click Yes Select the machine and click Next If no machine...

Страница 487: ...OK Check the settings and click Start Installation of the drivers starts Click Exit In Windows Server 2003 Server 2008 Server 2008 R2 Server 2012 Server 2012 R2 MF Toolbox is not installed Proceed to...

Страница 488: ...any other information including your personal information You can uninstall the Product Extended Survey Program at any time Uninstalling the Product Extended Survey Program Click Next Select the Resta...

Страница 489: ...ect the connection method with the computer USB Connection Select USB Connection and click Next Wired Wireless LAN Connection Select Network Connection and click Next In Server 2003 Server 2008 Server...

Страница 490: ...e and a computer via a network proceed to step 8 To connect the machine and a computer via USB cable proceed to step 13 Installation of the drivers starts When the following screen appears click Yes S...

Страница 491: ...ice List If the machine is still not displayed at all click Search by IP Address enter the IP address set on the machine OK Select the drivers to install and click Next To obtain device information fo...

Страница 492: ...stall additional drivers Check the displayed information and click Start Installation of the drivers starts Configure the machine normally used and make a test print To configure the machine as the ma...

Страница 493: ...ot send any other information including your personal information You can uninstall the Product Extended Survey Program at any time Uninstalling the Product Extended Survey Program Click Next Select t...

Страница 494: ...rrectly an MF Toolbox icon appears on the desktop Network Scan Utility When Network Scan Utility is installed correctly a Network Scan Utility icon appears in the taskbar e Manual When the e Manual is...

Страница 495: ...website http www canon com For more information about how to download the drivers see the driver download page for your machine Unzip the downloaded file If you are making a wired or wireless LAN conn...

Страница 496: ...the connection method with the computer USB Connection Select USB Connection and click Next Installation of the drivers starts Proceed to step 17 Wired Wireless LAN Connection Select Network Connecti...

Страница 497: ...st Check the computer and machine connection and IP address settings Viewing Network Settings e Manual and click Update Device List If the machine is still not displayed at all click Search by IP Addr...

Страница 498: ...tion for using a print server Select the Canon Driver Information Assist Service check box Select the printer drivers to install and click Next Specify details for each driver 13 14 Downloaded from Ma...

Страница 499: ...k the displayed information and click Start Installation of the drivers starts Configure the machine normally used and make a test print To configure the machine as the machine normally used select th...

Страница 500: ...er folder Displaying the Printer Folder Scanner driver network connection When the scanner driver is installed correctly an icon for the installed scanner appears in the Scanners and Cameras or Scanne...

Страница 501: ...If the icon is not displayed Uninstall the drivers Uninstalling the MF Drivers and repeat the installation from the beginning Downloaded from ManualsPrinter com Manuals...

Страница 502: ...nter driver and then add a network printer Installing the MF Drivers Adding a Network Printer Log on to the computer with an administrator account Open the printer folder Displaying the Printer Folder...

Страница 503: ...us_eng or uk_eng 32bit Driver folders of the CD ROM DVD ROM or downloaded file 64 bit operating system Specify us_eng or uk_eng x64 Driver folders of the CD ROM DVD ROM or downloaded file If you do no...

Страница 504: ...s printer and click Next If you want to share the printer make sharing settings for the printer added with Adding a Network Printer Setting Up Print Server e Manual Click Finish An icon for the instal...

Страница 505: ...select Network Right click the newly added printer icon and click Install Installation for using WSD is complete when an icon for the printer is added to the printer folder Deleting unneeded printer i...

Страница 506: ...Downloaded from ManualsPrinter com Manuals...

Страница 507: ...Uninstalling the MF Drivers Start the uninstaller from the User Software and Manuals CD ROM DVD ROM or from the MF Drivers file that you downloaded 1 Insert the User Software and Manuals CD ROM DVD R...

Страница 508: ...it Log on to the computer with an administrator account Display Programs and Features or Add or Remove Programs Displaying Programs and Features or Add or Remove Programs Uninstalling the MF Toolbox 4...

Страница 509: ...Canon Laser Printer Scanner Fax Extended Survey Program and click Uninstall or Remove The uninstaller starts Click OK Log on to the computer with an administrator account Display Programs and Features...

Страница 510: ...The uninstaller starts Click Uninstall Click OK 4 5 Downloaded from ManualsPrinter com Manuals...

Страница 511: ...he MF Toolbox is open To access these applications from the toolbox you need to manually register them to the toolbox Configuring Scan Settings in MF Toolbox e Manual It takes too long to uninstall th...

Страница 512: ...0L90 00H Appendix The Appendix provides information you should know such as how to use the Installation Guide disclaimers and copyright information Downloaded from ManualsPrinter com Manuals...

Страница 513: ...Top Page Topic Page Search by keyword You can search by entering keywords such as USB or environment Pages containing the keywords are displayed You can also enter phrases such as install the MF Drive...

Страница 514: ...e mouse pointer over one of the titles to display the topics in that chapter on the right Click a topic to display its page Top Click to return to the top page from any other page Site Map Click to di...

Страница 515: ...subsections of that topic Click to close an expanded topic Print all All pages of the selected chapter are opened in a separate window You can print them as necessary Navigation This shows which chap...

Страница 516: ...ch case sensitive Search with these conditions and specify the conditions After setting them press this to perform the search and display the results in the Result list Result list This displays pages...

Страница 517: ...printer or property Indicates a clarification of an operation or contains additional explanations for a procedure Buttons Buttons on the computer display are indicated with the following notation Exa...

Страница 518: ...0L90 00X Other This section describes basic Windows operations and includes disclaimers copyright information and other information Downloaded from ManualsPrinter com Manuals...

Страница 519: ...select Turn on network discovery Windows 7 Server 2008 R2 Start select Control Panel View network status and tasks Change advanced sharing settings under Network discovery select Turn on network disco...

Страница 520: ...8 Server 2008 R2 Server 2012 Server 2012 R2 Click System and Security or System and Maintenance System Windows Server 2008 Double click System Check the bit architecture 32 bit operating systems 32 bi...

Страница 521: ...er Windows 8 Server 2012 Right click the lower left corner of the screen Control Panel Hardware and Sound select Device Manager Windows 8 1 Server 2012 R2 Right click Start Control Panel Hardware and...

Страница 522: ...F THIS MATERIAL Copyright Copyright CANON INC 2014 No part of this publication may be reproduced transmitted transcribed stored in a retrieval system or translated into any language or computer langua...

Отзывы: