[Read Only]
Allows the Dedicated Community to only view MIB objects.
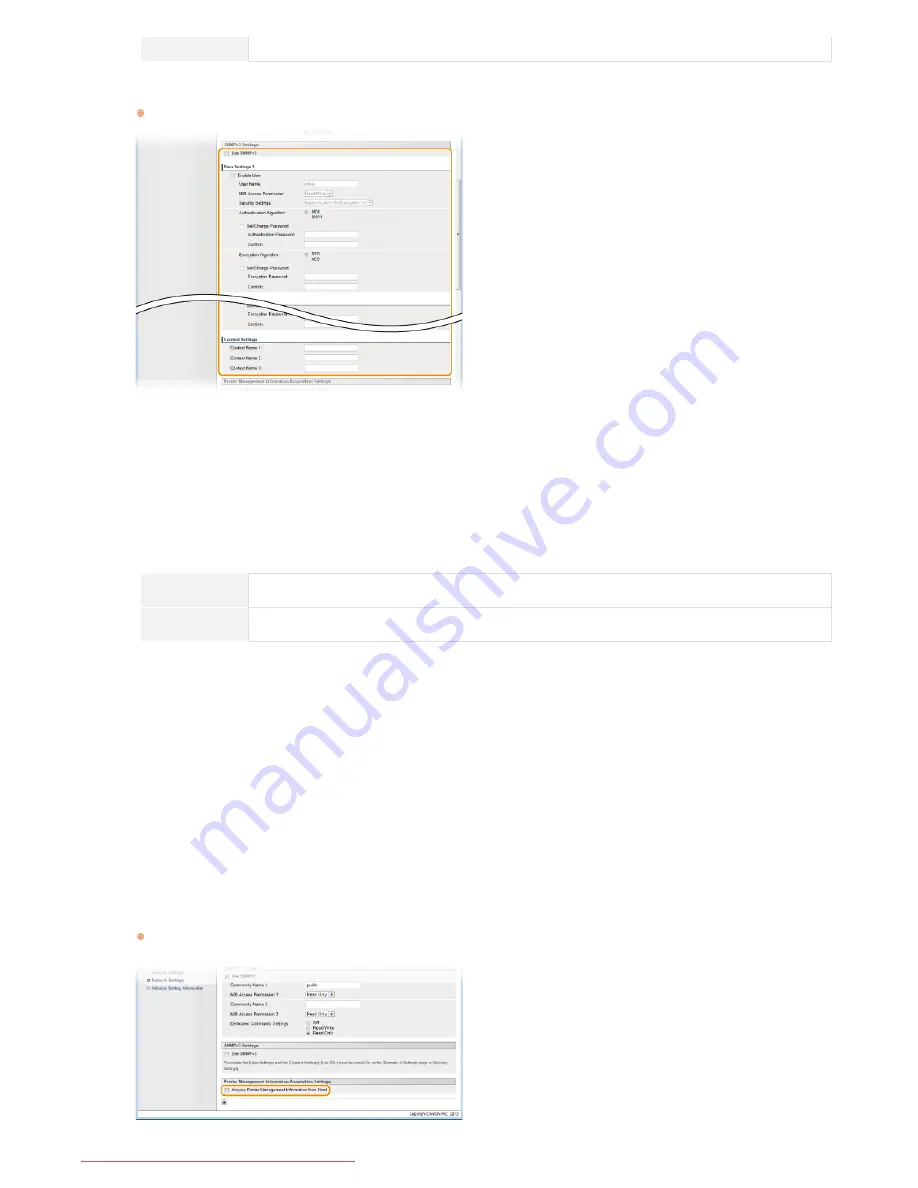
Specify SNMPv3 settings.
If you do not need to change SNMPv3 settings, proceed to the next step.
[Use SNMPv3]
Select the check box to enable SNMPv3. You can specify the rest of the SNMPv3 settings only when this check box is selected.
[Enable User]
Select the check box to enable [User Settings 1]/[User Settings 2]/[User Settings 3]. To disable user settings, clear the
corresponding check box.
[User Name]
Enter up to 32 alphanumeric characters for the user name.
[MIB Access Permission]
Select [Read/Write] or [Read Only] for access privileges to MIB objects.
[Read/Write]
Allows both viewing and changing the values of MIB objects.
[Read Only]
Allows only viewing the values of MIB objects.
[Security Settings]
Select [Authentication On/Encryption On], [Authentication On/Encryption Off], or [Authentication Off/Encryption Off] for the
desired combination of authentication and encryption settings.
[Authentication Algorithm]
When [Security Settings] has been set to [Authentication On/Encryption On] or [Authentication On/Encryption Off], select [MD5]
or [SHA1] as the authentication algorithm, according to your environment.
[Encryption Algorithm]
When [Security Settings] has been set to [Authentication On/Encryption On], select [DES] or [AES] as the encryption algorithm,
according to your environment.
[Set/Change Password]
To set or change the password, select the check box and enter between 6 and 16 alphanumeric characters for the password in the
[Authentication Password] or [Encryption Password] text box. For confirmation, enter the same password in the [Confirm] text
box. Passwords can be set independently for authentication and encryption algorithms.
[Context Name 1]/[Context Name 2]/[Context Name 3]
Enter up to 32 alphanumeric characters for context names. Up to three context names can be registered.
Specify printer management information acquisition settings.
With SNMP, printer management information (such as printing protocols and printer ports) can be monitored and obtained
regularly from a computer on the network.
6
7
㻝㻝㻞㻌㻛㻌㻞㻠㻜
Downloaded from ManualsPrinter.com Manuals
Содержание imageClass LBP6230dw
Страница 1: ...㻝㻌㻛㻌㻞㻠㻜 Downloaded from ManualsPrinter com Manuals ...
Страница 49: ...LINKS Basic Print Operations 㻠㻥㻌㻛㻌㻞㻠㻜 Downloaded from ManualsPrinter com Manuals ...
Страница 60: ...Printing Borders Printing Dates and Page Numbers 㻢㻜㻌㻛㻌㻞㻠㻜 Downloaded from ManualsPrinter com Manuals ...
Страница 87: ...LINKS Configuring Printer Ports 㻤㻣㻌㻛㻌㻞㻠㻜 Downloaded from ManualsPrinter com Manuals ...
Страница 91: ...Click Close 3 Click OK 4 㻥㻝㻌㻛㻌㻞㻠㻜 Downloaded from ManualsPrinter com Manuals ...
Страница 109: ...㻝㻜㻥㻌㻛㻌㻞㻠㻜 Downloaded from ManualsPrinter com Manuals ...
Страница 189: ...Close the top cover 5 㻝㻤㻥㻌㻛㻌㻞㻠㻜 Downloaded from ManualsPrinter com Manuals ...
Страница 200: ...LINKS Configuring Settings for Key Pairs and Digital Certificates 㻞㻜㻜㻌㻛㻌㻞㻠㻜 Downloaded from ManualsPrinter com Manuals ...
Страница 222: ...Click Back Exit 6 㻞㻞㻞㻌㻛㻌㻞㻠㻜 Downloaded from ManualsPrinter com Manuals ...
Страница 241: ...㻝㻌㻛㻌㻡㻢 Downloaded from ManualsPrinter com Manuals ...
Страница 253: ...7 Click Next Exit 㻝㻟㻌㻛㻌㻡㻢 Downloaded from ManualsPrinter com Manuals ...
Страница 262: ...㻞㻞㻌㻛㻌㻡㻢 Downloaded from ManualsPrinter com Manuals ...
Страница 273: ...Click OK 4 㻟㻟㻌㻛㻌㻡㻢 Downloaded from ManualsPrinter com Manuals ...
Страница 278: ...LINKS Connecting via USB 㻟㻤㻌㻛㻌㻡㻢 Downloaded from ManualsPrinter com Manuals ...


