


10
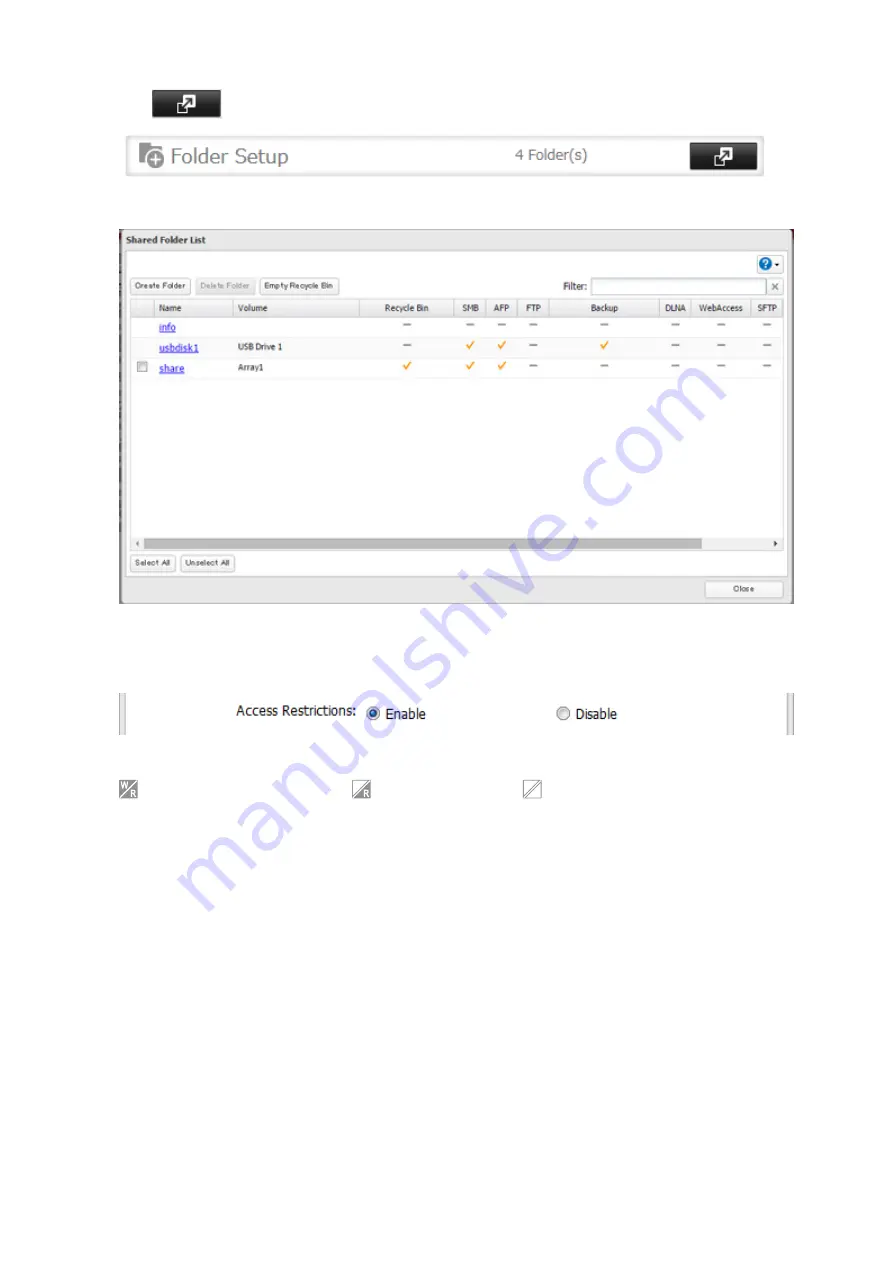
Click
to the right of “Folder Setup”.
11
Click the shared folder that you want to set access restrictions for.
12
Click
Edit
.
13
Enable “Access Restrictions”.
14
Click on the
External Users
tab and select the level of access for each external user.
: Read and write access allowed
: Read access allowed
: Access prohibited
15
Click
OK
.
Notes:
• Users that are automatically registered belong to the “hdusers” group. They can be added to other groups from
within group settings. Added users will be listed in “Users” > “External Users”. To delete a user that was registered
automatically, select that user and click
Delete External User
.
• If both read-only and read and write permissions are given to a user, the user will have read-only access.
• OS X 10.4 or earlier and Windows Server 2012 are not supported with external authentication.
• To access access-limited shared folders from OS X 10.7, use AFP instead of SMB; under “LAN Protocol Support”,
check “AFP (Mac)” on the destination folders to use AFP and click
OK
.
• If access restrictions are set for users and groups from the authentication server, guest and anonymous
connections will not be possible with AFP connections.
• FTP connections do not support authentication with an external SMB server.
• If using a Windows PC for external authentication, the default Windows SMB security settings may need to be
changed. An easy way to do this is to run the File Sharing Security Level Change Tool, available from this product’s
download page on the Buffalo website. This utility will let you easily change or restore your Windows security
settings to work with external authentication.
38
Содержание terastation 3000
Страница 23: ...4 Configure the desired settings then click OK 22...
Страница 26: ...3 Click Create User 25...
Страница 29: ...3 Click Add Group 28...
Страница 109: ...6 Click Time Machine 108...
Страница 110: ...7 Click Select Backup Disk 8 Select the shared folder and click Use Disk 109...
Страница 128: ...3 Click Edit 4 Click Browse 5 Select the shared folder that you want to make available to iTunes then click OK 127...
Страница 129: ...6 Click OK then OK again 7 Move the iTunes server switch to the position to enable the iTunes server 128...
Страница 134: ...4 Open the License tab then click Activate Free License To deactivate the license click 133...
Страница 136: ...3 Click Next 4 Click Find Cameras 135...
Страница 142: ...2 Select the search criteria on the left side of the search screen then click Search 141...
Страница 143: ...3 The search results are displayed Click a thumbnail to start the media viewer 142...
Страница 161: ...14Check that the license pack was added to Installed Licenses This completes authentication of an additional license 160...
Страница 187: ...9 Click the Client Settings tab 186...
Страница 191: ...4 Click Edit Note The settings of the PHP language interpreter can be changed from Edit php ini 5 Click Browse 190...
Страница 209: ...3 Click the LAN port where the jumbo frames will be used 4 Select the desired Ethernet frame size and click OK 208...


