


10
Reconfigure failover by referring to the “Configuring Failover” section above.
Backing Up Your Mac with Time Machine
Time Machine is a backup program included with macOS. Configure your TeraStation as shown below to use Time
Machine.
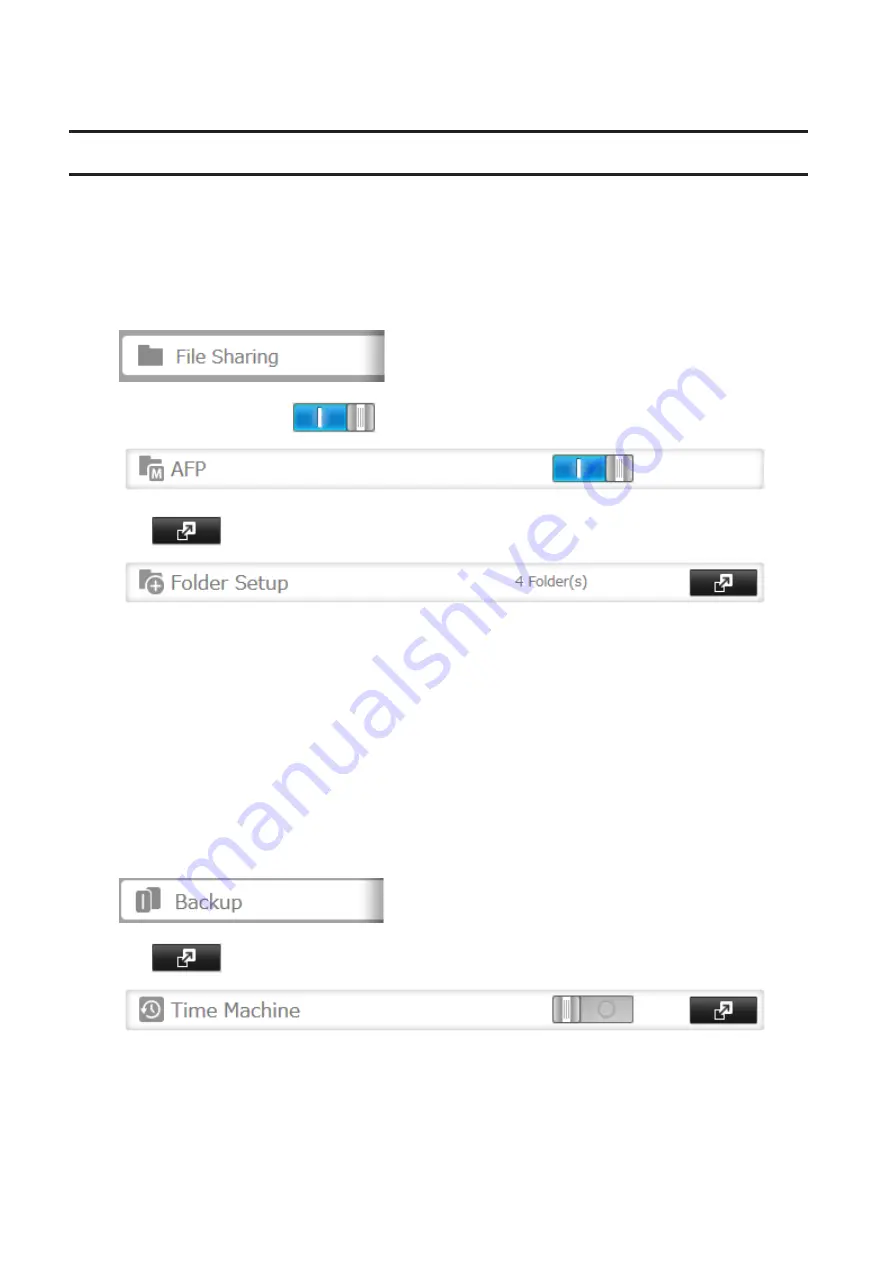
1. Preparing a Shared Folder for Time Machine
1
From Settings, click
File Sharing
.
2
Move the AFP switch to the
position to enable AFP.
3
Click
to the right of “Folder Setup”.
4
Choose a shared folder as your backup destination for Time Machine.
5
Click
Edit
.
6
Under “LAN Protocol Support”, select the “AFP (Mac)” checkbox and click
OK
.
7
Click
OK
, then click
Close
.
2. Configuring a Shared Folder as a Backup Destination
1
From Settings, click
Backup
.
2
Click
to the right of “Time Machine”.
3
Click
Edit
.
104
Содержание terastation 3000
Страница 23: ...4 Configure the desired settings then click OK 22...
Страница 26: ...3 Click Create User 25...
Страница 29: ...3 Click Add Group 28...
Страница 109: ...6 Click Time Machine 108...
Страница 110: ...7 Click Select Backup Disk 8 Select the shared folder and click Use Disk 109...
Страница 128: ...3 Click Edit 4 Click Browse 5 Select the shared folder that you want to make available to iTunes then click OK 127...
Страница 129: ...6 Click OK then OK again 7 Move the iTunes server switch to the position to enable the iTunes server 128...
Страница 134: ...4 Open the License tab then click Activate Free License To deactivate the license click 133...
Страница 136: ...3 Click Next 4 Click Find Cameras 135...
Страница 142: ...2 Select the search criteria on the left side of the search screen then click Search 141...
Страница 143: ...3 The search results are displayed Click a thumbnail to start the media viewer 142...
Страница 161: ...14Check that the license pack was added to Installed Licenses This completes authentication of an additional license 160...
Страница 187: ...9 Click the Client Settings tab 186...
Страница 191: ...4 Click Edit Note The settings of the PHP language interpreter can be changed from Edit php ini 5 Click Browse 190...
Страница 209: ...3 Click the LAN port where the jumbo frames will be used 4 Select the desired Ethernet frame size and click OK 208...


