


4
Click
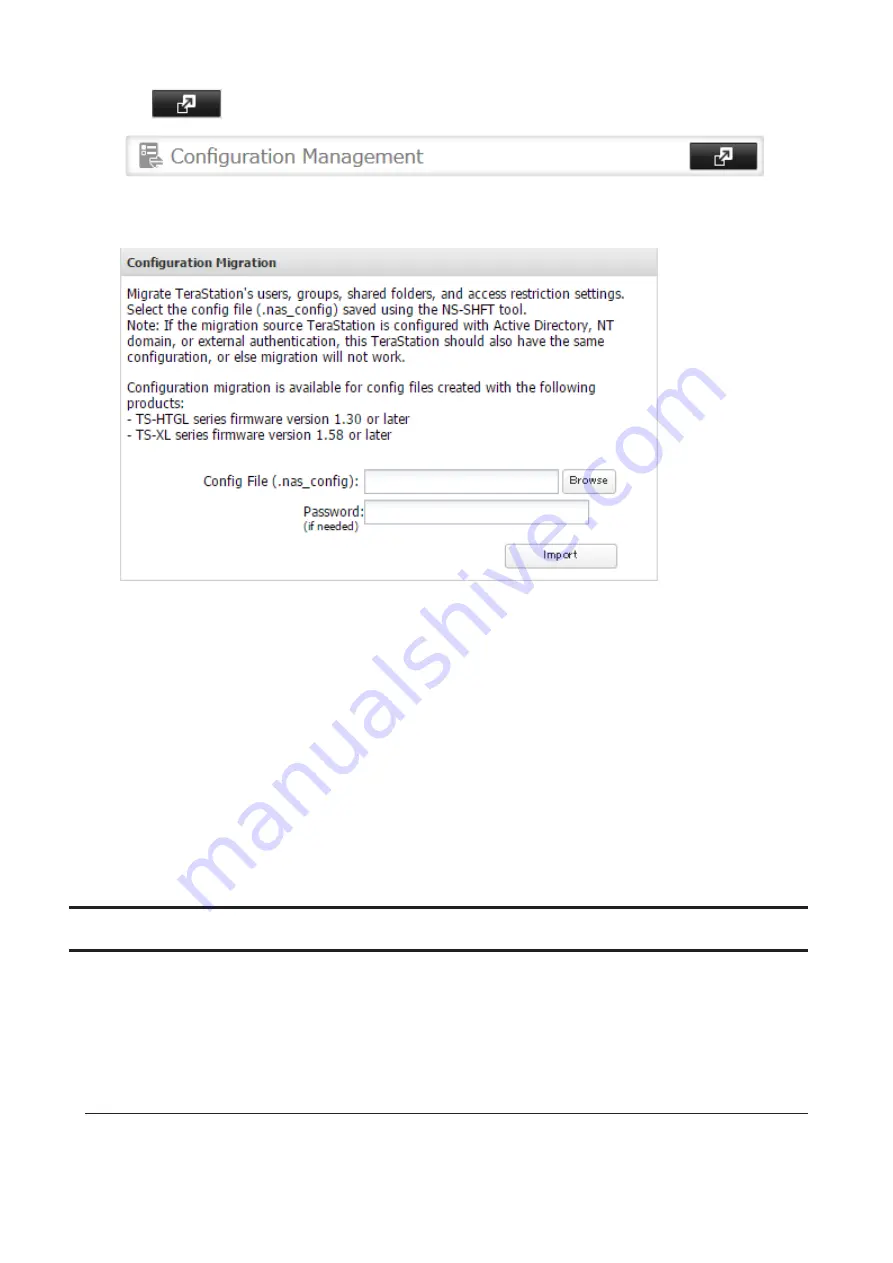
to the right of “Configuration Management”.
5
Click
Browse
and select the config file (.nas_config) that was created with another TeraStation.
If the config file was created with a password, enter it in the “Password” field.
6
Click
Import
.
7
The “Confirm Operation” screen will open. Enter the confirmation number, then click
OK
.
8
When transferring settings is completed, click
OK
.
Dismount the USB drive before unplugging it. See the “Dismounting Drives” section in chapter 4 for the procedure
on dismounting drives.
Notes:
• If the migration target TeraStation contains shared folders, users, and groups that share the same name as the
transferred settings, the existing settings will be overwritten.
• If the migration target TeraStations have already added some shared folders, users, and groups, the transferred
settings may exceed the maximum number of allowed shared folders, users, or groups. After migration finishes,
open Settings and verify that all settings were properly transferred.
Restoring Factory Defaults
There are several ways to initialize the TeraStation and restore its factory default settings. One simple way to do this
is to hold down the init button (refer to the TeraStation diagram in chapter 1) on the front panel for three seconds.
Normally this will reset the admin username and password, network configuration, SSL, and security port settings
to their factory default values. However, this button can be disabled in Settings. If the init button is disabled, refer to
the methods below on how to initialize the TeraStation.
Initializing from Settings
To initialize the TeraStation to its factory defaults from Settings, follow this procedure.
197
Содержание terastation 3000
Страница 23: ...4 Configure the desired settings then click OK 22...
Страница 26: ...3 Click Create User 25...
Страница 29: ...3 Click Add Group 28...
Страница 109: ...6 Click Time Machine 108...
Страница 110: ...7 Click Select Backup Disk 8 Select the shared folder and click Use Disk 109...
Страница 128: ...3 Click Edit 4 Click Browse 5 Select the shared folder that you want to make available to iTunes then click OK 127...
Страница 129: ...6 Click OK then OK again 7 Move the iTunes server switch to the position to enable the iTunes server 128...
Страница 134: ...4 Open the License tab then click Activate Free License To deactivate the license click 133...
Страница 136: ...3 Click Next 4 Click Find Cameras 135...
Страница 142: ...2 Select the search criteria on the left side of the search screen then click Search 141...
Страница 143: ...3 The search results are displayed Click a thumbnail to start the media viewer 142...
Страница 161: ...14Check that the license pack was added to Installed Licenses This completes authentication of an additional license 160...
Страница 187: ...9 Click the Client Settings tab 186...
Страница 191: ...4 Click Edit Note The settings of the PHP language interpreter can be changed from Edit php ini 5 Click Browse 190...
Страница 209: ...3 Click the LAN port where the jumbo frames will be used 4 Select the desired Ethernet frame size and click OK 208...


