


When failover, the backup TeraStation will take over the hostname and IP address of the main TeraStation unless the
IP conflict is detected. If you want to assign different IP address to the backup TeraStation after failover, configure
the “service IP address”. The service IP address will be a new address of the backup TeraStation when it takes over
operation from the TeraStation.
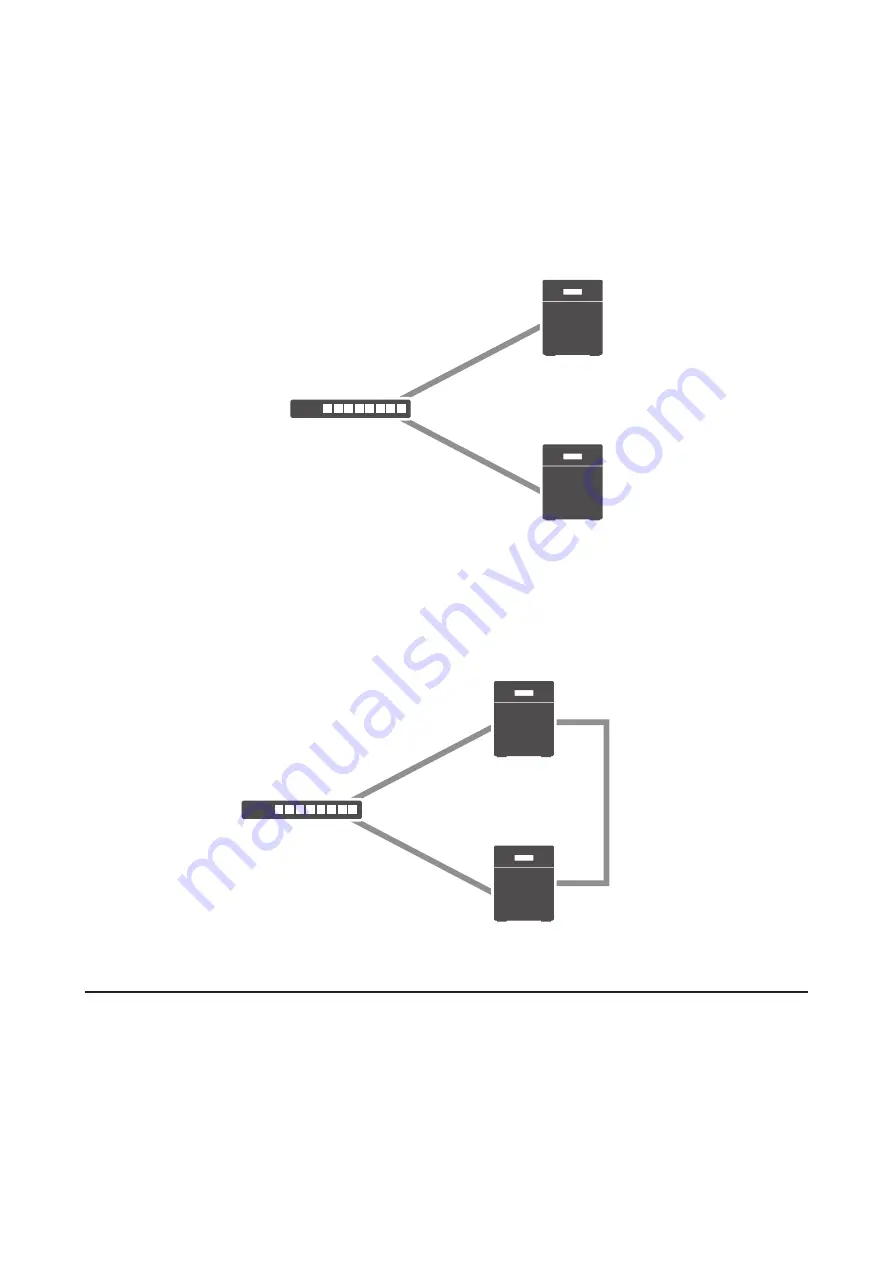
Using the Same LAN Port for Both Failover and Connecting to the Network
Using this setup, if the main TeraStation fails, the backup TeraStation will replace it completely. The backup
TeraStation will be updated over normal network traffic.
Main
Backup
Network
LAN port 1
(Static IP)
LAN port 1
(Static IP)
Using Different LAN Ports for Connecting to the Network and Failover
With this setup, the backup TeraStation and main TeraStation are connected by a second Ethernet cable connecting
their LAN 2 ports. Updating is done over this dedicated network path, so updates are quicker and don’t interfere
with normal network traffic.
Main
Backup
Network
LAN port 1
(Static IP)
LAN port 1
(Static IP)
LAN port 2
(Static IP)
LAN port 2
(Static IP)
Usage Restrictions
Functional Restrictions
Failover is not available when any of the following functions are enabled:
Replication, sleep mode, encrypted drive volume, MySQL server, media cartridge, LVM volume, iSCSI volume, port
trunking, cloud storage, surveillance server, hot spare, access restrictions by Active Directory or NT domain
99
Содержание terastation 3000
Страница 23: ...4 Configure the desired settings then click OK 22...
Страница 26: ...3 Click Create User 25...
Страница 29: ...3 Click Add Group 28...
Страница 109: ...6 Click Time Machine 108...
Страница 110: ...7 Click Select Backup Disk 8 Select the shared folder and click Use Disk 109...
Страница 128: ...3 Click Edit 4 Click Browse 5 Select the shared folder that you want to make available to iTunes then click OK 127...
Страница 129: ...6 Click OK then OK again 7 Move the iTunes server switch to the position to enable the iTunes server 128...
Страница 134: ...4 Open the License tab then click Activate Free License To deactivate the license click 133...
Страница 136: ...3 Click Next 4 Click Find Cameras 135...
Страница 142: ...2 Select the search criteria on the left side of the search screen then click Search 141...
Страница 143: ...3 The search results are displayed Click a thumbnail to start the media viewer 142...
Страница 161: ...14Check that the license pack was added to Installed Licenses This completes authentication of an additional license 160...
Страница 187: ...9 Click the Client Settings tab 186...
Страница 191: ...4 Click Edit Note The settings of the PHP language interpreter can be changed from Edit php ini 5 Click Browse 190...
Страница 209: ...3 Click the LAN port where the jumbo frames will be used 4 Select the desired Ethernet frame size and click OK 208...


