92
Note:
The selected folder is used internally by “WebAccess Remote”. Files are not added to this folder and the
amount of used space does not increase.
5
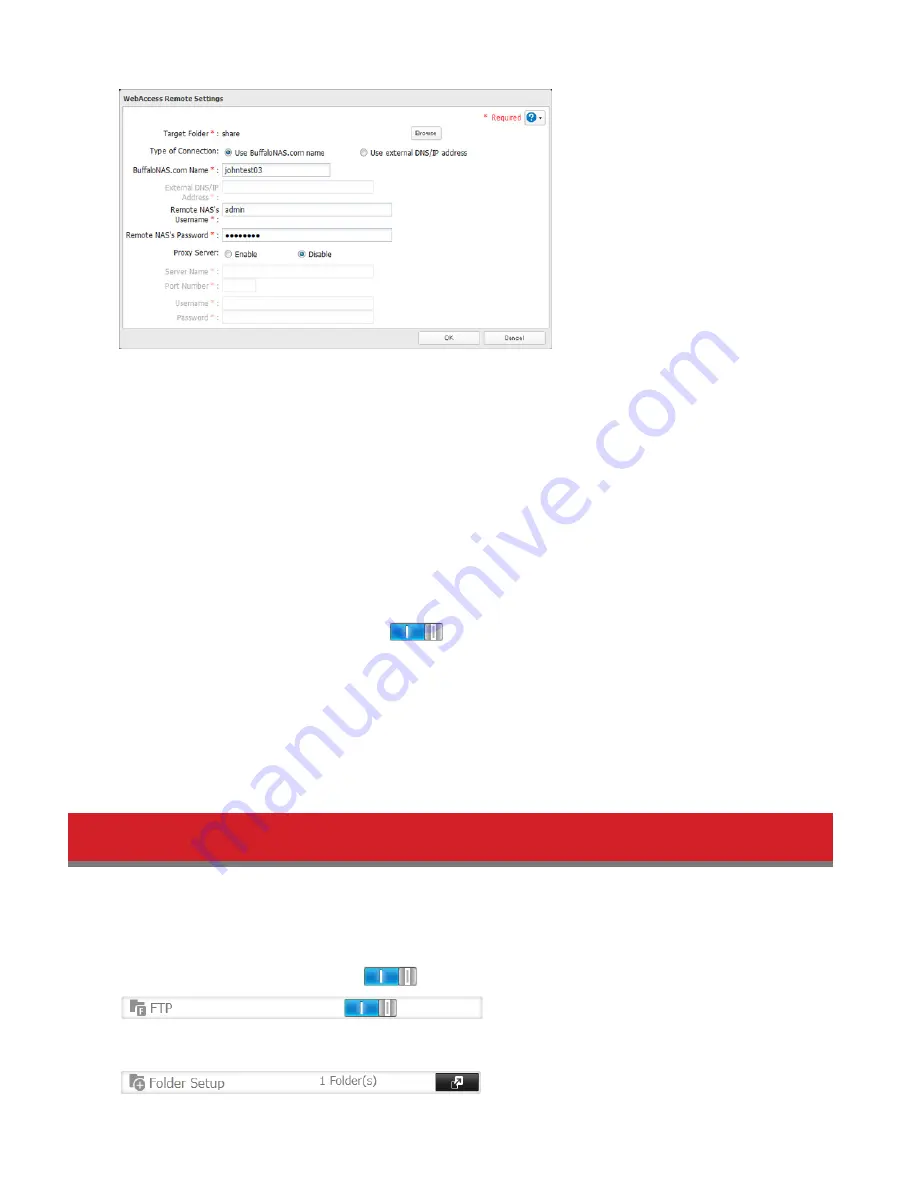
You may choose to enter a BuffaloNAS.com name or an external DNS/IP address. If “Use external DNS/IP address”
is selected, enter either the IP address of your DNS server, or the global IP address of the remote TeraStation’s
WebAccess.
Note:
Colons (:) are not supported in the external DNS/IP address field. If your DNS or IP address includes a colon,
use your BuffaloNAS.com name instead.
6
Enter the remote TeraStation’s WebAccess username and password.
7
Click
OK
.
8
Move the WebAccess Remote switch to the
position to enable WebAccess Remote.
9
You can directly access the shared folder in the remote TeraStation by entering the path displayed in
Target Folder
into the address box in Explorer, My Computer, or other file manager.
Notes:
• If using after the network has been temporarily disconnected, click
Remount
.
• Do not copy more than 10,000 files at once to the WebAccess Remote target folder. If copying fails, try again with
fewer files.
FTP
By default, the TeraStation’s shares are only accessible by users connected to the same network or router as the
TeraStation. The optional FTP server allows users outside the local network to access the TeraStation.
Note:
FTP is intended for users who already have FTP client software and have experience with it.
1
In Settings, move the FTP switch to the
position to enable FTP.
2
Open
Folder Setup
.
Содержание TeraStation 5000
Страница 1: ...TeraStation 5000 User Manual www buffalotech com 35020018 04 2014 01...
Страница 10: ...10 Chapter 1 Installation Diagrams TS5800D TS5600D TS5400D...
Страница 69: ...69 4 Insert the new drive in the empty slot Slide the drive in with the locking mechanism open...
Страница 70: ...70 5 Swing the lock back down until it clicks into place...


