169
3
An icon for the mapped share will appear in Computer or My Computer. You can use this network drive just like
any other hard drive.
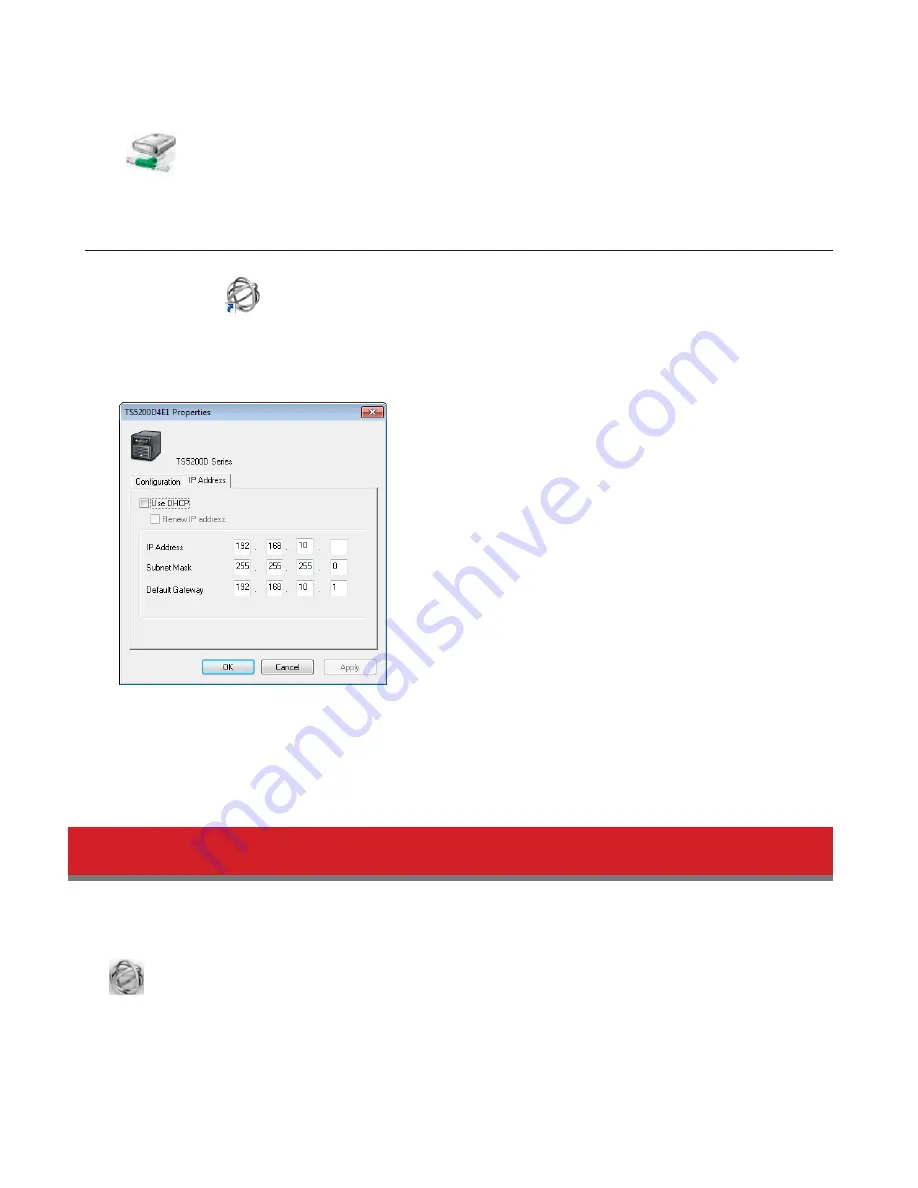
Changing the IP Address
1
Double-click the
icon on the desktop. NAS Navigator2 will start.
2
Right-click on your TeraStation’s icon and choose
Properties
-
IP Address
.
3
Uncheck “Use DHCP” and enter the desired settings, then click
OK
.
Note:
The following IP addresses are reserved and should not be used. If you configure one of them by accident,
initialize all settings with the init button on the TeraStation.
Local loopback address: 127.0.0.1, 255.255.255.0
Network address: 0.0.0.0, 255.255.255.0
Broadcast address: 255.255.255.255, 255.255.255.0
The IP address range from 224.0.0.0 to 255.255.255.255
NAS Navigator2 for Mac
NAS Navigator2 is a utility program that makes it easy to display Settings, change the TeraStation’s IP address, or check
its hard drive.
If you installed the TeraStation with the TeraNavigator CD, NAS Navigator2 was installed automatically. To launch it, click
the
icon in the Dock.
Содержание TeraStation 5000
Страница 1: ...TeraStation 5000 User Manual www buffalotech com 35020018 04 2014 01...
Страница 10: ...10 Chapter 1 Installation Diagrams TS5800D TS5600D TS5400D...
Страница 69: ...69 4 Insert the new drive in the empty slot Slide the drive in with the locking mechanism open...
Страница 70: ...70 5 Swing the lock back down until it clicks into place...


