81
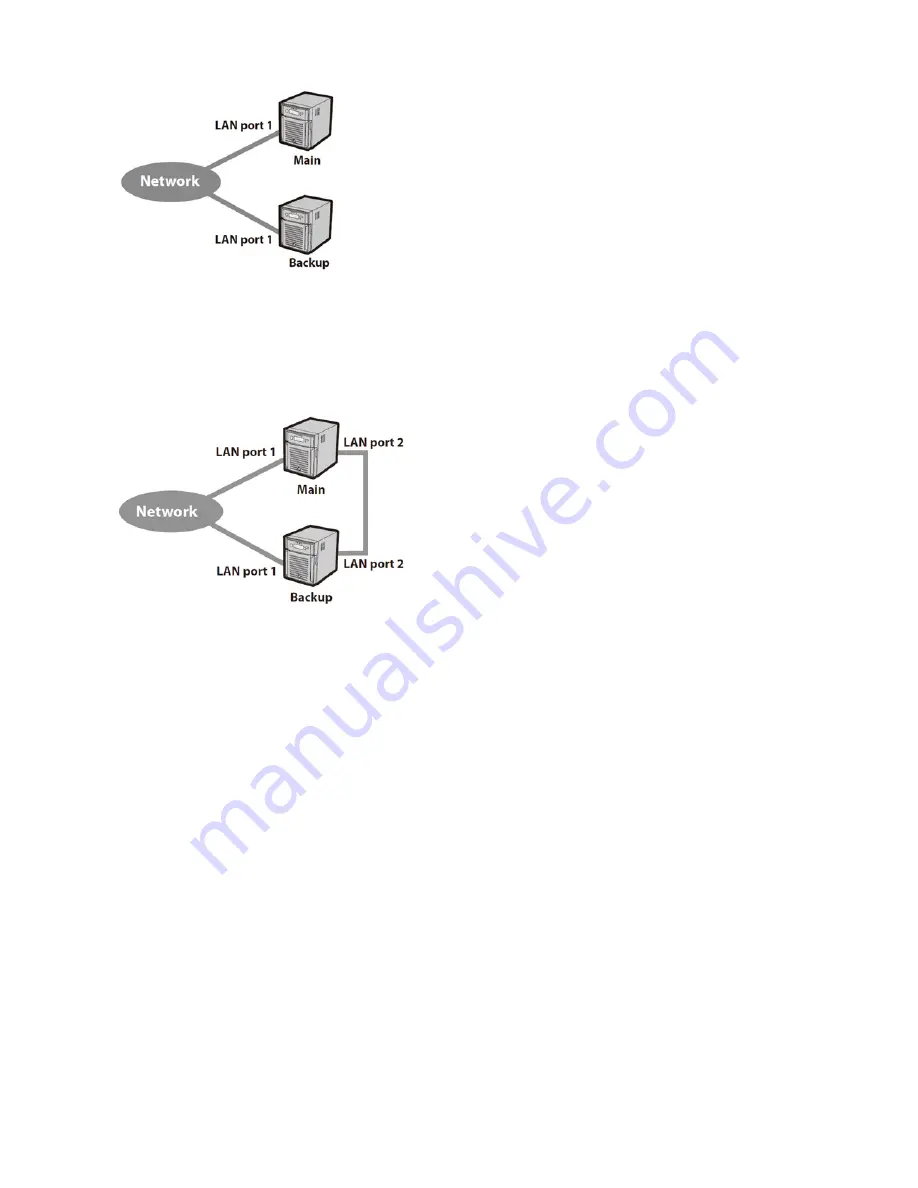
Connecting to the network at LAN port 1 and setting failover at LAN port 2
With the second setup, the backup TeraStation and main TeraStation are connected by a second Ethernet cable
connecting their LAN 2 ports. Updating is done over this dedicated network path, so updates are quicker and don’t
interfere with normal network traffic. With this setup, if the main TeraStation fails, the backup TeraStation will replace it
by name, but will keep its original IP address.
Check if the main TeraStation is alive using LAN port 1 and back up data via LAN port 2
• Select LAN port 1 for the backup target and LAN port 2 for the backup LAN port.
• This is more efficient than the setup below and doesn’t interfere with normal network traffic.
Check if the main TeraStation is alive and back up the data via LAN port 2
• Select LAN port 2 for the backup target and for the backup LAN port.
• This is fault-tolerant if network disconnections occur.
The main and backup TeraStations should be the same model and capacity. Use fixed IP addresses for both TeraStations.
Because the IP address of the TeraStation designated as the backup cannot be changed, set its IP address before
configuring failover.
Using with UPS
Once failover is configured, you cannot set up a UPS for the backup TeraStation. Configure your UPS before configuring
failover. UPS recovery can be configured for both the main TeraStation and the backup TeraStation. However, the UPS
settings of the main TeraStation will not be copied to the backup TeraStation.
If the backup TeraStation is configured to sync with the UPS connected to the main TeraStation, then if the main
TeraStation shuts down, the backup TeraStation will no longer be able to detect if there was a power outage. In this case,
move the UPS communication cable from the main TeraStation to the backup TeraStation and reconfigure the UPS link
settings.
Содержание TeraStation 5000
Страница 1: ...TeraStation 5000 User Manual www buffalotech com 35020018 04 2014 01...
Страница 10: ...10 Chapter 1 Installation Diagrams TS5800D TS5600D TS5400D...
Страница 69: ...69 4 Insert the new drive in the empty slot Slide the drive in with the locking mechanism open...
Страница 70: ...70 5 Swing the lock back down until it clicks into place...


