


2-38
2003 Buell XB9R: Chassis
HOME
INSTALLATION
1.
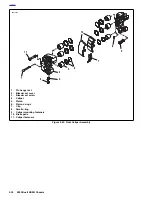
See
Figure 2-52.
Install caliper mount clip (1) if removed.
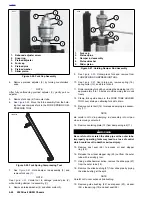
2.
See
Figure 2-51.
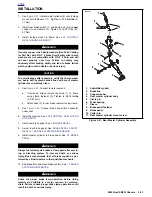
Install caliper assembly on caliper
mount. Brake pad surfaces must face rear brake rotor.
a. Install large caliper screw (7) (metric) tightening to
18-21 ft-lbs (24-28 Nm).
b.
Install small caliper screw (6) (metric) tightening to
14-18 ft-lbs (19-24 Nm).
c. Install caliper carrier onto swingarm tightening cali-
per carrier fasteners (8) to 24-26 ft-lbs (33-35 Nm).
1
1
WARNING
1
WARNING
Use only copper crush banjo washers (See Parts Catalog
for Part No.) with D.O.T. 4 brake fluid. Earlier silver banjo
washers are not compatible with D.O.T. 4 fluid and will
not seal properly over time. Failure to comply may
adversely affect braking ability and lead to brake failure
which could result in death or serious injury.
CAUTION
To avoid leakage, verify that gaskets, banjo bolt, hydrau-
lic brake line and caliper bore are completely clean.
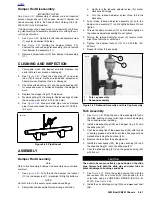
3.
See
Figure 2-51.
Connect brake line (1) to caliper using
two new copper washers (3) and banjo bolt (2) (metric).
Tighten to 16-20 ft-lbs (22-27).
4.
Depress rear brake pedal several times to set brake
pads to proper position within caliper. Bleed brake sys-
tem.
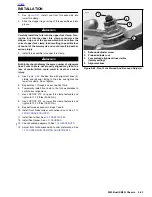
5.
Verify proper fluid level in reservoir.
1
1
WARNING
1
WARNING
Always test motorcycle brakes at low speed after servic-
ing or bleeding system. To prevent death or serious
injury, Buell recommends that all brake repairs be per-
formed by a Buell dealer or other qualified mechanic.
6.
Turn ignition key switch to ON. Apply brake pedal to test
brake lamp operation. Turn ignition key switch to LOCK.
1
1
WARNING
1
WARNING
Check for proper brake lamp operation before riding
motorcycle. Visibility is a major concern for motorcy-
clists. Failure to have proper brake lamp operation could
result in death or serious injury.
NOTE
Avoid making hard stops for the first 100 miles (160 km) to
allow new brake pads to “wear in” properly with the brake
rotor.
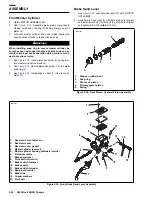
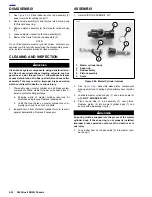
Figure 2-55. Rear Reservoir
8359
Содержание XB9R 2003
Страница 2: ...1 2 Edit Me Printed June 5 2002 12 26 pm ...
Страница 35: ...D 2 2003 Buell XB9R Appendix D HOME Figure D 2 Rear Brake Systems Top View b1115xbx ...
Страница 36: ...2003 Buell XB9R Appendix D D 3 HOME Figure D 3 Rear Brake Systems Left Side View b1116xcx ...
Страница 44: ...2003 Buell XB9R Appendix D D 11 HOME Figure D 11 Clutch and Throttle Cables Right Side View b1124xax ...
Страница 47: ...D 14 2003 Buell XB9R Appendix D HOME NOTES ...
Страница 49: ......
Страница 77: ...1 28 2003 Buell XB9R Maintenance HOME NOTES ...
Страница 103: ...1 54 2003 Buell XB9R Maintenance HOME NOTES ...
Страница 105: ... 2 ...
Страница 191: ......
Страница 263: ...3 72 2003 Buell XB9R Engine HOME NOTES ...
Страница 299: ...4 2 2003 Buell XB9R Fuel System HOME NOTES ...
Страница 385: ...4 88 2003 Buell XB9R Fuel System HOME NOTES ...
Страница 421: ...4 124 2003 Buell XB9R Fuel System HOME NOTES ...
Страница 423: ......
Страница 445: ...5 22 2003 Buell XB9R Starter HOME NOTES ...
Страница 447: ......
Страница 469: ...6 22 2003 Buell XB9R Drive Transmission HOME NOTES ...
Страница 497: ...6 50 2003 Buell XB9R Drive Transmission HOME NOTES ...
Страница 499: ......
Страница 565: ...7 66 2003 Buell XB9R Electrical HOME NOTES ...