57
Recording a pattern
Chap. 2
(6) PAD (Drum part)
This shows the pad bank, pad number, and
name of the instrument that is recorded at the
currently selected position.
By moving the cursor to this indication and
using the VALUE dial to change the pad
bank and pad number, you can replace the
recorded instrument with the instrument of
the pad bank and pad number you specify.
(7) NOTE (Bass part)
This shows the name of the note recorded at
the currently selected position.
By moving the cursor to this indication and
using the VALUE dial to change the name of
the note, you can replace the recorded note
with the note you specify.
(8) DUR (Bass part)
This shows the duration (length) of the note
recorded at the currently selected position, in
units of “beats - ticks.”
By moving the cursor to this indication and
using the VALUE dial to change the beats
and ticks, you can modify the duration of the
recorded bass note.
* Beats are divided into “ticks,” and there are 96 ticks in
one quarter note beat.
(9) VEL
This shows the velocity value of the
instrument or bass note recorded at the
currently selected position.
By moving the cursor to this indication and
turning the VALUE dial, you can modify the
velocity value that is recorded.
* You cannot record more than one instance of the same
instrument or bass note at the same position. If you
attempt to do so, the previous note will be overwritten by
the last-recorded note.
7.
Repeat steps 5–6 if necessary.
* If necessary, you can press [PAD] (or hold down
[SHIFT] and press [PAD]) to switch between the drum
part and the bass part.
8.
When you are finished recording, press
[EXIT].
9.
If you want to save the pattern, proceed
to “Saving a pattern” (p. 65).
■
Recording pitch bend data
in the bass part
You can record pitch bend data in the bass part.
This lets you simulate playing techniques such
as hammering-on or pulling-off.
1.
Access the step-record screen for the
bass part (p. 55).
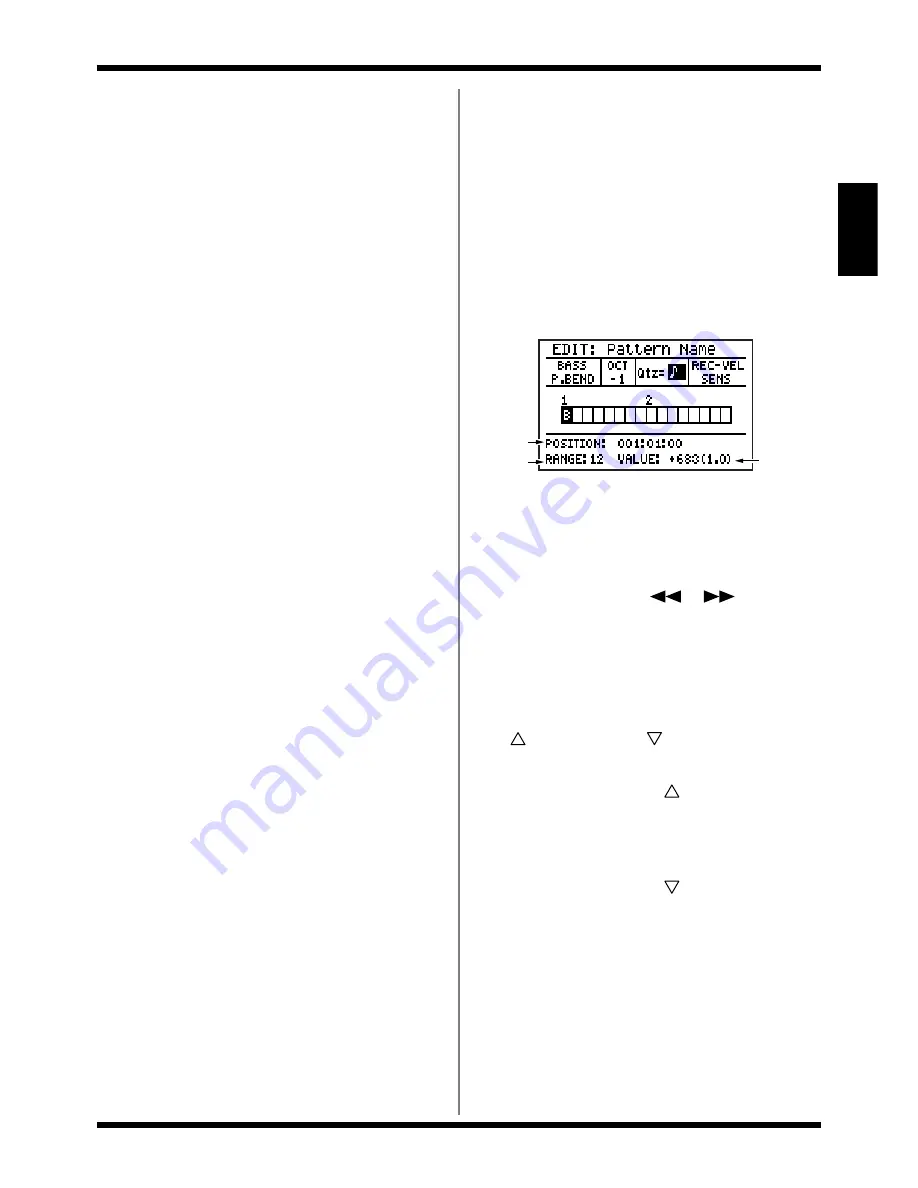
2.
Move the cursor to “BASS” and use the
VALUE dial to switch to “P.BEND.”
fig.02-230d
3.
Move the cursor to “Qtz” and use the
VALUE dial to specify the quantization.
4.
Specify the position at which you want to
record pitch bend data.
You can either use [
][
] to move
the cursor in the pattern display area to the
step that you want to record, or specify the
POSITION measure:beat:clock values to set
the recording position.
5.
Hold down [SHIFT] and press [CURSOR]
or [CURSOR]
to record pitch
bend data.
[SHIFT]+[CURSOR] :
The pitch bend amount is raised by a
semitone each time you press these keys.
(If Bend Range = 12)
[SHIFT]+[CURSOR] :
The pitch bend amount is lowered by a
semitone each time you press these keys.
(If Bend Range = 12)
An indication of “B” is shown in the pattern
display area where pitch bend data has been
recorded.
* If DISPLAY is set to “ALL,” the “
●
” indication takes
priority for steps at which both a bass note and pitch bend
data are recorded.
(1)
(2)
(3)
Содержание Dr. Rhythm DR-880
Страница 2: ......
Страница 21: ...21 Quick Start ...
Страница 48: ...48 ...
Страница 74: ...74 ...
Страница 84: ...84 ...
Страница 115: ...115 Chapter 8 Convenient function System settings ...
Страница 144: ...144 ...
Страница 145: ...145 Appendices ...
Страница 168: ......


