MIC Series IP Power Supply
Installation | en
19
Bosch Security Systems, Inc.
User Manual
F.01U.265.804 | 1.6 | 2012.08
9.
Prepare the power cable as needed, and then feed the cable into the enclosure.
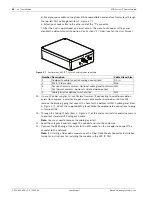
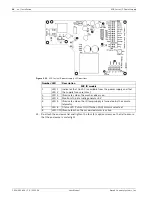
10. Connect the Live and Neutral cores to the correct screw terminals on terminal block HD1
as identified in the table below and printed on the PCB. Observe polarity and voltage.
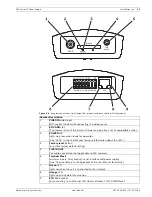
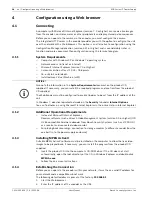
11. Remove the brass nut and copper washer from the earth termination post (item 3,
Figure 3.6
); set these aside.
Figure 3.6
Power (mains) input with shield removed, showing terminal block HD1 before wiring
12. Remove the ring terminal (supplied).
13. Insert the earth core from the mains cord (item 2,
Figure 3.6
) into the crimp portion (size
M6, UL-certified) of the ring terminal and crimp it in place.
Note:
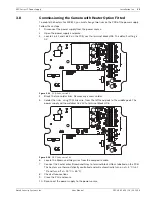
The graphic in the figure referenced below is representative of the connections;
the layout of the MIC IP PSU differs slightly from that depicted below.
14. Place the ring terminal onto the earth termination post.
15. Replace the copper washer. Secure with the brass nut.
16. Replace the internal shield, taking care to avoid pinching the cables. Tighten the screws.
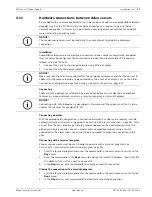
* If connecting a heater [MIC612 only], see
Section 3.8 Commissioning the Camera with Heater
Option Fitted
.
17.
On non-IR models only
: If necessary, connect a tamper switch to terminal block HD2.
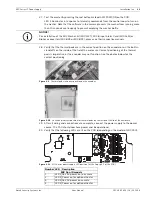
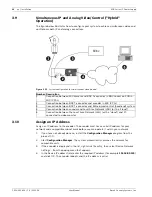
18. If simultaneous video (IP and analog (PAL or NTSC)) is desired, follow these steps:
a. Disconnect the coax cable between the BNC socket (marked "VIDEO IN") on the
encoder and the BNC socket CN1 on the PCB.
b. Attach a BNC "T" connector (75 ohm, user-supplied) to the BNC socket CN1 on the
PCB.
c. Re-attach the coax cable from the encoder to one end of the "T" connector.
PCB Marking Description
L
Live
N
Neutral
Earth / Ground
Number Description
1
Earth core cable to enclosure lid
2
Earth core cable to power supply PCB
3
Earth termination post
NOTICE!
For MIC612 cameras only
: You must connect the overall shield drain wire of the composite
cable to the power supply chassis in order to ground the chassis. Crimp the drain wire to the
ring terminal lug attached to the mounting screw of the PCB located to the right of BNC
socket CN3 (Video Switched). See
Figure 3.3
for location of the screw.
Содержание MIC IP PSU
Страница 1: ...MIC Series IP Power Supply MIC IP PSU en User Manual ...
Страница 2: ......
Страница 99: ......


