background image

724-746-5500   |   blackbox.com 

Page 84


Chapter 4: Advanced Functions

4.4.4 System Log

All important system events are logged. Use this function to check the router’s event log.

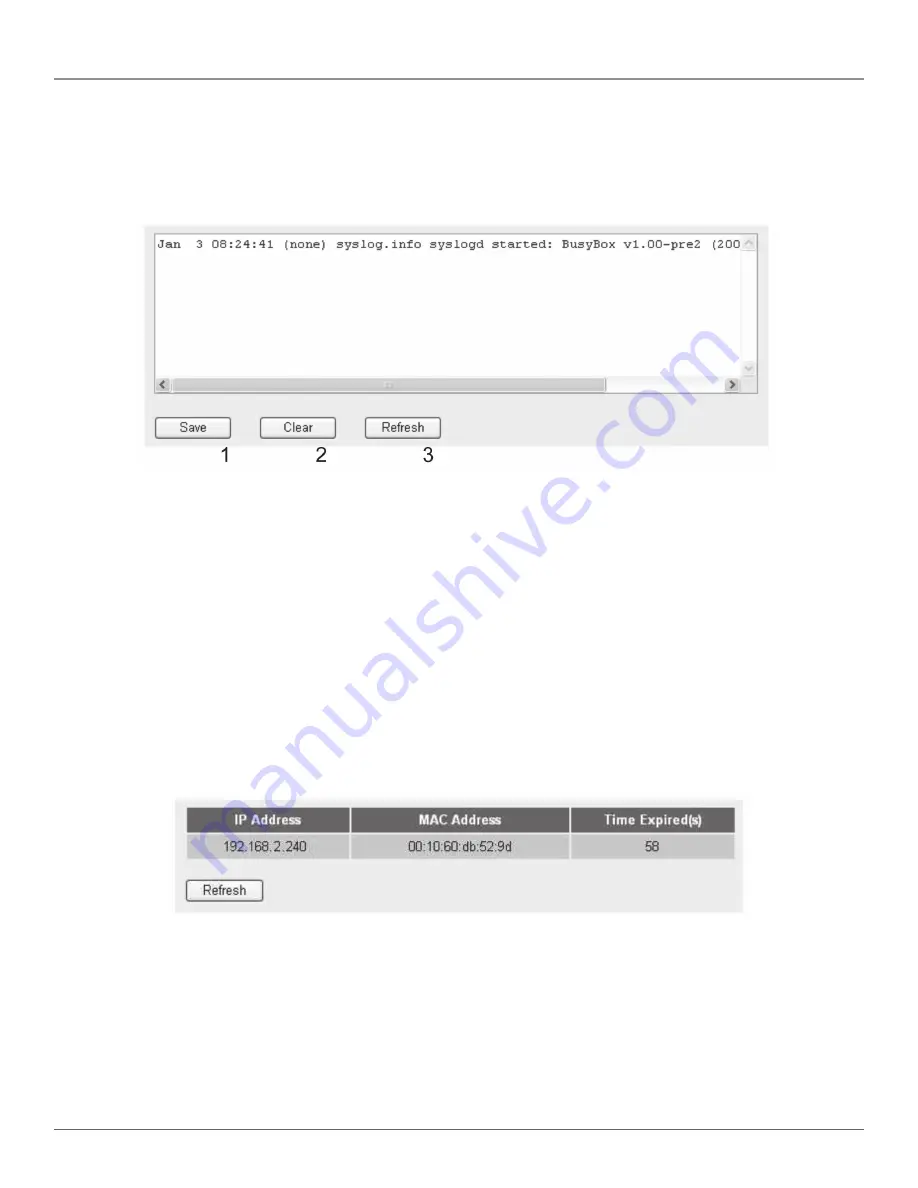
Click on the “System Log” menu on the left of the Web management interface, and the following message will be displayed:

Figure 4-32. Sample system log.

The system events will be displayed in this page.

Table 4-12. System events options.


Item 


Description


Save (1):  


Save the current event log to a text file.


Clear (2):  


Delete all event logs displayed here.


Refresh (3):  


Refresh the event log display.

4.4.5 Security Log

All information about network and system security is kept here, and you can use this function to check the router’s security event 
log.

Click on the “Security Log” menu on the left of the Web management interface, and the following message will be displayed:

Figure 4-33. Security log screen.

The system events will be displayed in this page.

Table 4-13. Security log options.


Item 


Description


Save (1):  


Save the current event log to a text file.


Clear (2):  


Delete all event logs displayed here.


Refresh (3):  


Refresh the event log display.

Содержание WRT-300BGN-R2

Страница 1: ...Mbps Pure Networking 802 11n 2T2R Wireless Router Order toll free in the U S Call 877 877 BBOX outside U S call 724 746 5500 FREE technical support 24 hours a day 7 days a week Call 724 746 5500 or f...

Страница 2: ...30 seconds Trademarks Used in this Manual Black Box and the Double Diamond logo are registered trademarks and Pure Networking is a trademark of BB Technologies Inc Microsoft Internet Explorer Windows...

Страница 3: ...ncouraged to try to correct the interfer ence by one of the following measures Reorient or relocate the receiving antenna Increase the separation between the equipment and receiver Connect the equipme...

Страница 4: ...n el flujo de aire por los orificios de ventilaci n 10 El equipo el ctrico deber ser situado fuera del alcance de fuentes de calor como radiadores registros de calor estufas u otros aparatos incluyend...

Страница 5: ...safety of those who install and use it However special attention must be paid to the dangers of electric shock and static electricity when working with electrical equipment All guidelines of this and...

Страница 6: ...Modem 24 3 3 2 Setup Procedure for Fixed IP xDSL 24 3 3 3 Setup Procedure for PPPoE xDSL 25 3 3 4 Setup Procedure for PPTP xDSL 26 3 3 5 Setup Procedure for L2TP xDSL 27 3 3 6 Setup Procedure for Tels...

Страница 7: ...arding 66 4 2 3 Virtual Server 67 4 2 4 Port Mapping for Special Applications 68 4 2 5 UPnP Setting 70 4 2 6 ALG Settings 71 4 3 Firewall 72 4 3 1 Access Control 73 4 3 2 URL Blocking 76 4 3 3 DoS Att...

Страница 8: ...to 300 Mbps SDRAM 16 MB Transmit Power 802 11n 15 dBm 1 dBm 802 11g 15 dBm 1 dBm 802 11b 18 dBm 1 dBm User Controls 1 Radio ON OFF switch 1 Reset WPS button Interface 1 RJ 45 WAN 4 RJ 45 LAN Connecto...

Страница 9: ...ge and Universal Repeater Advanced network and security features include Special Applications QoS DMZ Virtual Servers Access Control and Firewall Allows you to monitor the router s status via DHCP Cli...

Страница 10: ...ocket 100 240 VAC 50 60 Hz 2 5 What s Included Your package should contain the following items If anything is missing or damaged contact Black Box Technical Support at 724 746 5500 Wireless router A C...

Страница 11: ...set WPS Reset the router to factory default settings clear all settings or start the WPS func tion Press this button and hold it for 10 seconds to restore all settings to factory defaults and press th...

Страница 12: ...abled consumer devices other than computers such as game con soles or switches hubs to the router s LAN ports See Figure 3 2 Figure 3 2 Connect devices to LAN ports 3 Connect the A C power adapter to...

Страница 13: ...unsure see the following instructions to configure your computer to use a dynamic IP address If the operating system of your computer is Windows 95 98 Me go to Section 3 2 1 Windows 2000 go to Section...

Страница 14: ...n the Start button it should be located at the lower left corner of your computer then click on the control panel Double click Network and the Dial up Connections icon click Local Area Connection and...

Страница 15: ...S server addresses 3 2 3 Windows XP IP Address Setup 1 Click on the Start button it should be located at the lower left corner of your computer then on the control panel Double click Network and the I...

Страница 16: ...724 746 5500 blackbox com Page 16 Chapter 3 System and Network Setup Figure 3 8 TCP IP screen 2 Select Obtain an IP address automatically and Obtain DNS server address automatically then click OK...

Страница 17: ...should be located at the lower left corner of your computer then click on the control panel Click View Network Status and Tasks and then click Manage Network Connections Right click Local Area Network...

Страница 18: ...x com Page 18 Chapter 3 System and Network Setup Figure 3 10 TCP IP properties 2 Select Obtain an IP address automatically and Obtain DNS server address automatically then click OK Figure 3 11 Obtain...

Страница 19: ...tup 3 2 5 Router IP Address Lookup After the IP address setup is complete please click on Start at the bottom lower corner of your desktop then click Run Figure 3 12 Click on the Run button Type cmd t...

Страница 20: ...the network connection between your computer and router and or re check every step of the network setup procedure 3 Via a Web browser connect the router s management interface by following the instruc...

Страница 21: ...incorrectly Retype the username and password again If you re certain that the user name and password you typed are correct go to Appendix A Troubleshooting and reset the default settings TIP This pag...

Страница 22: ...click on the Quick Setup button Figure 3 17 Quick Setup screen The following message will be displayed 1 Set Time Zone Figure 3 18 Set Time Zone screen Table 3 1 Time settings Item Description Set Tim...

Страница 23: ...go to Section 3 3 2 PPPoE xDSL go to Section 3 3 3 PPTP xDSL go to Section 3 3 4 L2TP xDSL go to Section 3 3 5 Telstra Big Pond go to Section 3 3 6 If you re not sure contact your Internet service pr...

Страница 24: ...h with all settings click on the OK 3 in Figure 3 20 button if you want to go back to the previous menu click on the Back button 3 3 2 Setup Procedure for Fixed IP xDSL NOTE You can choose this Intern...

Страница 25: ...n use the default value Connection Select the type of Internet connection you want to use a detailed explanation Type 5 is listed below Idle Time Out 6 Type in idle time out detailed explanation liste...

Страница 26: ...in 3 3 1 or use the following IP address that is static IP address WAN interface settings must be correctly set or the Internet connection will fail even if the PPTP settings are correct Contact your...

Страница 27: ...in the idle time out for the Internet connection you want to use Refer to the Section 3 3 3 for detailed descriptions When you finish with all settings click on the OK 9 button if you want to go back...

Страница 28: ...ned by your Internet service provider here L2TP Gateway 3 Type in the PPTP gateway s IP address assigned by your Internet service provider here MTU 4 Type in the network connection s MTU value here If...

Страница 29: ...Login Server 4 Type in the login server s IP address here When you finish with all settings click on the OK 5 button if you want to go back to the previous menu click on the Back button When all sett...

Страница 30: ...time zone and time auto synchronization parameters Click on the System menu on the left of the Web management interface then click on Time Zone Select the time zone from the Set time zone drop down l...

Страница 31: ...llowing message will be displayed Figure 3 32 Change password screen Table 3 8 Change password options Item Description Current Password 1 Input the current password here New Password 2 Input the new...

Страница 32: ...ge this router from a specific IP address by enabling the Remote Management Function To do so follow these instructions Click on the System menu on the left of the Web management interface then click...

Страница 33: ...on 3 5 8 DDNS Client for details NOTE The default port number that the Web browser will use is 80 If the port setting on this page is not 80 you have to assign the port number in the Web browser s add...

Страница 34: ...your service provider only permits computers with certain MAC addresses to access the Internet If you re using the computer that s used to connect to the Internet via a cable modem simply press the Cl...

Страница 35: ...of DNS server provided by your service provider Gateway Address 3 After you finish with all settings click on the Apply 4 button and the following message will be displayed Figure 3 42 Settings saved...

Страница 36: ...ontinuous The connection will be always on If the connection is interrupted the router will re connect automatically Connect On Demand Only connect when you want to surf the Internet Idle Time Out is...

Страница 37: ...terface setting setup IP address and PPTP setting PPTP user name and password Start at the WAN interface setting Figure 3 45 WAN interface settings screen Select how you obtain an IP address from your...

Страница 38: ...t to use and refer to Section 3 3 3 for detailed descriptions When you finish with the settings click on the OK 9 button if you want to go back to the previous menu click on the Back button 3 5 5 Setu...

Страница 39: ...device login Check this box to choose the login server by yourself server manually 3 Login Server 4 Input the IP address of the login server here When you finish with all settings click on the OK 5 bu...

Страница 40: ...on to go back to the previous setup menu or to continue with other setup procedures Click on the Apply button to reboot the router so the settings will take effect please wait for about 30 seconds whi...

Страница 41: ...service provider Account E Mail 4 Input the DDNS registration s account or e mail Password Key 5 Input the DDNS service password or key After you finish with the settings click on the Apply 6 button a...

Страница 42: ...up to 253 clients so you can set the d field of the router s IP address as 1 or 254 or any number between 1 and 254 and pick a number between 0 and 254 for field c 2 In most cases you should use 255 2...

Страница 43: ...on t know what to use Lease time Two weeks or forever if you have less than 20 computers Start IP 192 168 2 100 End IP 192 168 2 200 Domain name leave it blank NOTES 1 The last field d field s number...

Страница 44: ...ss you want to assign to this computer or network device Add 4 After you input the MAC address and IP address pair click this button to add the pair to the static DHCP leases table If you want to remo...

Страница 45: ...ace you can use the router s wireless function to let the device connect to the Internet and share resources with other computers with wired LAN connection You can also use the built in security funct...

Страница 46: ...is router ro another wireless router to expand the network 4 AP Bridge Point to Multipoint Connect this router to up to four other wireless routers to expand the network 5 AP Bridge WDS Connect this r...

Страница 47: ...or 802 11b clients and 54 Mbps for 802 11g clients 2 4 GHz B G N 2 4 GHz band only allows the 802 11b 802 11g and 802 11n wireless network client to connect to this router The maximum transfer rate is...

Страница 48: ...e using the same channel which will disturb the radio communication between the wireless client and the wireless radio Setup Procedure for Station Infrastructure In this mode you can connect the route...

Страница 49: ...Description Band 2 Select the band you want to use Two wireless routers must use the same setting Channel Number 3 Select the channel you want to use Two wireless routers must use the same setting MAC...

Страница 50: ...pt wireless clients NOTE For WDS mode the output signal is the same as that of the normal AP mode Figure 3 65 AP Bridge WDS setup Table 3 25 AP bridge WDS options Item Description Band 2 Select the ba...

Страница 51: ...32 alphanumeric characters here ESSID identifies your own wireless router from others when there are other wireless routers in the same area The default SSID is default We recommend changing the defau...

Страница 52: ...to continue with router setup Click on the Apply but ton to reboot the router so the settings will take effect wait for about 30 seconds while the router reboots 3 7 2 Advanced Wireless Settings This...

Страница 53: ...20 40 MHz Preamble Type 8 Set the preamble type Do not modify the default value if you don t know what it is The default setting is Short Preamble Broadcast ESSID 9 Decide if the wireless router will...

Страница 54: ...ryption is disabled and every wireless device nearby will be able to connect to your wireless router if no other security measure is enabled such as MAC address access control see Section 3 7 4 or dis...

Страница 55: ...users by IEEE 802 1x but it does not encrypt the data during communication If there is a RADIUS server in your environment enable this function Check this box and another sub menu will appear Figure 3...

Страница 56: ...llowing setup menu will be displayed Figure 3 73 WPA setup screen Table 3 30 WPA options Item Description WPA Unicast Select a type of WPA cipher suite Available options are WPA TKIP WPA2 AES and WPA2...

Страница 57: ...s client supports the cipher you selected RADIUS Server Input the radius authentication server s IP address here RADIUS Server Port 4 Input the radius authentication server s port number here The defa...

Страница 58: ...set button to de select all MAC addresses Enable Wireless To enforce MAC address filtering check Enable Wireless Access Control When this item is Access Control 5 unchecked the wireless router will no...

Страница 59: ...ents and this wireless router You don t have to select an encryption mode and input a long encryption passphrase every time you need to setup a wireless client just press a button on a wireless client...

Страница 60: ...on function is properly set you ll see a Configured message here If the wireless security function has not been set you ll see unConfigured Self PIN code This is the wireless router s WPS PIN code Use...

Страница 61: ...ss router will be steady on when this wireless router waits for incoming WPS requests 3 7 6 Security Tips for Wireless Networks Here are some quick tips to help you improve your wireless network s sec...

Страница 62: ...e and the following message will be displayed Figure 4 1 Enable QoS settings screen Table 4 1 Enable QoS options Item Description Enable QoS 1 Check this box to enable QoS function unselect this box i...

Страница 63: ...e priority of the QoS rule you selected click on this button Move Down 10 To lower the priority of the QoS rule you selected click on this button Reset 11 To erase all values you just entered click on...

Страница 64: ...Range d Input the range of local source port numbers that will be affected by this rule If you want to apply this rule on ports 80 to 90 input 80 90 if you want to apply this rule on a single port jus...

Страница 65: ...n 4 2 Network Address Translation NAT Network address translations enable sharing a single IP address for multiple computers Without NAT all computers must be assigned a valid Internet IP address to c...

Страница 66: ...ng message will be displayed Figure 4 6 Enable port forwarding screen Table 4 3 Enable port forwarding screen options Item Description Enable Port Check this box to enable port mapping uncheck this bo...

Страница 67: ...setup procedures Click on the Apply button to reboot the router so the settings will take effect please wait for about 30 seconds while the router reboots To reset all settings in this page back to t...

Страница 68: ...lues Virtual Server Table 10 All existing virtual server mappings will be displayed here Delete Selected 11 Select a virtual server mapping by clicking on the Select box of the mapping then click on t...

Страница 69: ...re popular applications that require multiple connections Select an application from the Popular Applications selection and click on the Add button to save the settings to the Current Trigger Port Tab...

Страница 70: ...enu or to continue with other setup procedures Click on the Apply button to reboot the router so the settings will take effect please wait for about 30 seconds while the router reboots To reset all se...

Страница 71: ...ll settings in this page back to the previously saved values click on the Cancel button 4 2 6 ALG Settings Application Layer Gateway ALG is a special function of this router It includes many preset ro...

Страница 72: ...this page back to the previously saved values click on the Cancel button 4 3 Firewall Except for NAT this router also provides a firewall function to block malicious intruders from accessing your com...

Страница 73: ...up procedures Click on the Apply button to reboot the router so the settings will take effect please wait for about 30 seconds while the router reboots 4 3 1 Access Control This function allows or den...

Страница 74: ...MAC address and associated comment to the MAC address filtering table Reset 6 Remove all inputted values MAC Filtering All existing MAC addresses in the filtering table will be listed here Table 7 Del...

Страница 75: ...go back to the previous setup menu or to continue with other setup procedures Click on the Apply button to reboot the router so the settings will take effect please wait for about 30 seconds while the...

Страница 76: ...If you want to specify ports 80 to 90 input 80 90 If you want to apply this rule on a single port just input the port number for example 80 Add f When you finish with all settings click on the Add but...

Страница 77: ...6 To delete a specific URL Keyword entry check the select box for the MAC address you want to delete then click on the Delete Selected button You can select more than one MAC address Delete All 7 To...

Страница 78: ...Ping Ping is a common and useful tool to know the connection status of a specified remote From WAN 2 network device but some malicious intruder might try to fill your network bandwidth with a lot of p...

Страница 79: ...is page back to the previously saved values click on the Cancel button DoS Advanced Settings When you click on the Advanced button in the DoS menu the following message will be displayed Figure 4 25 D...

Страница 80: ...yed Figure 4 26 Settings saved successfully screen Click on the Continue button to go back to the previous setup menu or to continue with other setup procedures Click on the Apply button to reboot the...

Страница 81: ...net IP address will be mapped to address 3 Computer Name 4 Pull down the menu and all the computers connected to the router will be listed here Select the computer name without checking the computer s...

Страница 82: ...this page back to the previously saved values click on the Cancel button 4 4 System Status The functions described here will provide you with system related information To enter the system status menu...

Страница 83: ...following message will be displayed Figure 4 30 Internet connection status screen This information will vary depending on the connection status 4 4 3 Device Status Use this function to display the ro...

Страница 84: ...nt log to a text file Clear 2 Delete all event logs displayed here Refresh 3 Refresh the event log display 4 4 5 Security Log All information about network and system security is kept here and you can...

Страница 85: ...essage will be displayed Figure 4 34 Active DHCP client list screen All information about active DHCP leases issued by this router will be displayed here Click on the Refresh button to display the lat...

Страница 86: ...Table 4 14 Backup and restore options Item Description Backup Settings 1 Press the Save button and you ll be prompted to download the configuration as a file The default filename is config bin You can...

Страница 87: ...then click on Firmware Upgrade on the left of the Web management interface The following message will be displayed Figure 4 37 Firmware upgrade screen 1 Click on Next and the following message will b...

Страница 88: ...a router reset to solve the problem Click on Tool located at the upper right corner of the Web management interface then click on the Reset button on the left of the web management interface The follo...

Страница 89: ...ork contact Black Box Technical Support at 724 746 5500 Problem I can t connect to the Internet Solution a Go to the Status Internet Connection menu and check the Internet connection status b If this...

Страница 90: ...ee smoke coming out from router or A C power adapter disconnect the router and A C power adapter from utility power and call Black Box Technical Support at 724 746 5500 Problem The date and time of al...

Страница 91: ...can be anything from 000 to 255 or as four cascaded binary numbers separated by bbbbbbbb bbbbbbbb bbbbbbbb bbbbbbbb where each b can either be 0 or 1 A network mask is also a 32 bit binary pattern an...

Страница 92: ...e that forwards packets between different networks based on network layer address information such as IP addresses Subnet Mask A subnet mask which may be a part of the TCP IP information provided by y...

Страница 93: ...Page 93 NOTES...

Страница 94: ...724 746 5500 blackbox com Page 94 NOTES...

Страница 95: ...Page 95 NOTES...

Страница 96: ...inets and racks and power and surge protection products to media converters and Ethernet switches all supported by free live 24 7 Tech support available in 30 seconds or less Copyright 2013 All rights...

Отзывы: