724-746-5500 | blackbox.com
Page 33
Chapter 3: System and Network Setup
When you finish with these settings, click on the “Apply” button, and you’ll see the following message displayed on the Web
browser:
Figure 3-37. Settings saved successfully screen.
Press the “Continue” button to save the settings and go back to the Web management interface; press the “Apply” button to
save the settings made and restart the router so the settings will take effect after it reboots.
NOTE: When you want to manage this router from another computer on the Internet, you have to input the router’s IP address
and port number. If your Internet service provider assigns you a static IP address, you won’t have a problem. If the IP
address your service provider assigns to you will vary every time you make an Internet connection, you will have a problem.
Either ask your service provider to give you a static IP address, or use dynamic IP to host name mapping services such as
DDNS. Refer to Section 3.5.8, DDNS Client, for details.
NOTE: The default port number that the Web browser will use is “80.” If the port setting on this page is not 80, you have to
assign the port number in the Web browser’s address bar manually. For example, if this router’s IP address is 1.2.3.4, and
the port number you set is 8888, you have to input the following address in the Web browser’s address bar:
“http://1.2.3.4:8888”
3.5 Setup Internet Connection (WAN Setup)
You can set up the Internet connection by using the Quick Setup menu described in Section 3.3. However, to set up WAN
connections, you need to use the WAN configuration menu. You can also set advanced functions such as DDNS (Dynamic DNS)
here.
To start the configuration, follow these instructions:
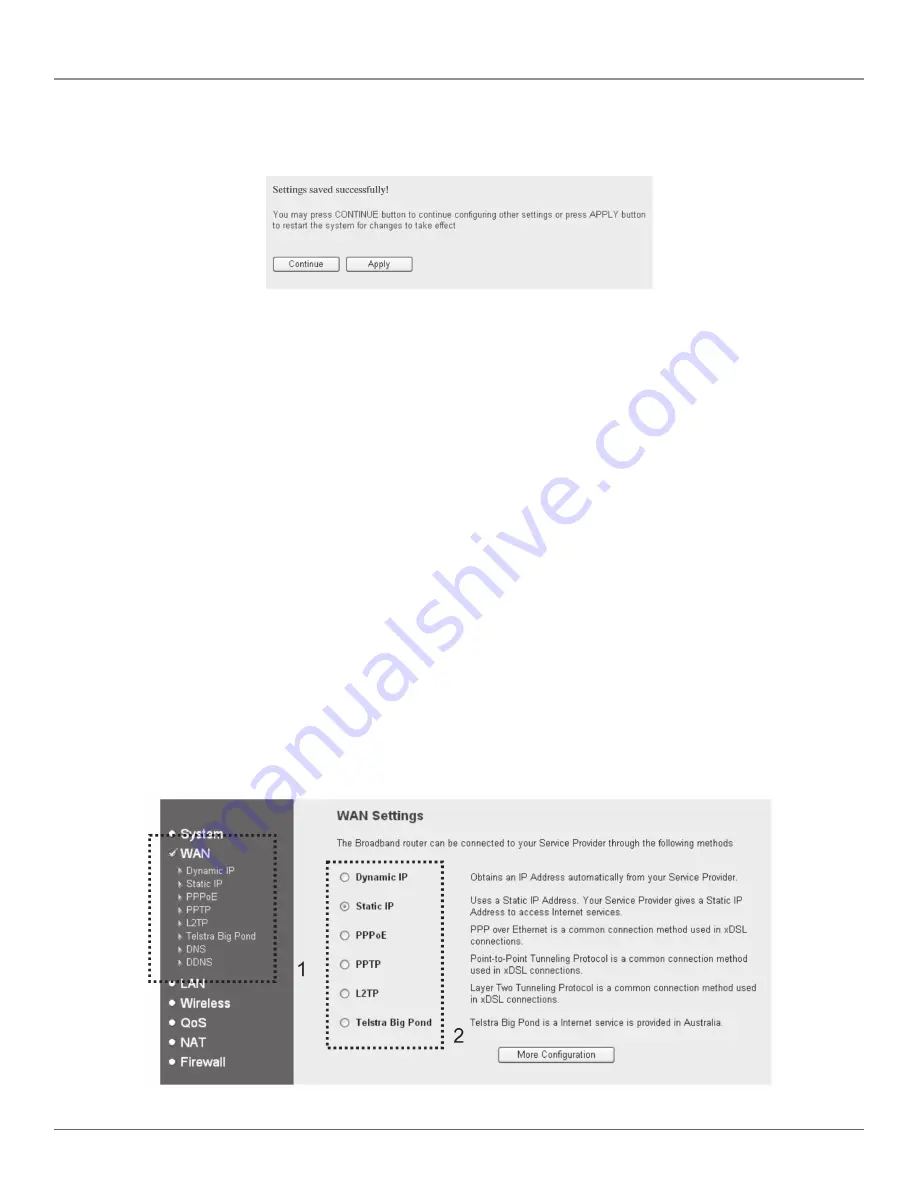
Click on the “WAN” menu on the left of the Web management interface, and the following screen will be displayed:
Select an Internet connection method depending on the type of connection you’re using. You can either click the connection
method on the left (1) or right (2). If you select the connection method on the right, click on the “More Configuration” button
after you select a method.
Figure 3-38. WAN setup screen.
Содержание WRT-300BGN-R2
Страница 93: ...Page 93 NOTES...
Страница 94: ...724 746 5500 blackbox com Page 94 NOTES...
Страница 95: ...Page 95 NOTES...


