


1.
2.
3.
4.
5.
6.
7.
8.
9.
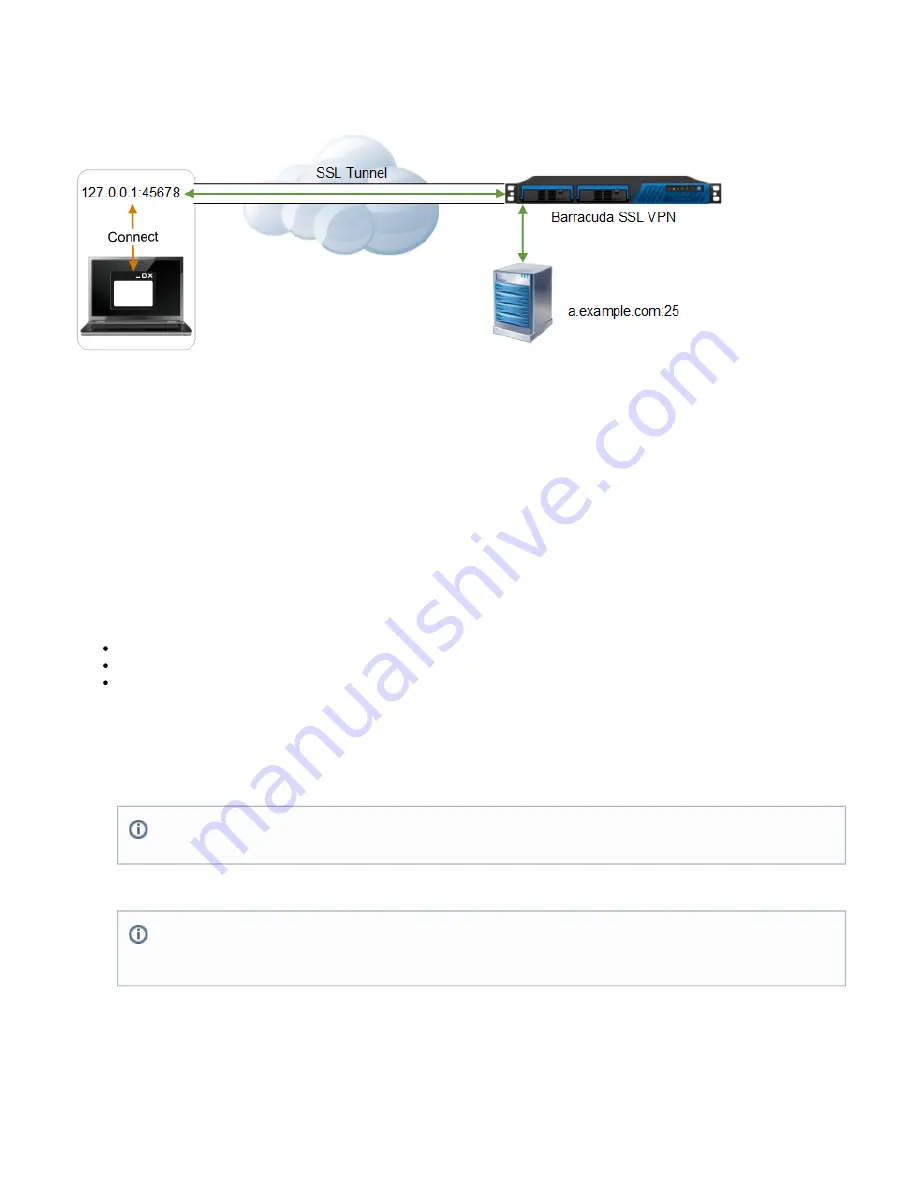
but to a Port on the 127.0.0.1 interface. The SSL VPN Agent accepts the local connection and forwards the traffic through the SSL tunnel. The
Barracuda SSL VPN forwards the traffic to the destination IP and Port defined in the SSL tunnel configuration. The traffic from the Barracuda SSL
VPN to the destination IP in the network is not encrypted anymore.
SSL tunnels can be configured to only allow local connections or to allow connections directly to the remote network. It is also possible to define
the source IP address of the SSL tunnel, so that clients in the same remote network can share a SSL tunnel. The tunnel is terminated when the
session is closed or timed out.
Next Steps
To create a SSL Tunnel complete the following instructions:
How to Create an SSL Tunnel
An outgoing SSL tunnel protects TCP connections that your local computer forwards from a local port to a preconfigured destination IP address
and port, reachable by the Barracuda SSL VPN that the user is connected to. To use the tunnel, the application or browser connects to a random
listener port on the 127.0.0.1 or 127.0.0.2 localhost address. The encrypted tunnel ends at the SSL VPN, all connection beyond the SSL VPN are
not secure. If you want other computers on the same network to share a SSL tunnel, use a network IP address instead of the 127.0.0.1 localhost
address as the source address.
In this article
Step 2. (Optional) Configure Advanced Tunnel Settings
Step 1. Create a SSL Tunnel
Log into the
.
Go to the
page.
RESOURCES > SSL Tunnels
In the Create SSL Tunnel section, select the desired database from the
drop down list.
User Database
Enter a unique name for the tunnel in the
field.
Name
In the
field, enter t
Destination Host
he name or IP of the resource you want to access.
In the Destination Port field, enter the port number on the destination host. If you have a client application running on the destination
host that for example listens at port 5900 for VNC, enter 5900.
Select Yes for
if the tunnel should be added to the default
Add to My Favorites
Resource Category.
Double-click on your desired policies from the Available Policies list to send them to Selected Policies list.
Click
to create the SSL Tunnel.
Add
The SSL tunnel is now visible in the
section.
SSL Tunnel
If you are a Super User in the Global View and you want to apply this SSL tunnel across more than one User Database, select
as the User Database to list the Policies across all the User Databases.
Global View
The ${} indicates that replacement variables can be used. Clicking this icon will load the replacement variables that are
available. The session variables are values taken from the current session. The userAttributes variables are values taken from
user-defined attributes for the currently logged on user.