


3.
4.
1.
2.
3.
4.
a.
b.
c.
d.
5.
1.
2.
3.
Select the resource categories that you want to apply to the application in the
section, and then click
.
Resource Categories
Add
Click Save.
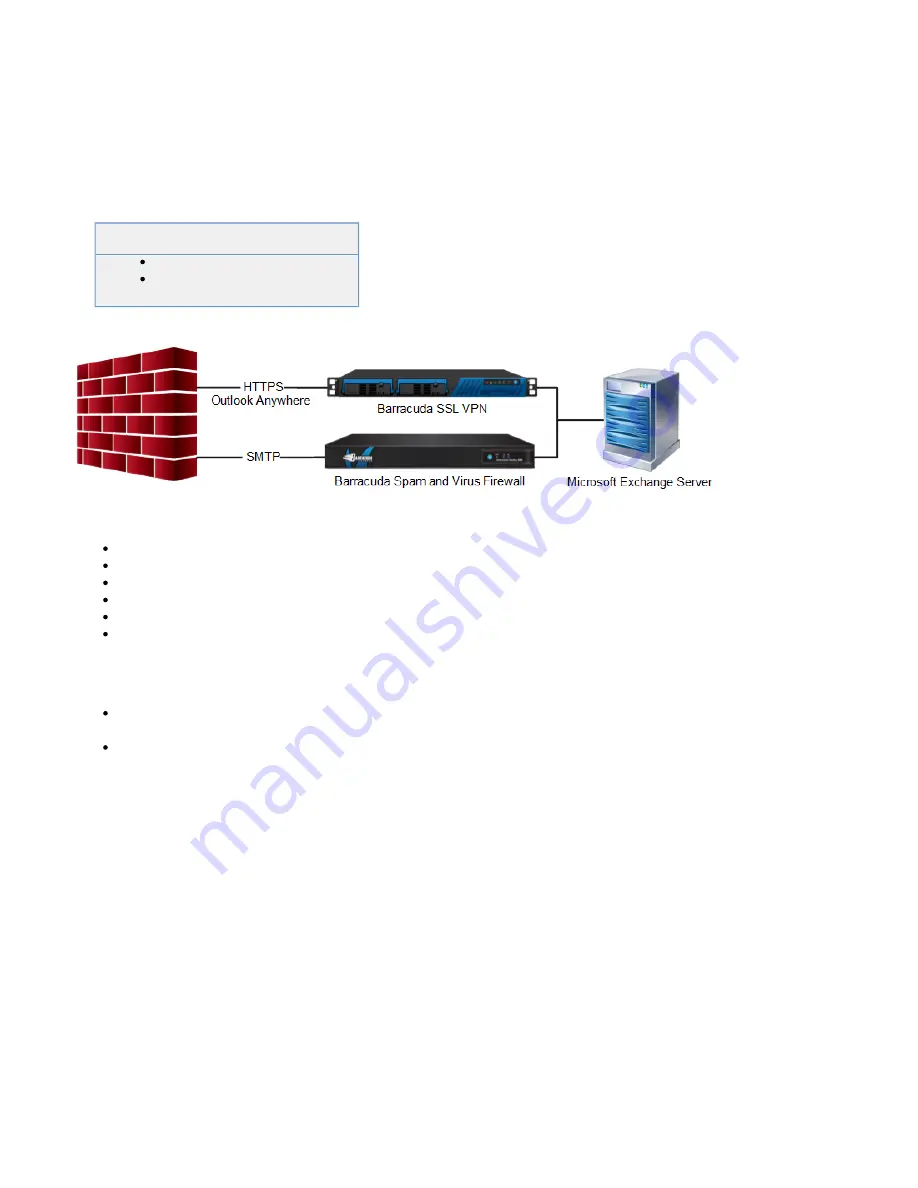
How to Configure Outlook Anywhere
To protect the Microsoft Exchange server from the direct external access, you can
deploy a
for all SMTP traffic and a Barracuda SSL
Barracuda Spam and Virus Firewall
VPN to handle all HTTPS traffic coming from the Internet. The client connects to the
Barracuda SSL VPN using Outlook Anywhere (formerly known as RPC over HTTPS).
Authentication and proxying of all traffic is also handled by the SSL VPN.
Related Articles
In this article:
Step 1. Configure the Barracuda SSL VPN
Step 2. Configure the Exchange Server
Step 3. Configure the Outlook 2013 Client
Step 4. Test the Configuration from an External Network
Troubleshooting Outlook Anywhere
Before you Begin
Make sure that you have a valid SSL certificate signed by a trusted root Certification Authority (CA) or a self-signed certificate. If you are
using a self-signed certificate, you must import it to the local certificate store on all the client machines on which you want to use Outlook.
If required, open port 443 on your internal firewall so that the Barracuda SSL VPN can communicate with the Exchange Server.
Step 1. Configure the Barracuda SSL VPN
Configure the Barracuda SSL VPN to act as an RPC Proxy.
Log into the
Open the Mange System > RESOURCES > Configuration page.
Verify that you have selected the correct user database on the top right of the page.
In the Outlook section:
In the Exchange Server field, enter the Exchange servers hostname.
In the Exchange Port field, enter
443
(unless you have configured the Exchange server to listen on a different port).
In the Protocol area, click the HTTPS option.
In the Authorized Policies section, select one or more policies that contain the users that should have access to the Outlook
proxy and click
to add them to the
Add
Selected Policies area.
Click Save Changes.
Step 2. Configure the Exchange Server
For each Exchange server, complete the following steps:
Open the Exchange 2013 web interface.
From the left hand panel of the
page, go to
and select
from the main menu.
Exchange admin center
servers
servers