Rotisserie Assembly Instructions
1.
Remove all components from the carton.
2.
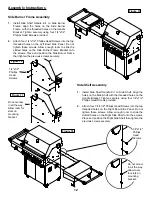
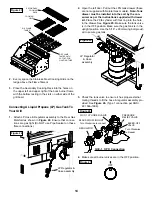
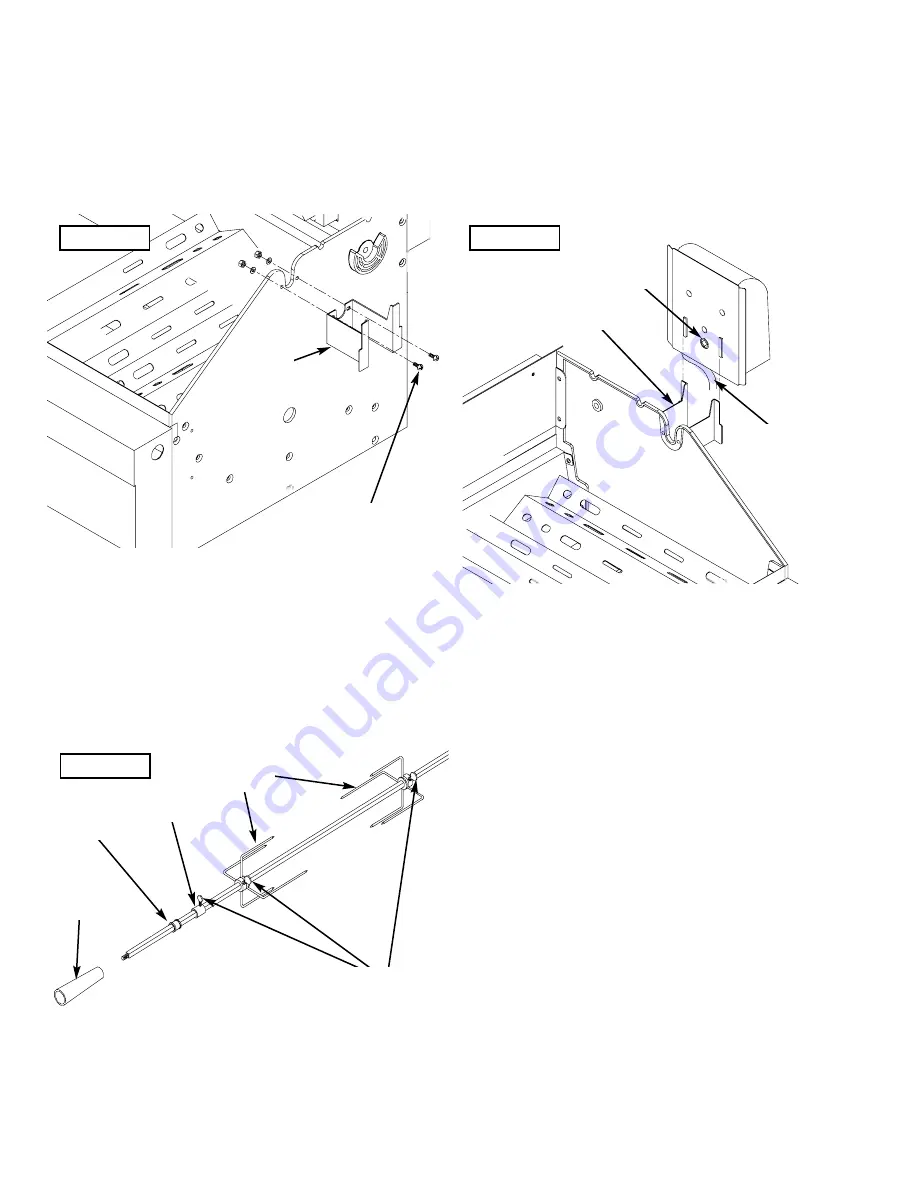
Attach the Motor Bracket on the outside of the right grill
bowl panel. Align the two holes of the Bracket with the
holes on the grill bowl. Tighten securely using two #10-
24x3/4" UNC Phillips Head Screws, Plain Washers and
Hex Nuts provided.
3.
Slide a Holding Fork onto each end of the Rotisserie
Spit. Adjust spacing between Holding Fork to accommo-
date your food, then tighten the Thumbscrews to keep
the Holding Forks in position. Slide the Collar and
Bushing onto the threaded end of the Spit. Do not tight-
en the Collar Thumbscrew until the Rotisserie is placed
into your grill. Last, screw the Handle onto the threaded
end of Rotisserie Spit as shown.
4.
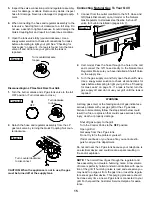
Install the AC (alternating current) Rotisserie Motor onto
the Motor Bracket as shown below. On your grill the
Motor attaches to the Bracket with
the electrical cord
DOWN, not up.
This installation insures that Rotisserie
Motor is slid onto Motor Bracket and Stainless Steel Spit
must be inserted into the Motor.
5.
Insert the assembled Rotisserie into the Motor as shown
below. The Motor should be on the right side of your grill
and the Handle on the left side. Place the Bushing into
the slot opening on the left side of your grill bowl, then
tighten the Collar Thumbscrew to the right of the
Bushing. The Collar will stabilize the Rotisserie during
the cooking process and the Bushing allows the
Rotisserie Spit to turn smoothly. Plug the Rotisserie into
an outlet and turn on to test.
The bushing and collar must always be used with this
Rotisserie.
BEFORE rotisserie cooking you will need to remove the
Cooking Grid(s) and possibly the Flame Tamers from your
grill. When rotisserie cooking place a Cooking Pan under the
food to be cooked. This will capture the drippings and keep
your grill clean of excess grease which could cause a fire.
Use caution when moving a Cooking Pan containing hot oils.
#10-24 x 3/4” UNC
Phillips Head Screws
Motor
Bracket
Thumbscrews
Holding
Forks
Collar
Bushing
Handle
Figure 44
Figure 45
Rotisserie Motor
with electrical
cord
DOWN
Spit must
be inserted
into Motor
Motor Bracket
Figure 46
21
Содержание Grand Endevator GE3BSSLP
Страница 2: ......
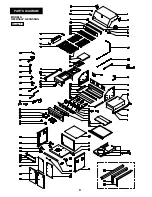
Страница 9: ...8 PARTS DIAGRAM MODELS GE3BSSLP GE3BSSNG Figure 13 ...
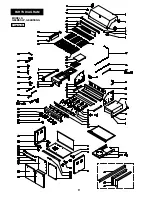
Страница 10: ...9 PARTS DIAGRAM MODELS GE4BSSLP GE4BSSNG Figure 14 ...


