Chapter 4. Programming
advanced features
4.1 Comm port settings
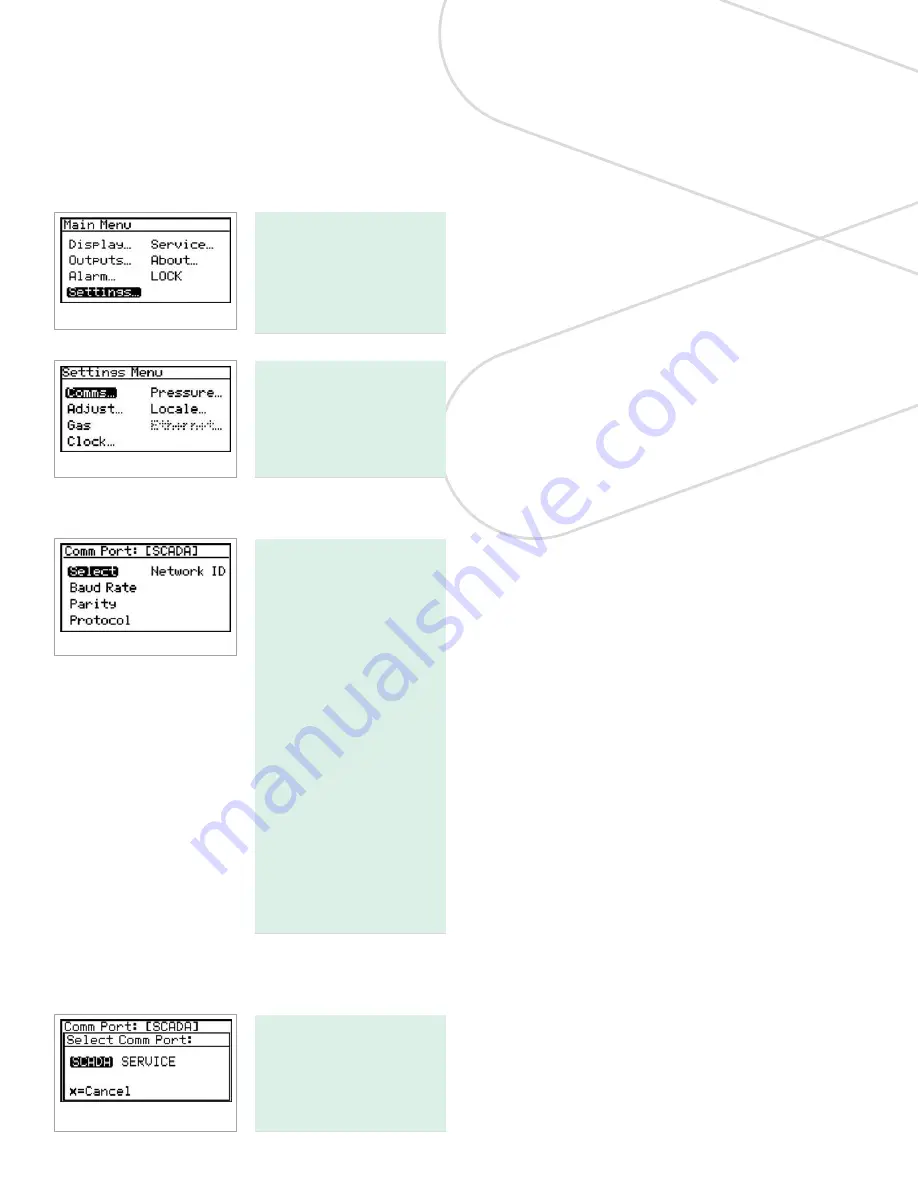
To access the
communication port
settings, from the main
menu select settings and
press enter. The following
screen appears:
To access the
communications port
settings, select comms...
and press enter. The
following screen appears:
4.1.1 Selecting a comm port
There are two physical
comm ports in the
Aurora
H2O
. Comm port 1 is
aligned to SCADA in the
instrument program and
comm port 2 is aligned
to service. This setup
enables the user to have
comm port 1 set up for
the primary digital output
(for example, RS-485
to the customer SCADA
system), and comm port
2 to be used for service
(for example, to enable
a service engineer to
interface with the
Aurora
H2O
using an RS-232 cable
connected to a laptop
PC in the field, running
AuroraView
software).
To select a communication port, use the arrow keys to
highlight select and press enter. The following screen
appears.
Select SCADA or service
and press enter. The
screen returns to the
comm port menu.
35
Содержание Panametrics Aurora H2O
Страница 2: ...ii...
Страница 4: ...no content intended for this page proceed to next page iv...
Страница 20: ...no content intended for this page 10...
Страница 32: ...no content intended for this page 22...
Страница 65: ...2 AuroraView boots up and displays a screen similar to Figure 55 below Figure 55 AuroraView main screen 55...
Страница 71: ...Figure 74 Exporting a simplified image Figure 75 Selecting enhanced metafile 61...
Страница 80: ...no content intended for this page 70...


