


Procedure
WBPEEUI220771A0
PR26 - 3
□
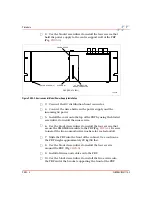
10. Use the bladed screwdriver to install the five screws.
□
11. Using the old PEP as a guide, connect the cable on the PEP
to the proper place on the multibus module.
□
12. Connect the AC cables to the outlets on the front and rear
of the PEP.
□
13. Connect the remaining cables to the front of the PEP.
Environmental Model
□
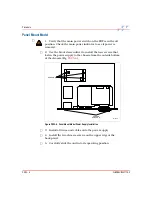
1. Verify that the main power on the PEP is in the off position.
Check the power indicator to see if power is removed.
□
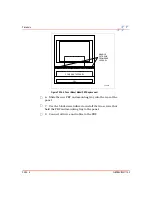
2. Verify that the AC line power (plant circuit breaker) to the
auxiliary terminal is shut down so that the AC line can be
safely disconnected.
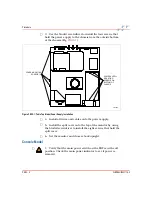
□
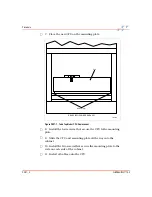
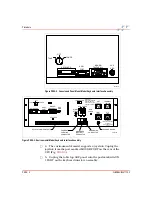
3. Label and remove all cables from the front of the PEP (Fig.
).
Figure PR26-2. Console Model PEP Replacement
T01308A
FRONT VIEW
SCREWS (5)
W1
Содержание C-I-CV42C
Страница 1: ...Bailey Hartmann Braun TM Instruction Conductor Conductor VMS Series 42 Auxiliary Terminal ...
Страница 15: ...WBPEEUI220771A0 ...
Страница 43: ...WBPEEUI220771A0 ...
Страница 53: ...WBPEEUI220771A0 ...
Страница 67: ...WBPEEUI220771A0 ...
Страница 77: ...WBPEEUI220771A0 ...
Страница 93: ...PR1 2 WBPEEUI220771A0 Procedure 3 Turn each end latch turn 4 Open the door ...
Страница 97: ...WBPEEUI220771A0 ...
Страница 107: ...WBPEEUI220771A0 ...
Страница 113: ...WBPEEUI220771A0 ...
Страница 123: ...WBPEEUI220771A0 ...
Страница 125: ...WBPEEUI220771A0 ...
Страница 133: ...WBPEEUI220771A0 ...
Страница 137: ...WBPEEUI220771A0 ...
Страница 141: ...WBPEEUI220771A0 ...
Страница 143: ...WBPEEUI220771A0 ...
Страница 145: ...WBPEEUI220771A0 ...
Страница 147: ...WBPEEUI220771A0 ...
Страница 151: ...WBPEEUI220771A0 ...
Страница 177: ...PR27 6 WBPEEUI220771A0 Procedure 7 Install all cables onto the CPU ...
Страница 181: ...WBPEEUI220771A0 ...
Страница 184: ...Procedure WBPEEUI220771A0 PR29 3 Figure PR29 2 IIADP02 Bezel Removal T01401A REAR VIEW SCREWS 4 ADP ...
Страница 185: ...WBPEEUI220771A0 ...
Страница 195: ...WBPEEUI220771A0 ...
Страница 197: ...WBPEEUI220771A0 ...
Страница 213: ...WBPEEUI220771A0 ...


