Section 03
ENGINE
Subsection 09
(CYLINDER AND HEAD)
VMR2004_132_03_09A.FM
03-09-5
CHAIN TENSIONER
Removal
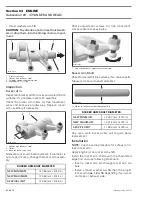
Remove:
– chain tensioner plug
no. 17
– O-ring
no. 22
– spring
no. 18
– chain tensioner plunger
no. 21
.
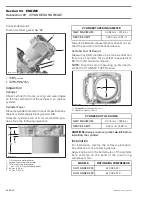
1. Chain tensioner plug
2. O-ring
3. Spring
4. Chain tensioner plunger
Inspection
Check chain tensioner plunger for free movement
and/or scoring.
Check if possible chain guides for wear. Replace as
necessary.
Check if O-ring
no. 22
is brittle, cracked or hard.
Replace as necessary.
Check spring condition. Replace if broken or worn.
Installation
For installation, reverse the removal procedure.
However, pay attention to the following.
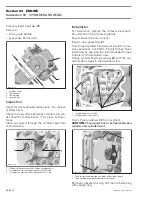
Screw the plunger until it touches the chain guide.
Install a spring end in plunger groove and the other
in the plug groove. Screw plug.
CAUTION:
Do not forget to place the O-ring
no. 22
on chain tensioner plug.
CHAIN TENSIONER HOUSING
Removal
Remove:
– chain tensioner
– screw
no. 19
– chain tensioner housing
no. 20
with O-ring
no. 23
.
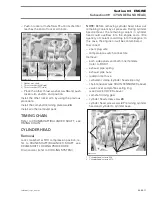
1. Chain tensioner screw
2. Chain tensioner housing
Inspection
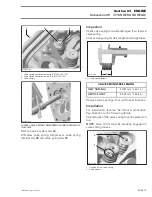
Check the housing for cracks or other damages.
Replace it if necessary.
Check if O-ring
no. 23
is brittle, cracked or hard.
Replace as necessary.
Installation
Reverse the removal procedure.
WARNING
Chain tensioner is spring loaded.
WARNING
Never perform this operation immediately af-
ter the engine has been run because the ex-
haust system can be very hot. Wait until ex-
haust system is warm or cold.
4
R400motr55A
3
2
1
2
R400motr56A
1
Содержание M-50 x 4
Страница 1: ...1 AUSA M 50 x 4 ROTAX ENGINE WORKSHOP MANUAL ...
Страница 2: ......
Страница 3: ......
Страница 7: ......
Страница 27: ......
Страница 31: ......
Страница 59: ......
Страница 85: ......
Страница 99: ......
Страница 136: ...Section 04 FUEL SYSTEM Subsection 03 CARBURETOR VMR2004_137_04_03A FM 04 03 1 CARBURETOR 0 V07F0ZS Harness assembly ...
Страница 147: ......
Страница 155: ......


