background image

Deskset Settings

110


Synapse SB67020/SB67025 Deskset User’s Guide

Back to Contents

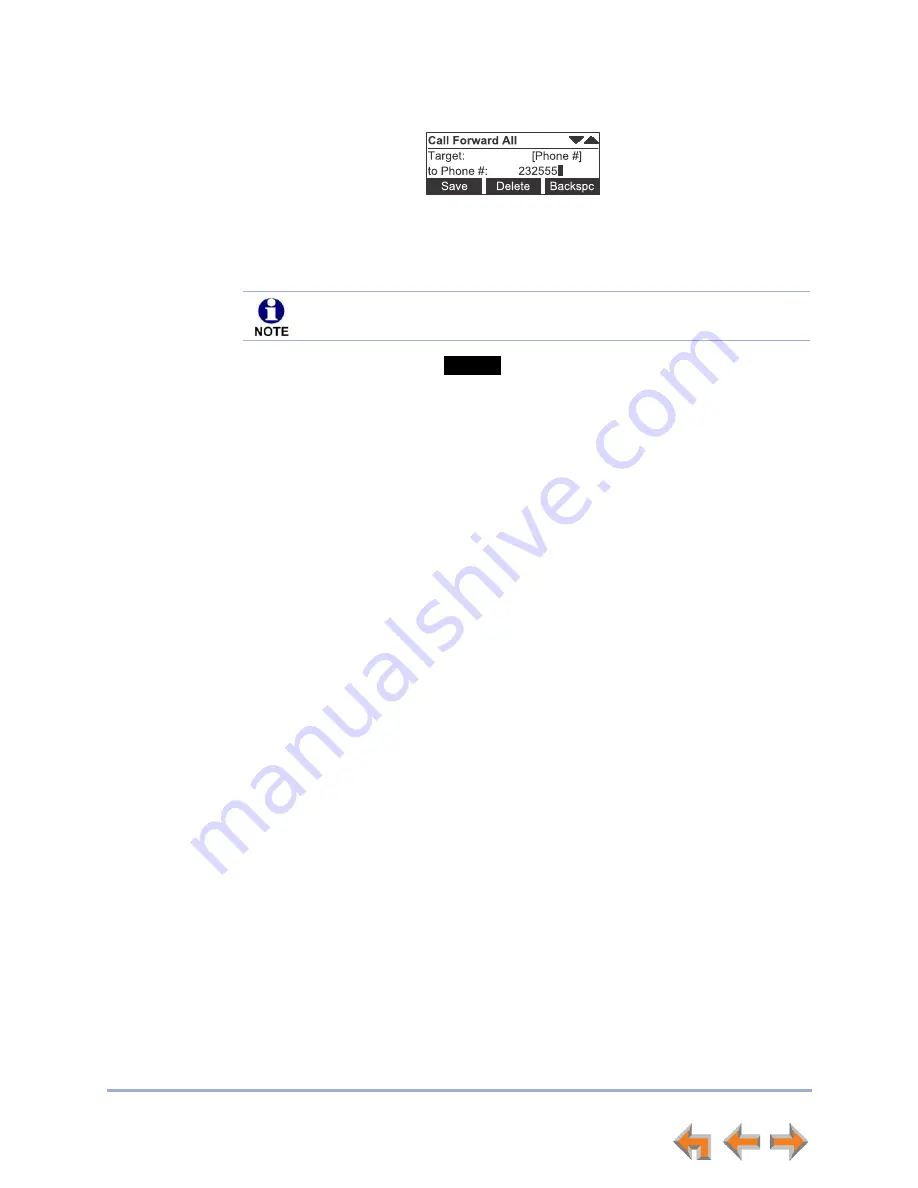
AutoAtt

. Press 

 to move to the 

to AutoAtt:

 field and select an Auto 

Attendant.

RingGrp

. Press 

 to move to the 

to RingGrp:

 field and select a Ring Group.

3. To confirm the change, press 

 . The 

Call Management 

menu appears. An 

error message appears if:

you entered an invalid extension number

your system administrator has disabled call forwarding/transferring to an outside 
line

you entered a restricted number.

If your system has no Ring Groups, this option does not appear.

Save

Содержание Synapse SB67020

Страница 1: ...to Advanced American Telephones San Antonio TX 78219 Synapse is a registered trademark of Advanced American Telephones Issue 12 07 13 AT T SB67020 SB67025 Deskset 2 13 Advanced American Telephones All Rights Reserved AT T and the AT T logo are trademarks of AT T Intellectual Property licensed t T T SB67020 SB67025 Deskset User s Guide ...

Страница 2: ... 13 Scroll Indicators 13 Deskset Status Indicators 14 Call Indicators 15 Call Indicators in Call Appearance mode 16 Call Indicators in Line Appearance mode 17 Call Status Icons 18 Call Status LEDs 18 Programmable Feature Keys 19 Programmable Feature Key LEDs 20 Dial Pad Entry 21 Using the Speakerphone 22 Using Help Screens 22 About the Auto Attendant 23 Caller Options 23 TL7600 Cordless Headset SB...

Страница 3: ...g Calls from Idle Mode 45 Viewing the Queued Calls List 45 Call Management 46 Call Management 47 Putting a Call on Hold in Call Appearance Mode 48 Putting a Call on Hold in Line Appearance Mode 49 Transferring a Call in Call Appearance Mode 50 Transferring a call to a busy extension 51 Transferring a Call in Line Appearance Mode 52 Making a Conference Call 53 Putting a Conference on Hold 54 Ending...

Страница 4: ... Recording an Introduction to Send with a Forwarded Message 82 Sending a New Message to a Distribution List 83 Deleting Messages 84 New Message Status Indications 85 Accessing Your Voicemail Remotely 86 Call Log 89 Using the Call Log 90 Managing Missed Calls 91 Listening to Voicemail From the Call Log 92 Storing Call Log Entries 93 Deleting Call Log Entries 94 Paging 95 Sending a Page 96 Single Zo...

Страница 5: ...o Attendant Settings 127 Using Do Not Disturb DND 128 Web Interface 129 Accessing the Web User Interface WebUI 130 Error Handling 131 Basic Settings 132 Personal Directory 134 Quick Dial 136 Voicemail Distribution 137 Help 140 Troubleshooting 141 Common Troubleshooting Procedures 142 Display Messages 143 Calls Generally 145 Incoming Calls 149 Outgoing Calls 152 Voicemail 154 Other Deskset Features...

Страница 6: ...e Before using this AT T product please read Appendix D Important Safety Instructions on page 169 Please thoroughly read this user s guide for all the feature operations and troubleshooting information necessary to operate your new AT T product Additional Documentation Downloadable copies of all Synapse documents including user s and administrator s guides installation instructions and Quick Start...

Страница 7: ...bes how they are used in this guide Go back to the last page viewed Go to the previous page Go to the next page Table 1 Description of Text Conventions Text Format Description Screen Identifies text that appears on a device screen or a WebUI page in a title menu or prompt HARD KEY or DIAL PAD KEY Identifies a hard key including the dial pad keys Identifies a soft key Line Appearance mode Text in t...

Страница 8: ...ess telephone system This chapter introduces the SB67020 Deskset and SB67025 Deskset and provides an overview of the Synapse System and the external features of the Deskset The SB67025 Deskset allows you to register a compatible AT T DECT Cordless Headset for hands free phone conversations For more information see Registering an Optional Cordless Headset SB67025 Only on page 121 Synapse System Ove...

Страница 9: ...ystem Synapse differs from conventional telephone systems in that calls are not coordinated by a central controller Instead Synapse uses a distributed control system over a Local Area Network LAN Figure 1 illustrates a sample system Figure 1 Sample Synapse System blue lines telephone green line T1 red lines Ethernet orange lines audio ...

Страница 10: ...the Deskset 2 Soft Keys Three keys that produce different actions depending on the LCD labels 3 Handset Traditional 2 conductor wiring FXO Foreign Exchange Office ports 4 Hard Keys Fixed function keys See Deskset Hard Keys on page 11 5 Programmable Feature Keys Provide easy access to various call functions 6 Display Keys Control menu functions shown in the display 7 Navigation Moves the cursor up ...

Страница 11: ...ion Keys Table 3 Deskset Function Keys 1 VOL VOL Increases decreases the ringer and voice volume 2 HEADSET Routes audio to headset Can be used to go off hook 3 HOLD Puts the current active call on hold Allows access to other calls and features while maintaining call connection 4 MUTE Mutes the microphone When on the other party cannot hear you 5 SPEAKER During a call switches voice to and from the...

Страница 12: ...xtension 220 for example You can access each Call Appearance by pressing a programmable feature key as shown in Figure 2 on page 10 By default the top two programmable feature keys on the SB67020 025 Deskset are Call Appearance keys Line Appearance Mode In Line Appearance mode each line also corresponds to a programmable feature key on the Deskset These are called Line Appearance keys in this User...

Страница 13: ...ys are a set of three context sensitive keys that provide functions based on what you are doing on the Deskset The top example in Figure 5 shows the soft key labels on the active call screen in Call Appearance mode The soft key labels change according to the current task For example if you are holding a call the key labels displayed are different from those displayed if you are making a call See A...

Страница 14: ...of the associated Call Appearance or Line Appearance key Audible Ring Delay is 10 seconds The number indicates the delay you have set Ringer volume set to zero The ringer is silent FWD Call Appearance mode only Call Forward All is ON ANS Auto Answer is ON See Auto Answering on page 43 DND Do Not Disturb is ON See Using Do Not Disturb DND on page 128 INT Direct Intercom is ON See Answering Direct I...

Страница 15: ...l status and soft keys show the optional actions to take as shown in Figure 7 The icon changes according to the call status See Call Status Icons on page 18 for a complete description of the available icons The Call Timer displays the duration of the current call status such as how long the call has been held If you subscribe to caller ID Call Information consists of the phone number for all calls...

Страница 16: ...continues Unanswered incoming calls are forwarded according to the Call Forward No Answer setting customized by the system administrator forward the incoming call to voicemail by pressing Your conversation with the first call continues but the screen stays with the second call You can press or or to return to the first call screen to listen to the message that the second caller is leaving The firs...

Страница 17: ...ctive call is put on hold return to the active call screen by pressing When all the lines are in use You cannot start a new call by lifting the handset or by pressing SPEAKER or HEADSET Instead the screen briefly displays All Lines Busy Unanswered incoming calls are forwarded according to the Call Forward No Answer setting customized by the system administrator Each line can have a different forwa...

Страница 18: ... Group or Call Queue Silenced Indicates incoming Ring Group or in Call Appearance mode Call Queue calls Conference On Hold Indicates you have put a conference call on hold On Hold Indicates you have put the call on hold Call Screening Call Appearance mode only Indicates the caller is leaving a message You can answer the call listen to the recording in progress or return to the idle screen Call For...

Страница 19: ...mplete list of possible programmable feature key assignments Table 7 Programmable Feature Key Default Functions Call Appearance Mode Key Function Label For more information see 1 Call 1a a Non programmable Call Indicators on page 15 2 Call 2 3 Park List Accessing the Park List on page 60 4 Page Sending a Page on page 96 5 Do Not Disturb Using Do Not Disturb DND on page 128 6 Call Forward All Call ...

Страница 20: ...ll at another Deskset Flash ORANGE Held call at another Deskset Extension Monitor monitors activity at another extension Off No call Steady GREEN Active call or paging Quickly Flashing GREEN Ringing call Slow Flash GREEN Call held Steady ORANGE Do Not Disturb DND ON Quickly Flashing ORANGE Incoming call with DND ON Park List Call Appearance mode only Off Not applicable Page Off No page Steady GREE...

Страница 21: ...g 7 cycles through P Q R S 7 p q r s For text fields that accept only numbers pressing a key once enters a number You can enter special characters by pressing the and keys Press to cycle through the special characters in that order Press to cycle through the special characters in that order Auto Attendant Call Appearance mode only Off Not applicable Quick Dial Off Not applicable Held Calls list Li...

Страница 22: ...ctive call if you are using the handset or a corded headset pressing SPEAKER switches audio to the speakerphone If the handset is not hung up pressing SPEAKER switches audio between the handset and the speakerphone Using Help Screens You can view Help on the Deskset screen These are very brief descriptions of how to use some of the features To use the Deskset Help 1 Press MENU then 1 and then 0 A ...

Страница 23: ...m administrator can create customize menus with your own greeting message and instructions to callers The Auto Attendant may be set up so that callers can access the Auto Attendant directory This allows callers to use any touch tone phone s dial pad to spell your name followed by pressing the pound sign to reach your extension You may want to give your extension number to frequent callers so they ...

Страница 24: ...This optional Cordless Headset shown in Figure 9 provides a 500 foot range and easy one button answering once it is registered to your SB67025 Deskset Use your Deskset to register your Cordless Headset See Registering an Optional Cordless Headset SB67025 Only on page 121 Figure 9 Optional TL7600 Cordless Headset ...

Страница 25: ...ly when you are on a call and flashes quickly when there is an incoming call NOTE To answer a call while you are already on a call press ON OFF The first call is dropped Press ON OFF to answer the next call 2 VOLUME Press the volume key on the side of the headset to adjust the listening volume when on a call 3 MUTE FLASH Press to mute the microphone during a call The headset beeps every 10 seconds...

Страница 26: ...ones You hear three short beeps when VOLUME keys are pressed when the volume is already at its highest or lowest setting The headset is not registered and the headset ON OFF button was pressed The headset has gone out of range from the Deskset during a call Low battery warning You hear 1 short beep every 20 seconds when the battery is low Key beep You hear 1 short beep when pressing the headset ON...

Страница 27: ... also predial or live dial using phone numbers from lists such as the Directory Call Log Redial quick dial and Messages In Call Appearance mode you can dial the extension for the system operator by pressing 0 zero The procedures in this chapter apply to both Call Appearance and Line Appearance mode unless otherwise noted Active Call Screen on page 28 Predialing on page 29 Live Dialing on page 30 M...

Страница 28: ...ce Mode Shown Table 11 Active Call Screen Description Key Description Begins transfer of a call Begins a conference call Call Appearance mode only Parks an external call Line Appearance mode only Simulates a hook flash which signals your telephone service provider to activate a feature external calls only Park 0 05 9 232 555 0176 Transfer Conf 1 Call Timer Called Phone Number Call Status Icon Tran...

Страница 29: ... the dial pad enter the phone number for example 9 232 555 0176 The predial screen appears Before you call the number you can press to store the number in your Personal list to insert a two second pause into the phone number to delete the last digit entered CANCEL to cancel predial 2 Lift the handset or press SPEAKER HEADSET or press a Call Appearance or Line Appearance key to go off hook and call...

Страница 30: ...l Appearance or Line Appearance key 2 Enter the number you want to dial Call Appearance mode only For external calls enter 9 or whatever digit if any that must be dialed first The Active Call screen appears Call Appearance mode shown 1 ExtList ParkList Page Park 0 05 9 232 555 0176 Transfer Conf 1 You can also make a call by pressing a quick dial key if your Deskset has any quick dial keys configu...

Страница 31: ...e 58 2 Press or until the desired entry appears 3 Press or SELECT to dial the displayed number The Deskset dials the number and the Active Call screen appears Call Appearance mode shown Call LastNme New Call Park Transfer Conf 1 Phone numbers are dialed as they appear in the lists Call Appearance mode only For external calls enter 9 or whatever digit if any that must be dialed before the phone num...

Страница 32: ...ging the Extension Status reads on a call If the other extension has Do Not Disturb ON the Extension Status reads Busy Figure 12 Extension Status Screens When the Extension Status screen appears you can press to call the other extension Your incoming call appears on the other Deskset s screen to go directly to the other extension s Personal Mailbox If you leave a message the other extension displa...

Страница 33: ...ssing SPEAKER or by some other method However your system administrator can configure your Deskset to use the Intercom line any time you go off hook Figure 13 Intercom Programmable Feature Key To make an intercom call 1 With the Deskset in Idle mode go off hook by lifting the handset pressing SPEAKER or by some other method 2 If necessary press the INTERCOM key then dial the extension number Inste...

Страница 34: ... that the system administrator has restricted for your Deskset If you dial a restricted number and go off hook a password screen appears After you enter your extension number and password the Restricted Call screen appears as shown in Figure 14 Figure 14 Restricted Call You can press CANCEL or hang up to return to the Idle screen immediately Calling Restricted Numbers Using Another Extension If yo...

Страница 35: ...eadset Use the Deskset dial pad to dial the number To make a call with the Cordless Headset 1 Press ON OFF on the headset The headset is active when you hear a dial tone 2 Dial the extension or phone number on the Deskset 3 Press ON OFF on the headset to end the call OR 1 Predial the extension or phone number on the Deskset 2 Press ON OFF on the headset to initiate dialing and transfer the audio t...

Страница 36: ... call the new calls are assigned to Call Appearance Line Appearance keys while the oldest call remains on the screen You can answer or ignore each call The procedures in this chapter apply to both Call Appearance and Line Appearance mode unless otherwise noted The following sections describe handling incoming calls Incoming Call Screen on page 37 Incoming Call Indication on page 38 Answering a Cal...

Страница 37: ...nd Active Call screens are shown in Figure 15 Figure 15 Incoming Call and Active Call Table 12 Incoming Call Screen Soft Keys Key Description Answers incoming call Silences ringer during incoming call Call Appearance mode only Forwards incoming call to voicemail Press Answer Incoming Call Active Call Answer Ignore FwdVM ...

Страница 38: ...e or Line Appearance key If your company has caller ID the incoming call screen displays caller information If the caller ID information is absent because it is unavailable UNKNOWN NAME and UNKNOWN NUMBER display If the caller chooses not to send the information PRIVATE NAME and PRIVATE NUMBER display Incoming Calls in Line Appearance Mode The incoming call screen appears as shown in Figure 16 exc...

Страница 39: ...nswer a call Previous active calls are automatically put on hold If you were predialing that call is canceled If your Deskset is configured to monitor another extension you can answer a call while it is ringing at the monitored extension For more information see Programmable Feature Key LEDs on page 20 To answer a remote call 1 On your Deskset press the flashing green programmable feature key Your...

Страница 40: ...arance LED continues to flash You can press the key or the flashing Call Appearance key or Line Appearance key to answer the incoming call Going off hook does not answer the call but starts a new call on the next available Call Appearance or Line Appearance Ignore Ignore Answer When the system is in Line Appearance mode your system administrator can set your Deskset to ignore all incoming calls on...

Страница 41: ...ation that you specified in the User Settings See Call Forward All and Call Forward No Answer on page 109 To forward all calls Press MENU then 1 and then 6 The Call Forward indicator FWD appears Press MENU then 1 and then 6 again to cancel forwarding all calls This feature applies to Call Appearance mode only RKQ 6PLWK 7 1HZ 0LVVHG DOOV 1HZ 0HVVDJHV ...

Страница 42: ...eening a call the Deskset screen displays the new call To screen a call Press to listen to a message that is being recorded The soft key changes to Press to interrupt the recording and talk to the caller Press to cancel call screening for this call and return to the previous screen Press to stop listening to the message being recorded This feature applies to Call Appearance mode only Listen Listen...

Страница 43: ...r the last ring a two second notification screen appears and you hear a warning tone Talk after the tone If you do not want the Deskset to automatically answer the call you can press IGNORE to send the call to the Call Forward No Answer target See Call Forward All and Call Forward No Answer on page 109 In Call Appearance mode you can press to send the call to voicemail immediately If there are mul...

Страница 44: ...nsions or all extensions depending on how your system administrator has set Direct Intercom The system administrator can also enable the Deskset to auto answer all external calls Your Deskset responds to Direct Intercom calls the same way it does to Auto Answered calls For more information see Auto Answering on page 43 Once Direct Intercom is enabled you cannot override the feature with the Deskse...

Страница 45: ...d Call Forward No Answer on page 109 do not apply to calls that are directed to Call Queue extensions Viewing the Queued Calls List When all Call Queue Agents are busy incoming calls are held in the Call Queue If your system administrator has set a programmable feature key as a Call Queue key the LED flashes orange slowly when calls are waiting in the Call Queue You can view and answer queued call...

Страница 46: ...ending on whether your system is in Call Appearance or Line Appearance mode This chapter describes the differences between the two modes Call Management on page 47 Putting a Call on Hold in Call Appearance Mode on page 48 Putting a Call on Hold in Line Appearance Mode on page 49 Transferring a Call in Call Appearance Mode on page 50 Transferring a Call in Line Appearance Mode on page 52 Making a C...

Страница 47: ...Call Status Icons on page 18 Figure 18 Active Call Screen Table 13 Active Call Screen Description Key Description Begins transfer of a call Begins a conference call Call Appearance mode only Parks a call Line Appearance mode only Simulates a hook flash which signals your telephone service provider to activate a feature external calls only Call Appearance Mode Line Appearance Mode Transfer Conf Par...

Страница 48: ...ou with a brief ring every 30 seconds When a call is on hold you can use the programmable feature keys or the Deskset Menu to access other functions When a call is on hold you can also press to start transferring the call to start a conference call to park the call 2 To take the call off hold display the call on screen and then press SELECT or press the associated Call Appearance key 0 27 Graham B...

Страница 49: ...e flashing orange Line Appearance key to take the call off hold making it an active call on their Deskset All Desksets including those that are not assigned that line can view and take your call off hold from the Held Calls list See Accessing the Held Calls List on page 65 When you put an Intercom call on hold only you can take the call off hold When a call is on hold you can use the programmable ...

Страница 50: ...m administrator The call transfer function is enabled by default To transfer a call 1 Press from the Active Call screen The call is automatically put on hold and the Transfer Setup screen appears 2 Select a transfer target You can dial an external number as shown below or an extension or make a call from a list by pressing or Go to Step 3 When the new call is established you can speak to the perso...

Страница 51: ...Idle mode Transferring a call to a busy extension If you try to transfer a call to an extension in your office that is on an active call or is paging the Extension Status screen reads on a call as shown in Figure 19 If the other extension has Do Not Disturb ON the Extension Status screen reads Busy as shown in Figure 19 Figure 19 Extension Status Screens You can press to call the other extension Y...

Страница 52: ...er from a list For example press and select an extension to call take a held call off hold or access the Held Calls list MENU 1 1 to retrieve a held call transfer the call directly to voicemail by pressing The Transfer to Voicemail screen appears on which you can press to select an extension s Personal Mailbox to select a Group Mailbox if available to transfer the call to your Personal mailbox Pre...

Страница 53: ... a second call You can dial the second call normally as shown below or you can select a held call and take it off hold or you can start the second call from a list See Accessing Items in Lists on page 58 When the second call has been established the soft key appears 3 To join the calls press Your extension is now in conference with the other two phone numbers If you hang up while on the conference...

Страница 54: ... to start a new call Answer an incoming call To take a conference call off hold 1 Press a corresponding Call Appearance or Line Appearance key Ending a Conference To end a conference From the Conference screen you can press to end the conference Both calls hang up and your Deskset returns to the Idle screen or the Call Appearance or Line Appearance you were on before the conference call or Call Ap...

Страница 55: ...rator your Deskset rings and the parked call appears To answer the call press Retrieving a Parked Call You can retrieve parked calls from any extension in the system To retrieve a parked call If you know the extension number of the parked call dial it OR 1 Press MENU then 1 and then 2 to display the Park List screen 2 Press or to display the desired entry 3 Press to retrieve the parked call The Ac...

Страница 56: ...en such as the Call capacity reached screen appears Call Management Using a Headset You can use a corded or cordless headset with the SB67020 025 Deskset A corded headset can be plugged into the headset jack on the back of the Deskset The cordless headset must provide its own wireless radio in a base that is plugged into the headset jack If the headset is a compatible AT T DECT Cordless Headset it...

Страница 57: ...Guide Back to Contents To send audio from the headset to the corded handset lift the handset If the handset is already off hook press HEADSET to send audio to the handset While the handset is off hook you can press HEADSET again to return audio to the headset ...

Страница 58: ... how to access an individual item in a list All instructions start from the Idle screen The Deskset may provide access to the following lists Call Queue List See Accessing the Queued Calls List on page 59 Park List See Accessing the Park List on page 60 Directory List See Chapter 6 Directory on page 66 Voicemail List See Chapter 7 Voicemail on page 74 Call Log See Chapter 8 Call Log on page 89 Ext...

Страница 59: ...ministrator can set up a programmable feature key as a Call Queue key The Call Queue key LED flashes orange slowly when there are calls waiting in the Call Queue You can press the key to access the Queued Calls list To access the Queued Calls list 1 Press MENU then 1 and then 1 The Queued Calls list appears The oldest queued call is at the top of the list 2 Press or to highlight the desired entry ...

Страница 60: ...skset may have a programmable feature key set up as a Park List key You can press the key to access the Park List To access an entry in the Park List 1 Press MENU then 1 and then 2 The Park List appears 2 Press or until the desired entry is on the screen 3 Press or SELECT to answer the parked call Press CANCEL at any time to return to the Idle screen This feature applies to Call Appearance mode on...

Страница 61: ...iver or press SPEAKER to go off hook Line Appearance mode Lift the receiver or press SPEAKER then press the Intercom key The Dialing screen appears Call Appearance mode shown 2 Press The Extension List appears 3 Press or until you highlight the desired entry 4 Press SELECT to call the highlighted extension ExtList 1 ExtList Page ParkList ExtList You can also access the Extension list from the foll...

Страница 62: ... list appears 2 Press or until you see the desired entry 3 Press SELECT to redial the number or press to redial the number by pressing store the caller s number by pressing The Store Redial Entry screen appears with the number filled in Table 14 Redial List Function Key Description Stores the caller s number in the Personal list You can also enter the caller s name Deletes the entry Allows you to ...

Страница 63: ...edial list or all Redial entries Ensure the entry you wish to delete is displayed To delete a single entry 1 In the Redial list press or until you see the desired entry 2 Press 3 Press CANCEL to exit the Redial list To delete all Redial entries 1 In the Redial list press or to display the soft key 2 Press A confirmation screen appears 3 Press to confirm deletion 4 Press CANCEL to exit the Redial l...

Страница 64: ...rch for an exact match or the closest match For example If you press 4 once the Deskset searches for names beginning with G If you press 7 three times the Deskset searches for names beginning with R See Dial Pad Entry on page 21 for information on entering other individual letters This searching function uses only the uppercase letters When an exact match is found the entry appears If you enter a ...

Страница 65: ...is is not always possible because all Desksets in the system may not have the same lines assigned to them For example your department may have lines 1 to 4 assigned to your Desksets Another department in your company may have lines 5 to 8 assigned to their Desksets Using the Held Calls list you can access calls being held on lines 1 to 8 If the held call is on a line that is not assigned to your D...

Страница 66: ...hese entries are available only at your extension System This public directory is created and maintained by the system administrator You can view and sort this directory but you cannot modify it Extension This is a list of all extensions in the system It contains the Display Names that the administrator entered and the extension number of each Deskset You can view and sort this directory but you c...

Страница 67: ...ed in Table 15 Figure 21 Directory Table 15 Directory Screen Description Key Description Creates a new entry in the Personal list Switches between first and last name sort in Directory and Extension list Dials the on screen number Allows you to change previously entered information Displays a list of Directory settings Deletes the entry Call LastNme New Entry type Personal System or Extension Full...

Страница 68: ... Call Appearance mode Press MENU then 1 and then 7 Line Appearance mode Press MENU then 1 and then 5 The Directory list appears 2 Press or to show the desired entry 3 Press SELECT to dial the displayed phone number To change Directory settings 1 From the Directory list press or to display the soft key 2 Press to display the Directory Settings screen 3 Press or to highlight the desired list and pre...

Страница 69: ...fields using the dial pad See Dial Pad Entry on page 21 The name text fields are limited to 20 characters each and the number field is limited to 32 digits 4 When editing the entry you have the following options Press or to move the cursor Press or to move to the previous or next field Press to erase the highlighted character if there is one or else the character before the cursor Press to insert ...

Страница 70: ...racters each and the number field is limited to 32 digits 5 When editing the entry you have the following options Press or to move the cursor Press or to move to the previous or next field Press to erase the highlighted character if there is one or else the character before the cursor Press to insert a two second pause into the phone number The pause appears as a P in the field and is counted as a...

Страница 71: ...t automatically fills in the name and number if available If necessary edit the name and number Press to move the cursor to the Last Name and Phone entries Press to erase the highlighted character if there is one or else the character before the cursor Press to insert a two second pause into the phone number The pause appears as a P in the field and is counted as a digit For external phone numbers...

Страница 72: ...rance mode Press MENU then 1 and then 7 Line Appearance mode Press MENU then 1 and then 5 The Directory appears 2 Press or to display the entry to be deleted 3 Press so that appears 4 Press The confirmation screen appears 5 To confirm the deletion press Delete Delete Settings Edit Delete Are you sure you want to delete this entry Yes No Yes The key is not available when a System or Extension entry...

Страница 73: ... pad to search the system searches for the names in the sort order To sort Directory entries 1 Call Appearance mode Press MENU then 1 and then 7 Line Appearance mode Press MENU then 1 and then 5 The Directory appears 2 To sort the entries by first name press To sort the entries by last name press The Directory stays in the chosen sort order until you change it FirstNme LastNme ...

Страница 74: ...onal Mailbox at your Deskset has 30 minutes of recording time Your system administrator may give you access to one or more Group Mailboxes Group Mailboxes allow more than one person access to voicemail messages You can also record a message and send it to a voicemail distribution group that you have created See Voicemail Distribution on page 137 The following sections describe how to listen to and...

Страница 75: ...t keys described in Table 16 Figure 23 Messages Screen Table 16 Voicemail List Description Key Description Key Description Plays message Deletes displayed message Initiates Message Forward function Plays all voicemail messages Deletes all voicemail messages Clears and restores the new message indication from a message Allows dialing options before calling a number from Call Log Redial list or Mess...

Страница 76: ...rs as shown in Figure 25 allowing you to press to see the list of mailboxes Figure 25 Leave New or Listen Screen From the Mailbox list screen you can access your personal voicemail and messages stored in Group Mailboxes such as the sales department shown in Figure 24 Your Personal Mailbox is always at the top of the list of mailboxes Select a mailbox to access the messages stored in that mailbox T...

Страница 77: ...s of that group If someone else is listening to a message when you delete it the message is not deleted until the listener exits the voicemail session Message playback is not interrupted if you receive a call while listening to Group Mailbox voicemail The incoming call appears on the Deskset screen accompanied by a call waiting tone There is no call waiting tone in Line Appearance mode ...

Страница 78: ...pears Press to create a message to send to a voicemail distribution list See Sending a New Message to a Distribution List on page 83 Press to view the Mailbox list if you have Group Mailboxes or voicemail messages If your system administrator has assigned a Group Mailbox to you a list of your Personal Mailbox and Group Mailboxes appears a If necessary press or to highlight the desired Mailbox b Pr...

Страница 79: ...xt older message To play all messages 1 On the Messages screen press or to display the soft key 2 To play all messages press The system starts with the oldest and ends with the most recent There is a short beep between messages The icon appears on messages that are being played for the first time During message playback you can press to pause message playback or to skip back or forward by 8 second...

Страница 80: ... person who left the message 1 On the Messages screen press or until the desired entry is on the screen 2 Press The Call Back screen appears Press or to view the dialing options Press to dial the number Press to store the entry in your Personal Directory Press CANCEL to return to the Messages list Callback Call Back Graham Bell 232 555 0176 Call Store Call Store ...

Страница 81: ... forwarding process A selection screen appears 4 Select a Forward Destination Press to display the Voicemail List Press or to highlight the desired extension and press SELECT The Forward Message screen appears If you have enabled voicemail distribution you can press to display voicemail distribution lists Press or to highlight the desired Distribution List and press SELECT The Forward Message scre...

Страница 82: ... Press after selecting the destination for a forwarded message The Play Rec Intro screen appears 2 Press to begin recording The soft key changes to 3 When finished recording press The message review screen appears Reaching the 30 second limit automatically stops recording You can or the announcement 4 Press to display the Forward Message screen Msg Intro Attached appears on the screen 5 Press to f...

Страница 83: ...en 3 With voicemail distribution enabled the Leave New Message or Listen screen appears 2 Press The Distribution List screen appears 3 Press or to highlight the desired distribution list 4 Press SELECT The Play Rec Message screen appears 5 Press to begin recording The soft key changes to 6 When finished recording press The Message Recorded screen appears Reaching the 120 second limit automatically...

Страница 84: ...sages 1 On the Messages screen press or until the desired entry is on the screen 2 Press to delete the message The system deletes the message and displays call information for the next message OR To delete all messages a Press or to display the soft key b Press The confirmation screen appears c Press to confirm DelMsg DelAll Messages 1 9 David Carter Jul 19 443 555 0625 11 07a DelAll DelAll Are yo...

Страница 85: ...an mark a message as new or old at any time To clear and restore new Message indications 1 On the Messages screen press or until the desired entry is on the screen 2 Press or to display the soft key 3 Press to clear the new message indication The soft key replaces 4 If desired press to restore the icon for a selected message marking the message as new again ClrNew Messages 1 10 Graham Bell Jul 19 ...

Страница 86: ... voicemail remotely 1 Dial your company phone number 2 After the call is answered enter your extension number 3 Immediately press the star twice You will hear Enter your access code followed by the pound sign 4 Enter your password if you have created one then enter pound to access the voice prompt menu Even if you have not created a password you must still enter the pound When the system is in Lin...

Страница 87: ...o listen to new messages press 1 To listen to old messages press 2 To change voicemail options press 8 Once you press 1 or 2 and the messages start playing you have the following options To stop message playback and replay options press 5 To delete the current message press 3 To repeat the previous message press 4 To skip this message press 6 To jump back 8 seconds press 7 To jump forward 8 second...

Страница 88: ...diagram in Figure 29 you have the following options To record a primary greeting press 1 To record an alternate greeting press 2 To choose the Primary or Alternate greeting press 7 2 Begin recording after the tone 3 To end the recording press 5 4 Select one of the following options To review the recording press 1 To record over the greeting press 3 To accept the greeting press 9 Figure 29 Remote V...

Страница 89: ...view the Call Log by pressing MENU then 1 and then 8 Call Appearance mode or MENU then 1 and then 6 Line Appearance mode from the Idle screen This system has a caller ID feature that works with the caller identification service offered through your telephone service provider There is a fee for this service and it might not be available in all areas This telephone can provide information only if bo...

Страница 90: ...r If the caller chooses not to send the information PRIVATE NAME and PRIVATE NUMBER appear 1 Name and number The Ring Group name can also appear here 2 NEW Indicates call was not answered and has not been reviewed 3 Voicemail message available for playback Exclamation mark indicates message is new A Ring Group or Call Queue icon can also appear here The voicemail icon replaces other icons when bot...

Страница 91: ...ndicated by NEW To review and make calls from the Call Log 1 On the Call Log screen press or to see the desired entry Press to access dialing options before calling a number and to dial the displayed number The Call Back screen appears Press to dial the on screen number Call Log entries may not be in the proper format for dialing In some areas you need to remove the area code or add or remove a 1 ...

Страница 92: ...entry is on the screen 2 Press The message playback screen appears If necessary use the dial pad to enter your password and press SELECT 3 Press Delete while the message is playing to delete the voice message There is a slight delay until the message indicators change 4 When the message playback completes the Call Log appears 5 Press CANCEL to exit the Call Log PlayMsg Graham Bell 05 10 Pause Dele...

Страница 93: ...t Name and Number fields 3 Fill in the Last Name field if desired To create the Last Name or to edit any field use or and the dial pad See Dial Pad Entry on page 21 4 Press to store the entry and return to the Call Log 5 Press CANCEL to exit the Call Log Store Store C BBB C D Save Pause Backspc C C D Save Pause Backspc When entering a phone number you must add a 9 or whatever digit if any that mus...

Страница 94: ...l Log entries 1 From a Call Log entry press The displayed entry is removed from the list and the next entry appears OR To delete all Call Log entries press or to display the soft key a Press The confirmation screen appears b Press to confirm 2 Press CANCEL to exit the Call Log Delete DelAll C E Store ClrNew DelAll DelAll Are you sure you want to delete all entries Yes No Yes ...

Страница 95: ...or a zone If your Synapse system includes an optional overhead paging OHP system you may be able to page through loudspeakers If the OHP is a single zone paging system it is included when you page All Extensions The single zone OHP may also be included in an individual Paging Zone If the OHP is a multi zone paging system it is not included when you page All Extensions However it appears as Overhea...

Страница 96: ...r a Paging Zone 3 Press SELECT The system emits a short paging tone and the Page screen appears OR Press CANCEL to return to the idle screen 4 Speak into the speakerphone or pick up the handset to speak 5 When finished press or CANCEL hang up the handset or press SPEAKER The Idle screen appears At the extensions being paged Desksets involved in active calls listening to a message or playing or rec...

Страница 97: ...l Extensions and they may be included in other Paging Zones To page using a single zone overhead paging system 1 Lift the handset or press SPEAKER and then press OR Call Appearance mode Press MENU then 1 and then 3 Line Appearance mode Press MENU then 1 and then 2 The Paging Zones screen appears 2 Highlight the appropriate zone 3 Press SELECT The system displays the Page screen 4 Wait for feedback...

Страница 98: ...n 2 The Paging Zones screen appears 2 Highlight Overhead Paging 3 Press SELECT 4 If more than one multi zone OHP system is available highlight the Analog Terminal Adapter ATA to which the desired OHP system is connected and then press SELECT For more information see your system administrator See also Synapse System Overview on page 9 5 The multi zone Overhead Page screen appears If necessary enter...

Страница 99: ...dministrator can use the following Deskset menus and features to customize your Deskset Deskset Menu on page 100 Features on page 101 User Settings on page 103 Setting and Changing Your Password on page 119 Admin Settings on page 125 Deskset Information on page 126 Auto Attendant Settings on page 127 Using Do Not Disturb DND on page 128 ...

Страница 100: ...e Features menu These features are discussed throughout this User s Guide See Features on page 101 for appropriate links Press 2 to display the User Settings menu See User Settings on page 103 for further instructions Press 3 to display the Admin Settings menu See Admin Settings on page 125 Press 4 to display the Deskset Information screen See Deskset Information on page 126 for further instructio...

Страница 101: ...e 96 Make an announcement to your organization 4 Messages 78 Play delete or forward messages 5 Do Not Disturb 128 Turn Do Not Disturb on and off 6 Call Forward All 41 Turn Call Forward All on and off 7 Directory 67 View and make calls from the Directory 8 Call Log 90 View and make calls from the Call Log 9 Redial 62 View the last 20 numbers dialed and redial a selected number 0 Help 22 View help i...

Страница 102: ...rd messages 4 Do Not Disturb 128 Turn Do Not Disturb on and off 5 Directory 67 View and make calls from the Directory 6 Call Log 90 View and make calls from the Call Log 7 Redial 62 View the last 20 numbers dialed and redial a selected number 0 Help 22 View help information on the Deskset screen Features Menu 1 3 Features Menu 2 3 Features Menu 3 3 Depending on how your system administrator set up...

Страница 103: ...ngs 104 2 Call Management 108 2 Intercom Auto Answer 111 3 Deskset Settings 113 3 Deskset Settings 113 4 Directory Settings 118 4 Directory Settings 118 5 User Password 119 5 User Password 119 6 Voicemail to Email 124 6 Voicemail to Email 124 Table 21 SB67025 Deskset Menu User Settings Call Appearance mode See page Line Appearance mode See page 1 Greetings 104 1 Greetings 104 2 Call Management 108...

Страница 104: ...Enter your password and press SELECT To correct errors press To cancel your changes on that screen press CANCEL at any time The set will return to the previous screen Greetings Use the Greetings menu as shown in Figure 34 and described in Table 22 to record greetings Figure 34 Greetings Menu Backspc Table 22 SB67020 025 Deskset Menu User Settings Function See page Description 1 Voicemail Greeting ...

Страница 105: ...ing the PlayRec soft key changes to Play 2 Press to make the highlighted greeting the greeting played to callers The system checks to see if the selected greeting has been recorded If the selected greeting has been recorded ACTIVE appears beside the selected greeting If a greeting has not been recorded Greeting not recorded appears To record a Primary or Alternate greeting 1 Press MENU then 2 then...

Страница 106: ...een appears and the key changes to 6 Press when you are finished The greeting is saved and the message review screen appears Recording stops automatically if you exceed the 60 second time limit 7 Press to review the message or to delete the greeting 8 Press CANCEL to return to the Voicemail Greetings menu Record Record Stop Stop Play Delete ...

Страница 107: ...ith recordings at other extensions in the system To record and play a personal name 1 Press MENU then 2 then 1 and then 2 to display the Name Recording menu The and soft keys do not appear if your name has not already been recorded 2 Press to record a personal name The key changes to 3 Press when you are finished The recording is saved and the recording review screen appears 4 Press to review the ...

Страница 108: ...gure 35 and listed in Table 23 Figure 35 Call Management Menu The Call Management menu applies to Call Appearance mode only In Line Appearance mode you can set your Deskset to automatically answer Intercom Calls only See Automatic Answering on page 111 Table 23 Deskset Call Management Menu Function See page Description 1 Call Forward 109 Redirect incoming calls 2 Auto Answer 111 Automatically answ...

Страница 109: ...ll destination in the User Settings menu or using the WebUI See Basic Settings on page 132 Call Forward No Answer can only be set by the system administrator This setting determines the delay of and the destination for unanswered calls for each extension The default destination is voicemail When your system is in Line Appearance mode your system administrator can set a Call Forward No Answer desti...

Страница 110: ... to move to the to RingGrp field and select a Ring Group 3 To confirm the change press The Call Management menu appears An error message appears if you entered an invalid extension number your system administrator has disabled call forwarding transferring to an outside line you entered a restricted number If your system has no Ring Groups this option does not appear Save ...

Страница 111: ...e Deskset automatically answers each call 4 Press to confirm the change The Call Management menu appears In Line Appearance mode the User Settings menu appears If your system administrator has enabled Direct Intercom on your Deskset you cannot enable Auto Answer The message Auto Answer is currently unavailable appears In Line Appearance mode Auto Answer applies to Intercom extension to extension c...

Страница 112: ...Deskset Settings 112 Synapse SB67020 SB67025 Deskset User s Guide Back to Contents When an incoming call is automatically answered a Call Answered screen appears and a tone sounds ...

Страница 113: ...Table 24 Deskset Settings Menu Function See page Options 1 Display 114 Contrast 1 9 Backlight Lo Hi Off 2 Sounds 115 Ring Volume 0 9 Ring Delay 0 40 seconds Call Appearance mode only Ringtones 1 9 Key beeps On Off Call Waiting Tone On Off 3 Volume Settings 116 Speaker Volume 1 9 Receiver Volume 1 9 Headset Volume 1 9 Paging Volume 1 9 4 Preferred Audio Mode 117 Preferred Mode Speaker Headset Desks...

Страница 114: ...en contrast and backlight To use the Display menu 1 Press MENU then 2 then 3 and then 1 The Display menu appears 2 Press or to adjust the Contrast level from 1 to 9 The default is 5 3 Press to set the Backlight level Press or to select Hi Lo or Off The default is Hi 4 Press to accept the adjustments and return to the Deskset Settings menu Save ...

Страница 115: ... 3 Call Appearance mode Press and then or to set the Ring Delay from 0 to 40 seconds The default is 0 which also disables the feature Although the Call Appearance or Line Appearance LED flashes the Deskset does not ring for the time you set 4 Press and then or to select one of nine Ringtones The default is 1 Ringtone samples play when selected 5 Press and then or to turn Key Beeps On or Off The de...

Страница 116: ... To use the Volume Settings menu 1 Press MENU then 2 then 3 and then 3 The Volume Settings menu appears 2 Press or to set the Speaker Volume from 1 to 9 The default is 4 3 Press and then or to set the Receiver Volume from 1 to 9 The default is 3 4 Press and then or to set the Headset Volume from 1 to 9 The default is 4 5 Press and then or to set the Paging Volume from 1 to 9 The default is 4 6 Pre...

Страница 117: ...g the handset takes first priority in all instances You can set the audio preferences to Headset or Speaker by using the Preferred Audio menu To use the Preferred Audio Mode menu 1 Press MENU then 2 then 3 and then 4 The Preferred Audio menu appears 2 Press or to select the preferred audio mode Speaker or Headset 3 Press to accept the adjustments and return to the Deskset Settings menu Answer Save...

Страница 118: ...nu 1 Press MENU then 2 and then 4 The Directory Settings menu appears 2 Press or to Hide or Show the Personal Directory This Directory holds your personal Directory entries See Directory on page 66 3 Press and then press or to Hide or Show the System Directory This Directory holds public entries created and maintained by the system administrator 4 Press and then press or to Hide or Show the Ext Li...

Страница 119: ... password entry is no longer necessary for User Settings voicemail and the WebUI To use the Password menu 1 Press MENU then 2 and then 5 The User Password menu appears 2 Press 1 to set or change the password Follow the steps in Changing Your Password on page 120 3 Press 2 to reset your password A confirmation screen appears 4 Press to confirm that you want to reset your password The message User p...

Страница 120: ...NU then 2 then 5 and then 1 The Set Change Password menu appears 2 Use the dial pad to enter a password To correct errors press To start over press 3 Press and enter the new password again 4 To accept the change press The Password Saved screen appears then the User Settings menu appears Passwords can be up to six digits Backspc Delete Save ...

Страница 121: ...adset from its charging base 3 Press Registration in Progress appears while the Deskset searches for the headset 4 When registration is complete Headset is registered appears and the Cordless Headset ON OFF light turns solid blue 5 Press CANCEL The User Settings menu appears The headset must be in the charger otherwise registration cannot proceed Even if the Cordless Headset has been in its charge...

Страница 122: ...creen displays Headset is not registered The Cordless Headset ON OFF light flashes twice every five seconds to indicate it is not registered 4 Press CANCEL The User Settings menu appears Deregistering the Cordless Headset without the Deskset Cordless headsets can also be deregistered using the headset You can use this method when you cannot use the Deskset for standard deregistration The Deskset m...

Страница 123: ...ts itself The Deskset returns to the unregistered cordless accessory startup screen If the registration process times out on the Deskset it displays Registration Failed and returns to Idle mode If Cordless Headset registration fails the ON OFF light on the headset flashes twice every five seconds To reset the headset remove the headset from the charger and try the registration process again beginn...

Страница 124: ...il notification of a new message without the WAV attachment 1 Press MENU then 2 and then 7 The Voicemail to Email menu appears 2 Press or to select the desired Voicemail to Email mode OFF Email Copy voicemail messages will be emailed to you as audio file attachments Email Notification you will receive email notifying you of new voicemail messages 3 Press The User Settings menu appears The Voicemai...

Страница 125: ...in password The Admin Settings menu appears Call Appearance mode shown For more information about these settings see the Synapse Administrator s Guide available for download at www telephones att com synapseguides The Admin Settings are determined by your system administrator Only someone with access to the system administrator s password can change the Admin Settings ...

Страница 126: ... may be used by your system administrator or the installer Figure 37 Deskset Information To display the Deskset Information 1 Press MENU and then 4 The Deskset Information screen appears The model number device status IP Address and Software version are listed with other information 2 Press to view additional information 3 Press CANCEL to return to the main menu Deskset Information 1 4 Deskset Inf...

Страница 127: ...Attendant on Incoming calls are forwarded to an Auto Attendant menu or destination according to the weekly schedule that the system administrator has set OFF Turns the Auto Attendant off Incoming calls are forwarded to the destination that the system administrator has set Manual Immediately forwards incoming calls to the Auto Attendant menu or other destination that the system administrator has se...

Страница 128: ... Call Appearance or Line Appearance key LED flashes To enable or disable Do Not Disturb 1 Call Appearance mode Press MENU then 1 and then 5 Line Appearance mode Press MENU then 1 and then 4 The DND indicator appears on the Idle screen when Do Not Disturb is on Call Appearance mode The DND indicator only appears when Call Forward All is disabled When Call Forward All is set no calls ring regardless...

Страница 129: ... Interface WebUI that resides on your Deskset See Accessing the Web User Interface WebUI on page 130 After you log on to the WebUI you can configure the following features Basic Settings on page 132 Personal Directory on page 134 Quick Dial on page 136 Voicemail Distribution on page 137 You can also view the Deskset Help from the WebUI See Help on page 140 ...

Страница 130: ...the IP Address 4 On your computer open an Internet browser 5 Type the Deskset IP address in the browser address bar and press ENTER on your computer keyboard 6 A Login page appears 7 Under Login Name log on as a user by typing your extension number 8 Enter your password if you have created one see Setting and Changing Your Password on page 119 Otherwise leave the password blank 9 Click You can cre...

Страница 131: ...the WebUI fields and click the page is not saved The WebUI displays an error message at the top of the page The field with the incorrect value is highlighted in yellow as shown in Figure 38 You can view a more detailed error description by resting your mouse pointer on the highlighted field Figure 38 WebUI Error Indication Invalid Entry ...

Страница 132: ...internal calls In Call Appearance mode callers using the Auto Attendant can search for your Extension Name to reach your extension Figure 39 WebUI Basic Settings Call Appearance mode shown To modify the Basic Settings Call Appearance mode 1 Set the Call Forward All Settings When on Call Forward All forwards calls to the target you select and your Deskset does not ring a Turn Call Forwarding Off or...

Страница 133: ... previously enabled from the Deskset See Auto Answering on page 43 and Automatic Answering on page 111 Line Appearance mode Under Intercom Auto Answer select an Auto Answer delay or disable Auto Answer if it was previously enabled from the Deskset 3 Configure the Voicemail to Email Settings a Click Yes or No to enable or disable Voicemail to Email for this extension b Enter your Email Address Audi...

Страница 134: ...inistrator can also create a System Directory of names and phone numbers referred to as System list on the Deskset that is available to all extensions To add an entry to the Extension Directory 1 In the navigation menu at left click Personal Directory The Directory List page appears 2 Click The Add Personal Directory List Entry page appears 3 Complete the form with the required information 4 Click...

Страница 135: ...information 4 Click to accept your changes or to reject the changes To sort and delete Personal Directory entries 1 In the navigation menu at left click Personal Directory to display the Directory List 2 To sort entries by last name click The button then changes to This action only works during the current session The sort order reverts to listing the names by first name when you log on the next t...

Страница 136: ...r has set up as Quick Dial keys All other Programmable Feature Keys are unavailable 2 Enter names and telephone numbers or extensions in the Name and Number columns If it is an external phone number enter a 9 or whatever digit if any that must be dialed first to indicate that it is an external call To edit or delete an entry type over the entry 3 To save entries click or to reject the changes clic...

Страница 137: ... feature there will be an additional step every time you access your messages See Accessing Your Messages on page 78 To enable and disable voicemail distribution lists 1 In the navigation menu at left click Voicemail Distribution to display the Voicemail Distribution Lists page If you have previously enabled voicemail distribution and created one or more voicemail distribution lists the existing v...

Страница 138: ...tion Lists page 2 Click The Create Distribution List page appears 3 Enter a Name for the voicemail distribution list 4 Assign Distribution List Members Select one or more extensions from the Available Extensions list and click OR Select one or more extensions to remove from the Distribution List Members list and click 5 Click to save these settings or click to return to the previous page without s...

Страница 139: ...st you want to edit or delete The Edit Distribution List page appears 3 Optional Click to delete this distribution list then go to Step 6 4 Edit the distribution list Name as needed 5 Assign Distribution List Members Select one or more extensions from the Available Extensions list and click OR Select one or more extensions from the Distribution List Members list and click 6 Click to save these set...

Страница 140: ... SB67020 SB67025 Deskset User s Guide Back to Contents Help To access WebUI Help 1 In the navigation menu at left click Help A PDF Help file opens 2 To view a topic click the link for that topic The page for that topic appears ...

Страница 141: ... page 143 Calls Generally on page 145 Incoming Calls on page 149 Outgoing Calls on page 152 Voicemail on page 154 Other Deskset Features on page 157 WebUI on page 159 PC Deskset Interaction on page 160 TL7600 Cordless Headset SB67025 Only on page 161 For customer service or product information contact the person who installed your system If your installer is unavailable visit our web site at www t...

Страница 142: ...jack on the device The system devices are not immediately active when powered up and after a power interruption Allow at least 30 seconds for the device to boot up If your Deskset uses Power over Ethernet PoE ask your system administrator to confirm that the PoE switch is working correctly To resolve a sluggish unresponsive or unusually behaving device Reset the device by pressing the RESET button...

Страница 143: ...estoring factory defaults by pressing the RESET button more than five seconds Probable Cause Corrective Action The Ethernet cable is unplugged Ensure that one end of the Ethernet cable is plugged into the port marked LAN on the device and that the other end is plugged into your office LAN Confirm that the Ethernet port light next to the Ethernet port is green If it is not unplug the cable and plug...

Страница 144: ...old the reset switch for more than five seconds The device software version is different than the rest of the system Ask your system administrator to update all devices to the current software version Probable Cause Corrective Action Probable Cause Corrective Action Not enough time has elapsed The device may display Synchronizing for a few seconds This is normal and does not indicate a problem Pro...

Страница 145: ...e on a call that call is dropped Maximum Call Duration was exceeded None External calls that you transfer or forward to another external number use two lines The duration of such calls is limited by a timer that your system administrator sets Probable Cause Corrective Action Putting the T1 Gateway into loopback test mode prevents phone calls from occurring Do not run loopback tests while the T1 tr...

Страница 146: ...N administrator should ensure the following minimum guidelines are met A switched network topology is recommended using standard 10 100 Ethernet switches that carry traffic at a nominal rate of 100 Mbit s The office network infrastructure should use Cat 5 wiring Do not connect a network server PC to the PC port on the Deskset Make sure the network cable is solidly plugged in If you tug on the cabl...

Страница 147: ...ss again Probable Cause Corrective Action Call Appearance mode only The Call Forward All settings are incorrect Check that Call Forward All is on FWD should appear in the top right corner of the screen while in Idle mode Ensure that a valid extension number has been entered as a destination extension Confirm that the Call Forward All Target is set to Ext Probable Cause Corrective Action Transferri...

Страница 148: ...ard All Target is set to Phone On the Deskset press MENU 2 2 1 Ensure that a valid external number is shown in the to Phone field Enter a 9 or whatever digit if any that must be dialed first for an external call Check that forwarding to an external phone number has been enabled Your system administrator must enable Call Forward Transfer to Outside Telephone Number for your Deskset Probable Cause C...

Страница 149: ...n this feature off Incoming calls may be directed to a Ring Group or Call Queue that you are not part of Calls may also be redirected via DID numbers and Trunk Routing Line Appearance mode only Incoming calls on the line are being forwarded to a CFNA destination and the Seconds before Forwarding setting is 0 Seconds See your system administrator The ringer volume is too low or a ring delay is set ...

Страница 150: ... press the pound sign to start the search Probable Cause Corrective Action The Deskset is set to Call Forward All Deactivate Call Forward All Press MENU 1 6 Direct Intercom is enabled and only calls from certain extensions are automatically answered Ask your system administrator to disable Direct Intercom then enable Auto Answer on your Deskset On the Deskset press MENU 2 3 The Deskset is in DND m...

Страница 151: ...pports caller ID Both you and your caller s telephone companies must use caller ID compatible equipment If you have DSL phone lines confirm that you have a DSL filter plugged in between each Deskset and DSL wall jack The DSL filter must be plugged into the wall jack not the Gateway Probable Cause Corrective Action The line is a shared fax voice line None The line appears busy during the fax detect...

Страница 152: ...Consult your system administrator Probable Cause Corrective Action An external phone number cannot be accessed through the Gateway Ensure that you enter a 9 or whatever digit if any that must be dialed first for an external call For example 9 1 555 0123 If you see All Phone Lines Busy on the Deskset screen try again later because all outside lines may be in use Ensure that a Gateway is connected t...

Страница 153: ...mode only If any x11 extensions already exist such as 411 or 611 then the extensions take precedence In other words dialing 411 calls extension 411 not the 411 directory service 911 cannot be assigned as an extension number Consult your system administrator Ensure that you enter a 9 or whatever digit if any that must be dialed first for an external call For example 9 1 555 0123 Probable Cause Corr...

Страница 154: ... Probable Cause Corrective Action Calls are not being directed to voicemail or the voicemail memory is full Call Appearance mode only Verify that Call Forward All is off or is targeted to voicemail Press MENU 1 6 to turn this feature off FWD will not be in the top right corner of the Deskset display To set the Call Forward All target log on to the WebUI On the Basic Settings page set the Target Ty...

Страница 155: ... longer than six seconds the Deskset stops recording and disconnects the call If the Deskset s memory becomes full during a message the Deskset stops recording and disconnects the call If the caller s voice is very soft the Deskset may stop recording and disconnect the call Probable Cause Corrective Action Group Mailboxes are accessed by multiple users None Group Mailboxes are accessed by multiple...

Страница 156: ...ore entering your remote access code user password If you have no password press star star then pound Confirm you are calling from a touch tone phone When you dial a number you should hear tones If you hear clicks the phone is not a touch tone telephone and cannot activate the answering system The answering system might not detect the star star while your announcement is playing Try waiting until ...

Страница 157: ...r Press MENU 4 at a Deskset to find the IP address If the other Desksets have been assigned static IP addresses you may have to assign your Deskset a static IP address to match the other Desksets Probable Cause Corrective Action Call Appearance mode only The selected Deskset is set up to forward all calls Select a different Deskset on which to record the greeting Call Appearance mode only Disable ...

Страница 158: ...quick dial entries on the WebUI to write over an existing entry a Log on to the WebUI and click Quick Dial Keys b Edit the quick dial entries c Click Your SB67030 031 Deskset has been configured for Call Queue The quick dial key and quick dial list are unavailable See your system administrator if you need to use Quick Dial instead of Call Queue If you have an SB67020 025 Deskset the system adminis...

Страница 159: ...he third line of the information Ensure that there is an Ethernet cable attached to Network port on the Deskset and to the LAN If a PC at the same workstation is sharing the LAN connection attach an Ethernet cable to your computer s Ethernet port and to the PC port on the back of the Deskset Confirm that your computer and your Deskset are on the same subnet so that they can talk to each other Chec...

Страница 160: ... LAN Probable Cause Corrective Action A computer connected through the Deskset will be limited to 100 Mbits s Use separate Ethernet connections for the Deskset and the computer so that the computer can take advantage of the network s greater bandwidth Probable Cause Corrective Action For PCs connected to the LAN through Desksets disruption to the Deskset operation affects the PC For example when t...

Страница 161: ...adset is not registered Register the headset at the Deskset On the Deskset press MENU 2 6 Once the headset is registered the headset light is blue when the headset is placed in the charger Register Probable Cause Corrective Action The headset is not getting power from its battery Verify that the battery is installed and charged correctly Place the headset into the accessory charger Ensure the char...

Страница 162: ... be close to being out of range Try moving closer to the Deskset Other electronic products can cause interference with your headset Try installing the Deskset far away from devices such as televisions microwaves or other cordless devices If the problem persists check audio quality on the Deskset and or contact your system administrator Probable Cause Corrective Action Headset is in the charger or ...

Страница 163: ...east six hours For optimum daily performance return the Cordless Headset to the charger when not in use You may need a new battery Your headset might be malfunctioning Contact the headset manufacturer Probable Cause Corrective Action The headset is registered to another Deskset If others are using headsets in your vicinity someone may have accidentally registered your headset to their Deskset If n...

Страница 164: ...possible television sets microwaves or other cordless telephones Probable Cause Corrective Action The Deskset is unavailable powered off out of range or removed from the system Deregister the headset at the headset Press VOL MUTE VOL MUTE VOL VOL MUTE You cannot identify or locate the Deskset that the headset is registered to If the headset is registered to an unknown Deskset which has AC power yo...

Страница 165: ...s an option as the current Active option Answers an incoming call Backspace the cursor when entering data Dials the on screen entry Allows dialing options before calling a number Clears the current entry Clears NEW indication from a message Initiates a conference call Deletes all records Deletes a record Deletes a voicemail message Shows any additional information Opens the distribution lists End ...

Страница 166: ...list of options Initiates a system page Parks a call Opens the Park List Inserts a two second pause in a digit string Plays a message or recording Plays all voicemail messages Plays a message from the Call Log Plays a recording Begins a recording Retrieves a parked or queued call Saves a setting Sends a voicemail message Displays the Directory Settings menu Stop recording Stores the name and numbe...

Страница 167: ...ifications Feature Specification Size 6 9 7 9 8 1 H W D 57 angle 7 9 7 9 7 1 H W D 41 angle Weight 35 59 oz 1009 g including adapter Power Requirements 5 1 V DC 1700 mA 48 V DC Typ PoE Class 2 Transmit Frequency Deskset Cordless Headset 1921 536 1928 448 MHz RJ 45 Ethernet Network Jack 10Base T 100Base Tx with auto MDI MDIX switching Headset Jack Traditional corded headset jack type with 2 conduct...

Страница 168: ...t install the equipment near a sink bathtub or shower Electrical Storms Electrical storms can sometimes cause power surges harmful to electronic equipment For your own safety exercise caution when using electrical appliances during storms Cleaning Your Unit Your unit has a durable plastic casing that should retain its luster for many years Clean it only with a soft cloth slightly dampened with wat...

Страница 169: ...ake it to an authorized service facility Opening or removing parts of the unit other than specified access doors may expose you to dangerous voltages or other risks Incorrect reassembling can cause electric shock when the product is subsequently used Do not overload wall outlets and extension cords The power adapter is intended to be correctly oriented in a vertical or floor mount position The pro...

Страница 170: ...008 ATTN Information Technology Group Synapse Syn248 GPL code request along with a written request for the available code If your request does not fully comply with the foregoing requirements VTech reserves the right to reject your request Further by requesting and receiving the available code you release VTech its affiliates and its and their officers directors employees and representatives VTech...

Страница 171: ...ppearance key that is not busy with predialing dialing ringing or an active or held call BYPASS port An RJ 11 jack on the PSTN Gateway that allows for communication during power outages Plug an analog telephone into this jack Call Appearance On the SB67020 025 Deskset the programmable feature keys identified as Call Appearance keys on the right side of the Deskset On the SB67030 031 Deskset the fi...

Страница 172: ...ovide telephone operation during a power failure when used with an analog phone Ethernet A type of computer networking technology that connects devices via Local Area Networks LANs Extension Directory A private list of names and phone numbers available to only a single extension referred to as Personal list on the Deskset Extension list A list of names and extension numbers for the Synapse system ...

Страница 173: ...our Synapse system extensions to another extension IP address Internet Protocol address An individual numeric identification assigned to devices on your LAN key beep When enabled pressing a key plays a tone LAN Local Area Network A communications network that allows data devices to communicate with each other LCD Liquid Crystal Display The screen that provides instructions and feedback LED Light E...

Страница 174: ...n another location that is linked to your office through a SIP Gateway You can call remote Desksets by dialing their extension number You can also make long distance calls through a remote site as if you were dialing a local call Depending on your system configuration you may need to dial a prefix such as 9 to make remote site calls Consult your system administrator RF radio frequency The communic...

Страница 175: ... or that system users reach at any time by dialing 0 zero T1 A digital signaling standard to transmit voice and data between devices trunk A communications connection between the Synapse system and the telephone company unsupervised transfer Occurs when you do not communicate with the transfer recipient when transferring calls The transfer recipient does not have to pick up the phone and talk to y...

Отзывы: