4-6
Chapter 4: BIOS setup
The utility verifies the file, then starts updating the BIOS file.
DO NOT shut down or reset the system while updating the BIOS to prevent
system boot failure!
5. The utility returns to the DOS prompt after the BIOS update process is
completed. Reboot the system from the hard disk drive.
The BIOS update is finished! Please restart your system.
C:\>
ASUSTek BIOS Update for DOS V1.06 (09/08/04)
Current ROM
Update ROM
Note
Writing BIOS:
FLASH TYPE:
MXIC 25L1605A
PATH:
BOARD:
Z9PE-D8 WS
VER:
0203
DATE:
08/24/2011
BOARD:
Z9PE-D8 WS
VER:
0206
DATE:
09/30/2011
WARNING! Do not turn off power during flash BIOS
Содержание Z9PE-D8 WS
Страница 1: ...Motherboard Z9PE D8 WS ...
Страница 15: ...1 Product introduction This chapter describes the motherboard features and the new technologies it supports ...
Страница 22: ...1 8 Chapter 1 Product introduction ...
Страница 27: ...ASUS Z9PE D8 WS 2 5 2 2 3 Motherboard layout Z9PE D8 WS ...
Страница 51: ...ASUS Z9PE D8 WS 2 29 2 9 Connectors 2 9 1 Rear panel connectors ...
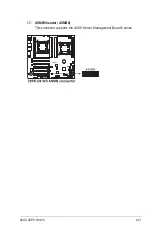
Страница 63: ...ASUS Z9PE D8 WS 2 41 17 ASMB6 header ASMB6 This connector supports the ASUS Server Management Board 6 series ...
Страница 64: ...2 42 Chapter 2 Hardware information ...
Страница 65: ...3 Chapter 3 Powering up This chapter describes the power up sequence and ways of shutting down the system ...
Страница 66: ...ASUS Z9PE D8 WS Chapter summary 3 3 1 Starting up for the first time 3 3 3 2 Powering off the computer 3 4 ...
Страница 195: ...ASUS Z9PE D8 WS 6 29 9 Click Finish to complete the installation ...
Страница 198: ...6 32 Chapter 6 Driver installation 6 Click Finish to complete the installation and exit the wizard ...
Страница 201: ...ASUS Z9PE D8 WS 6 35 7 Click Install to begin installation 8 Click Finish to complete the installation ...
Страница 222: ...Appendix summary A ASUS Z9PE D8 WS A 1 Z9PE D8 WS block diagram A 3 ...
Страница 223: ...ASUS Z9PE D8 WS A 3 A 1 Z9PE D8 WS block diagram ...
Страница 224: ...A 4 Appendix A Reference information ...


